
By: XEONIQ [ Instagram | Tumblr ]
This is an extremely long guide, not intended to be read in one sitting but as a resource to utilise together with anecdotes on my philosophy on photography as a process. The Contents below feature links for navigation, and if you want to dive into the practical knowledge, feel free to skip the rather lengthy introduction.
Contents
- 1.0 Introduction
- 2.0 Understanding your Camera
- 3.0 Tips on Shooting
- 4.0 Post-Processing your Photos
- 5.0 Sharing your Photos
- 6.0 Developing your Taste and Style
- 7.0 Summary
1.0 Introduction
I have been a hobbyist photographer for almost ten years, easing off a performance car interest once I turned 30, wanting a pursuit that was more creative (and also less dangerous). Self-actualisation is something that I’ve been very interested in as I’ve grown older, and photography has been a minor, but important part of that process, serving as a means and as an outlet of artistic expression. I’ve interacted with a number of communities and platforms online, and met other hobbyists, and in doing so I found that photography could be not only a solo, intrapersonal activity, but also a social one. Further, the outputs of this hobby, the photographs, become a form of media that can be appreciated and act in participation with other content once published. For all these reasons, and at the request of various friends, acquaintances I’ve made over the years, I decided to make this beginner’s guide to photography in order to help others to, hopefully, appreciate the hobby in a similar, rewarding way.
The main point that I will be reiterating over and over in this guide is that a hobbyist’s approach to photography should not be about capturing the “perfect” photograph, but is instead about habitually integrating the process of taking photos into your lifestyle. And further, the way to develop your technique and your control over the photographs you take, to align your vision with what you want to capture with the actual photo you end up with, it will require practice, and not simply buying the latest equipment. If you want to spend money on more capable cameras, professional lenses and other accessories then by all means. Your budget and purchases are your business; but ensure you are completely aware that these purchases are for novelty (to collect, to consume) and to perhaps enable different techniques; and will not instantly allow you to take “better” photos. You practicing consideration and taking photos with purpose and an applied perspective is what will allow you take photos that you love, not the gear that you acquire. The internet sadly is rife with gear reviewers and sponsored photographers providing information that is heavily commercially-biased, and they will tell you how one brand or certain model is a “must purchase” today. I hope this guide can expel any such notion and that even the most entry level equipment is sufficient to start enjoying the hobby.
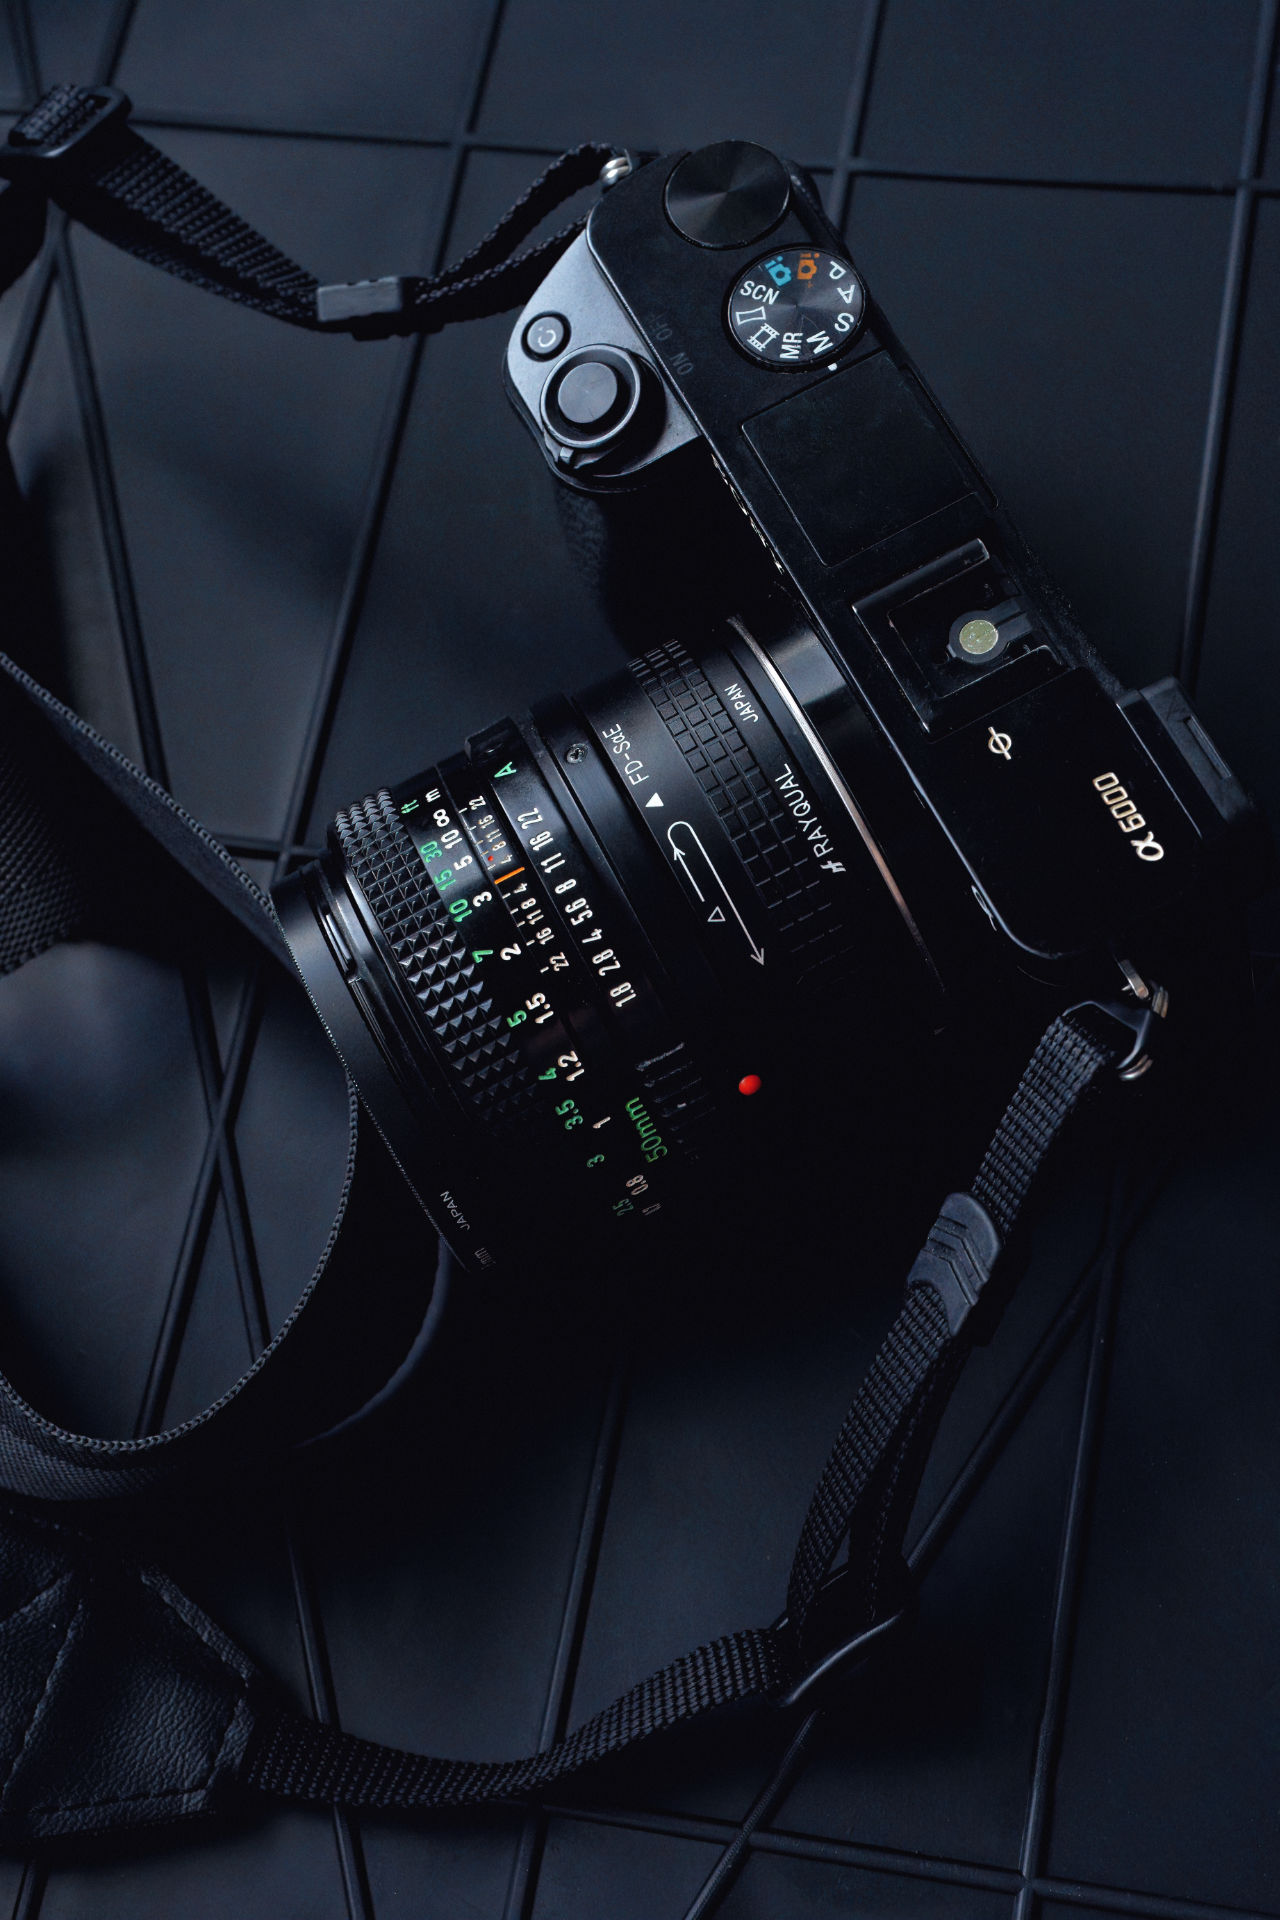
To illustrate examples in this guide I have dusted off my old Sony A6000, an entry level crop-sensor APS-C camera I’ve had since 2014 and retired in 2018 when I upgraded to a Sony A7M3 full frame camera. One can find this camera for around $USD175 second hand in good condition. I am by no means advocating anyone to buy this, however if you do not have a camera and wanted an option, this camera is inexpensive, capable and easy to find (all qualities I value in my ideology of “considered consumerism”). This guide is generalised and any digital camera will do from any brand or type, even a phone.
1.1 Who is this Guide for?
I wrote this guide with two types of people in mind: those who are interested in photography but haven’t yet bought a camera or know where to start, and those who bought a camera, possibly years ago, but haven’t fully utilised it due to difficulties or frustrations that prevented them from enjoying the process or achieving the results they desired.
This guide is not for photographers who are already confident with using their gear, who have created their own style and who have learned a number of techniques which are most likely far beyond what I will go over in this guide. If you are an experienced photographer there may be one of two tips in Section 3.2, especially in the fashion section where I have the most experience, that might be worth skimming; otherwise many of the guidelines and rules I go over here will be redundant. For every loose rule I provide there will be dozens of examples of amazing photos that I could never hope to take myself that break said rule. Photography involves a considerable amount of technique, but also a subjective, creative eye.
1.2 Digital Photography vs Film/Analog
Those that know or have followed me may recall my preference for film (aka analog) photography over digital. In 2023, the prices of most film, especially colour, have increased substantially. You could be looking at over $50USD to buy a roll of film, have it developed and then scanned for you, giving you either 24 or 36 frames. The cost of a digital shot is the total purchase price of the camera and the meager electricity spent keeping it charged divided by how many shots you take with it and thus will work out far cheaper if you are shooting dozens of frames a day while learning as a beginner. And while I enjoy the process of analog photography, where you cannot immediately check the result of the photo as you can on a digital camera’s monitor after shooting, I can easily say that digital photography is a more practical alternative for most people to learn versus film. Nonetheless, if you already have a film camera and want to learn photography on it, then a good deal of this guide will still be relevant.
1.3 Why even use a Digital Camera over a Smart Phone Camera?
Smart cameras are becoming very good for photography. For sharing close up shots of food, something you bought, even a face selfie with the front camera, a smart phone is probably the way to go just in terms of convenience to be able to shoot and share on a direct message or a social media website without needing to transfer the file. A phone also is extremely compact and is something you have with you everywhere, which enables you to capture moments that you may miss without having a camera available. However, where a dedicated camera really shines is the enjoyment of using a device with dedicated controls to taking photographs (versus a phone that is designed for a wide variety of usages) and the ability to change lenses for a variety of perspectives that a phone typically misses out on. Further, digital cameras have much larger sensors than phones and this enables superior image quality, especially in low light conditions. Having said that, it is still very much possible to create engaging, immersive photos using a smart phone camera. My friend, Dylan Knight curated a set of Hong Kong street photographs, shot entirely on a very old iPhone SE model here: Vertical Hong Kong.
The practical guide now begins in the sections below.
2.0 Understanding your Camera
This section outlines the concept of the “exposure triangle”, focusing methods, different modes available on most digital cameras, how to care for your camera gear and a short discussion on lenses.
2.1 The Exposure Triangle
Before your eyes gloss over and you skip ahead, I promise not to lecture you on boring, “useless” theory. The exposure triangle is worth understanding on a very basic level so you can better conceptualise how to use your camera to capture the light which will comprise your photographs.
2.1.1 ISO
This is the sensitivity to light if your digital camera’s sensor. The higher the number the more sensitive, so if your scene is dark increasing this will make the photo brighter. However, this comes at a cost, the higher you set this ISO, the more digital “noise” will be on your image, which reduces detail and sharpness. This typically starts at 100 (your base ISO) and goes up to 1600 and beyond. Thus we can control how sensitive the camera sensor is to light at the expense of image quality via digital noise with this setting. It should be noted that high ISO digital noise can create texture that may lend well to the aesthetic of the photo you wish to create, but in general when starting out, having a lower noise setting will give you a “cleaner” image.
2.1.2 Aperture
This is the size of the opening in your lens that lets the light in from your given scene, which will pass through the lens’s glass and hit your camera sensor. This measured in f/stops and the lowest f/stop on your lens (which could be between 1.4 to 4 typically) will let the most light in and the highest f/stop (which could be between 16 to 32 typically) will let the least light in. When the lens aperture is open at its widest (so the lowest f/stop) less of a scene will be in focus (there will be more blur in out of focus areas). When the lens aperture is open at its narrowest (so the highest f/stop) almost everything will be able to be kept in focus. Like ISO there is a trade off as well. Typically a lens has the best quality, sharpness and detail around f/8 and it is softest wide open (lowest f/stop) and has the most aberration and loss of detail at the highest f/stop; especially on older and lower quality lenses. Thus we can control both how much light is hitting the sensor (a technical concern), and how much of the scene will be in focus (a creative concern, with trade offs).
2.1.3 Shutter Speed
This is how long the camera sensor will be exposed to the light available in your chosen scene as delivered through your camera lens. The fastest could be up to 1/8,000th of a second or even more with an electronic shutter, and the longest up to a minute or longer depending on your camera. Again, we can control both how long that light is hitting the sensor to expose an image (a technical concern), and the duration of exposure captured relative to position of the camera (a creative concern, that allows for any number of long-exposure creative techniques, both static and in motion).
2.1.4 Putting it together
In general you want the ISO sensitivity as low as your scene’s light allows for (100 during the day and 800/1600 for an interior or at night time), you want your shutter speed to be at least 1/160 for a sharp shot; 1/500 for action, and your aperture should be around f8 for being sharp for most lenses, open as wide as possible (smallest f-stop available) at night for handheld photography or if you want to blur the background behind a subject, and around f13-16 to get more of a scene in focus. I will discuss this in more detail in the PASM mode section of the guide.
2.2 EVF vs Monitor
The Electronic View Finder (EVF) is the screen inside the view piece you look through when taking a shot. This is how you see your “frame”, which is the rectangular image that is going to be replicated in its entirety as a JPEG or RAW file via your camera sensor. The monitor provides a replica of this view on the camera’s screen. Both are typically capable of setting all your options and functions. Some entry level cameras do not have an EVF, and if yours is so, the monitor will be what you are going to use. Using the monitor, if it has a hinge that allows for an articulated screen, can be more discrete than using the EVF, which may be ideal for street photography that includes people. When using the camera on a tripod or setting up a timered shot, the monitor is often more convenient to view depending on how the camera is situated. The EVF is often far superior for using in bright outdoor conditions as your eye is sheltered from the sun, and in my case, I feel more immersed in capturing the shot using an EVF over the monitor.
2.3 Manual Focus versus Auto Focus
I am a large proponent of manual focus over auto focus for a number of reasons. Firstly, if you are completely used to autofocus lenses you will avoid a large host of affordable manual focus lenses and perhaps be limited to expensive auto focus (AF) lenses that may put you off getting a lens that may actually suit your photography style or output. Secondly, in my experience even with very good native lenses and eye- and face-detecting algorithms (which most beginners with entry level cameras won’t have access to anyway) AF lenses can often miss focus or hit focus on a part of the subject or scene you did not intend. Rarely in my experience shooting fashion, portraits, architecture, or street scenes have there been shots that were so crucial in their timing that I needed to rapidly fire auto focus or would have missed the shot. Certainly there are methods that utilise high speed AF photography and the photographer can find something very unique and special in hundreds if not thousands of shots taken on a single day out using a “spray and pray” method, however I will argue that if you are starting out, you need to take things slow and compose shots with consideration. In that context, manually focusing the shot will be superior to autofocus and ensure you do not miss the focus and that you also take the time to compose and frame your shot to your satisfaction. In this guide 100% of my sample images were taken with manual focusing.
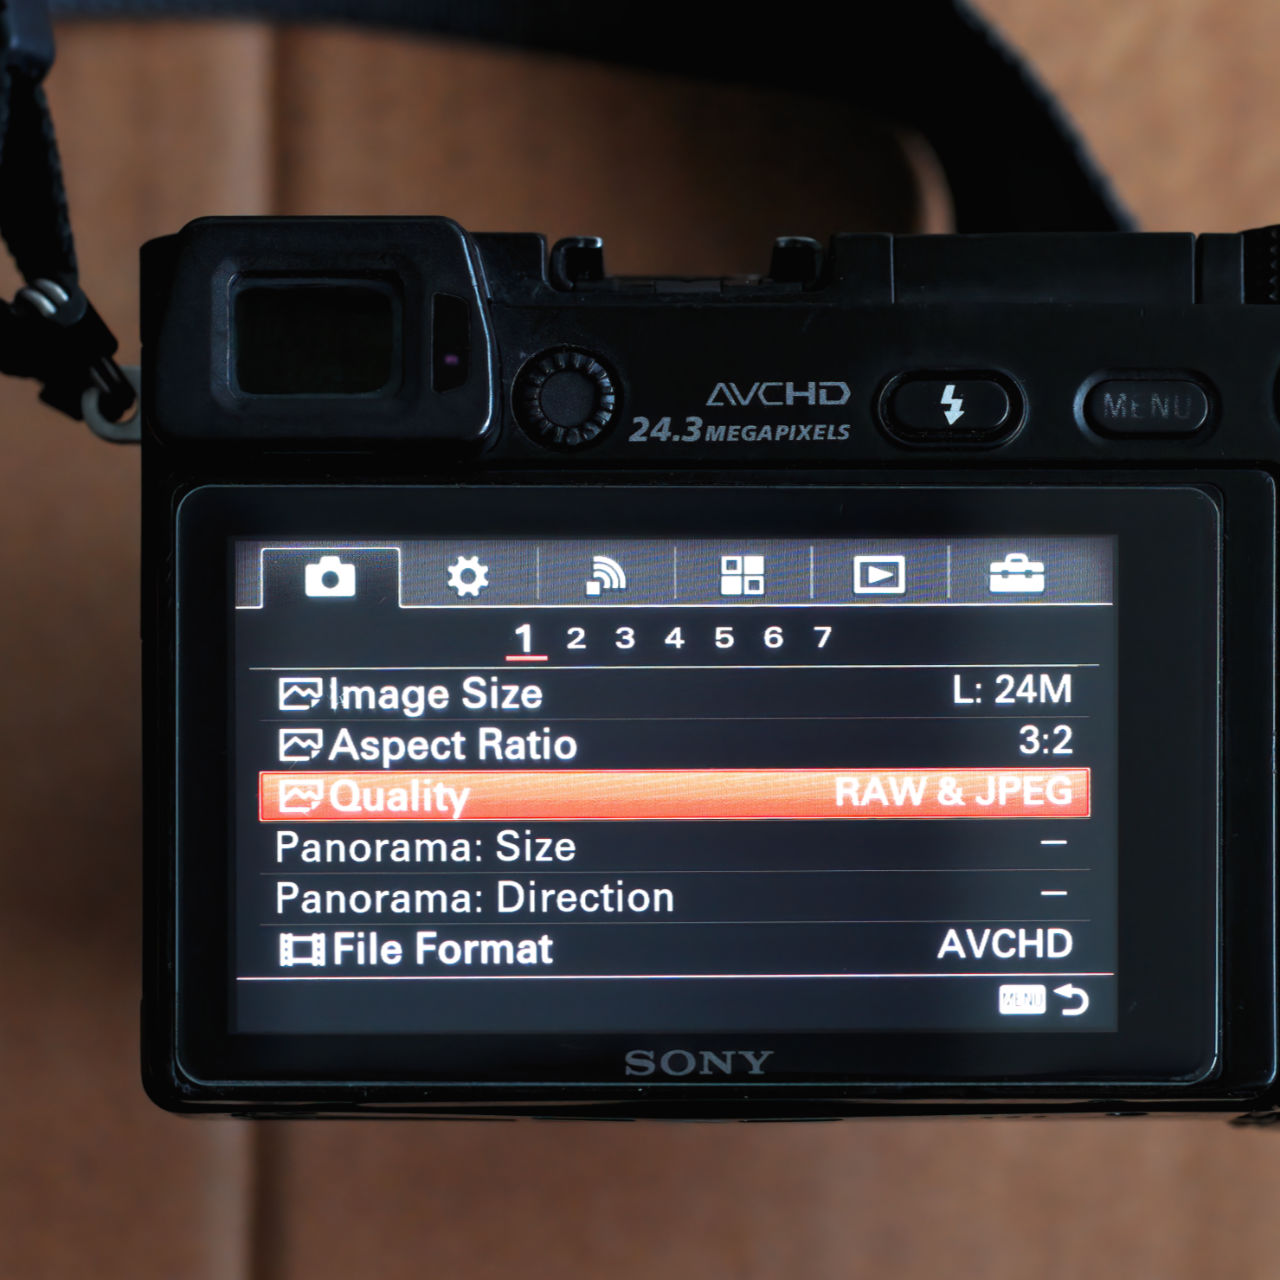
2.4 PASM and Auto Modes
There may be some very limited entry models that only have an auto mode on the camera and if yours is like this you do not need to read this section. However, most digital cameras will allow you to control your exposure with a PASM dial, and many have a number of automatic modes as well. The Auto mode will have the camera set what it believes is the best combination of ISO, shutter speed and aperture for you. On some models the Auto mode might even detect low dynamic range in a scene and take multiple images to increase this using bracketing.
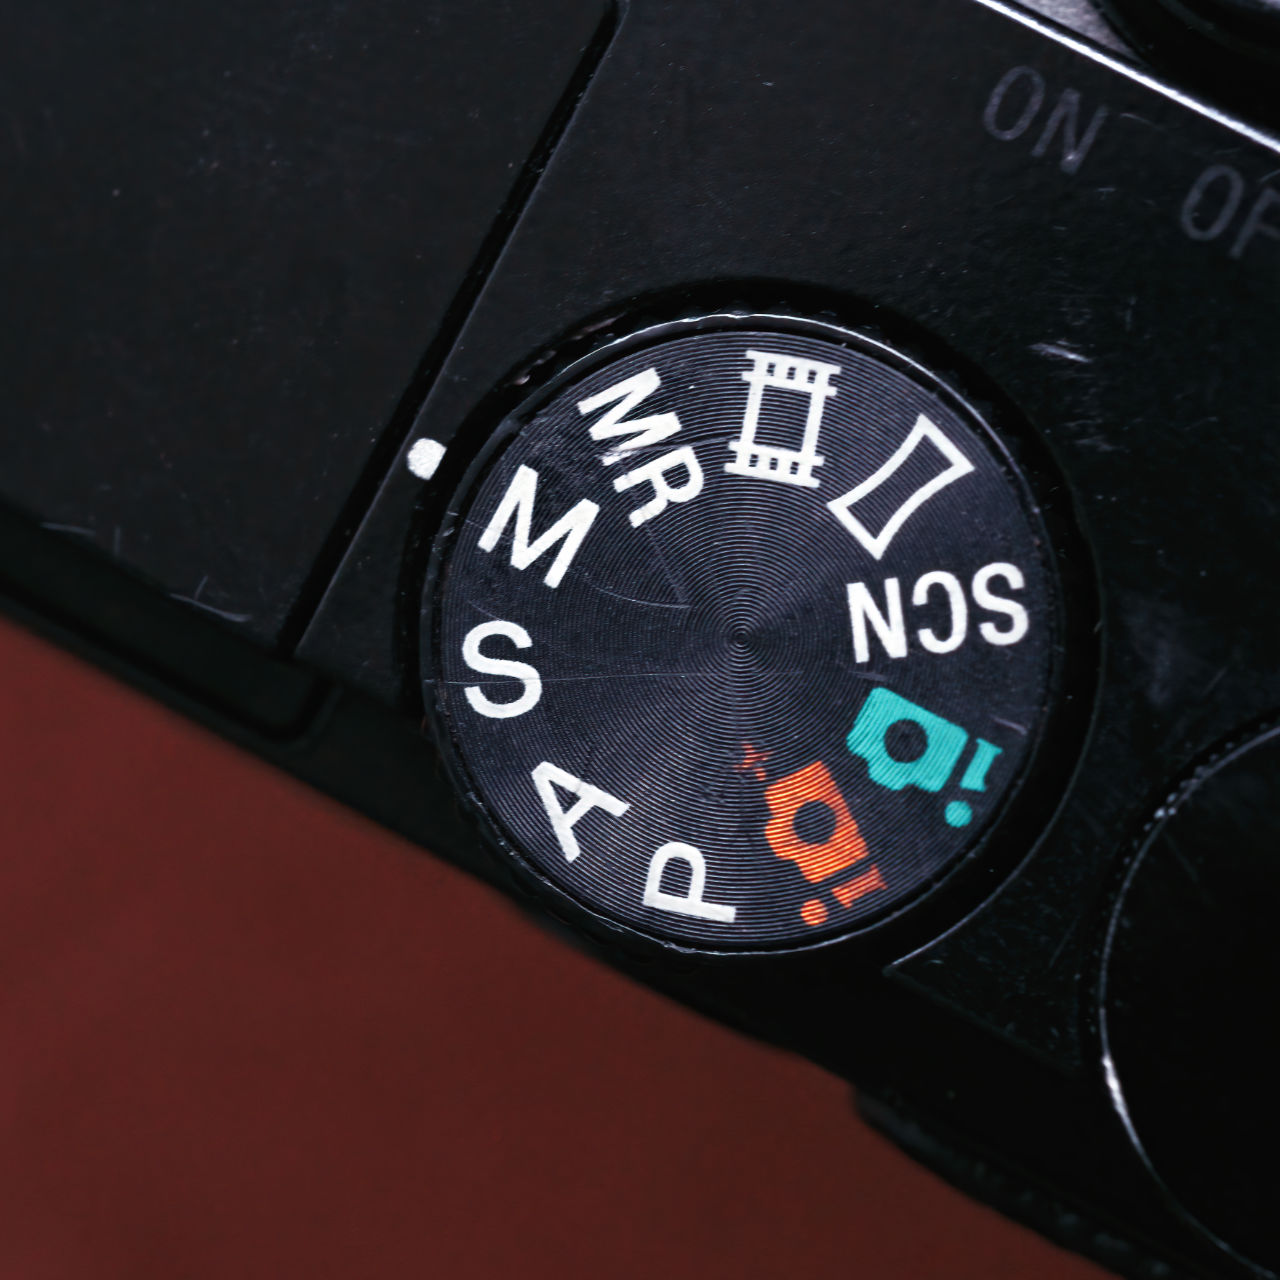
A summary of the different PASM modes is as follows:
- Program Mode (P): In Program mode, the camera automatically selects the aperture and shutter speed for you based on the lighting conditions. This mode is a step up from full automatic mode as it allows some creative control over ISO, white balance, and other settings. Rotating one of the dials on your camera will change the combination of aperture and shutter speed settings while retaining a set exposure value (EV). An EV of 0 indicates a “perfect” exposure of light and you can set this EV value to typically +/- 3 stops with increments in between. For example, a -1 EV will make the camera provide you with a range of aperture and shutter speeds that are darker than a perfectly exposed shot, and a +1 EV will provide you with all the combination of settings that result in a brighter shot.
- Aperture Priority Mode (A or Av): In Aperture Priority mode, you manually set the aperture (the size of the lens opening), and the camera automatically adjusts the shutter speed to achieve the set exposure (EV). This mode is useful when you want to control the depth of field in your image, such as when you want to blur the background for a portrait or keep everything sharp for a landscape photo but don’t want to bother setting the shutter speed yourself.
- Shutter Priority Mode (S or Tv): In Shutter Priority mode, you manually set the shutter speed, and the camera automatically adjusts the aperture to get a correct exposure. This mode is great for capturing movement: a fast shutter speed can freeze action, while a slow shutter speed can create a motion blur effect on a moving subject, or on the background if you pan the camera yourself. Again, this is based on a set EV.
- Manual Mode (M): In Manual mode, you have complete control over both the aperture and shutter speed. There is no EV value that the camera considers. This mode provides the greatest amount of creative control, as it allows you to determine the exact exposure you want. Manual mode is essential for certain challenging conditions where auto modes might not achieve the desired results, such as night photography or high-contrast scenes. With digital photography, where you can easily check the result of your combination of ISO, aperture and shutter speed settings, the manual mode is something I would argue that you should learn to use as you will be able to maximise your control over the resulting image.
2.5 Caring for your Camera
I personally don’t baby my cameras and use them in all sorts of weather. I do not use a specialist camera bag and most of the time my camera of the day stays slung around my side on its shoulder strap. However, there are a few minor things you should keep in mind that will help you maintain your equipment, but that won’t leave you spending hundreds of dollars on accessories or having to carry cumbersome camera bags.
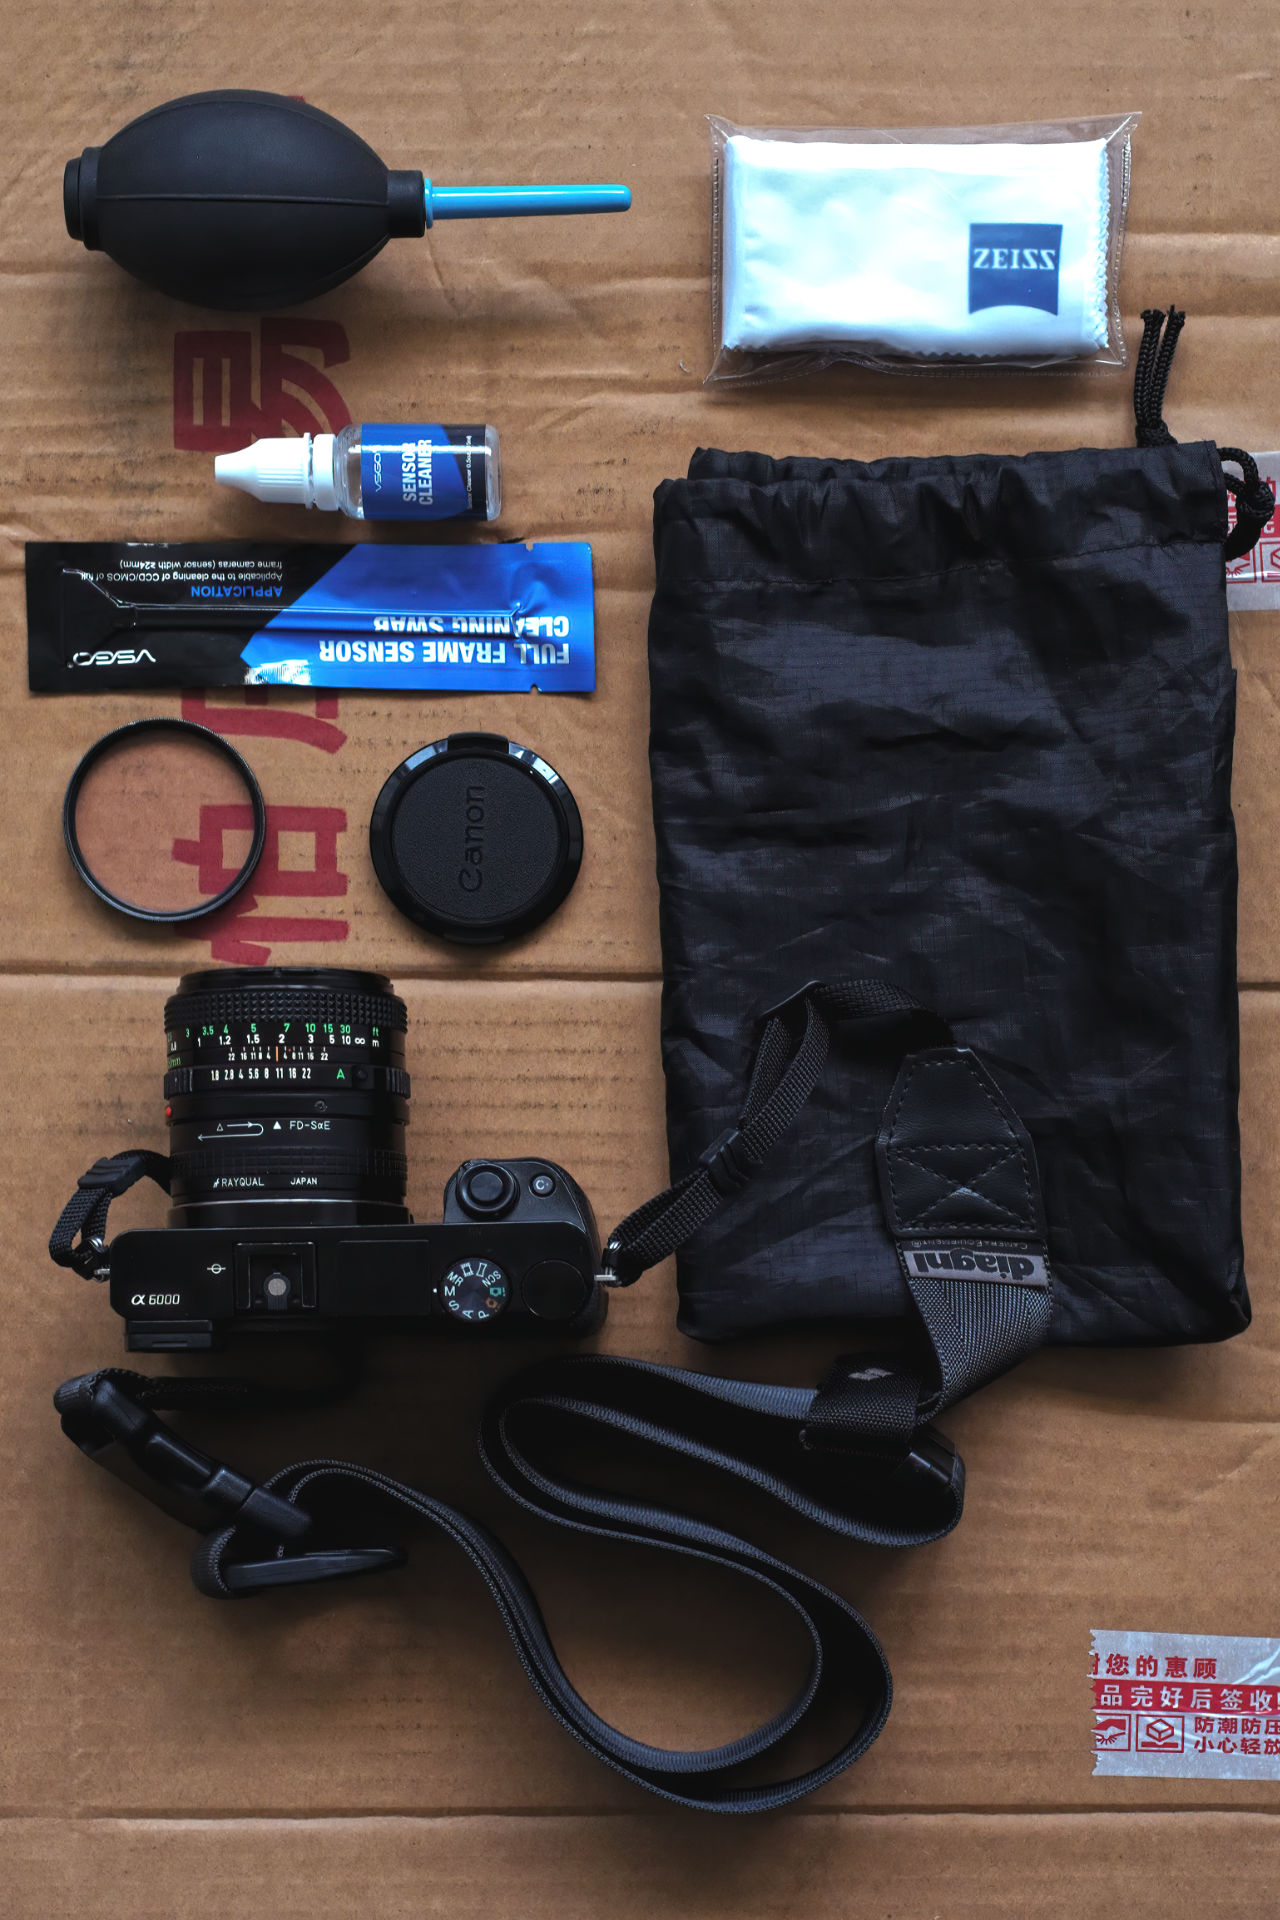
2.5.1 Microfibre Towel
This has a number of uses. Firstly, the camera might get wet or dirty while you are shooting and may be necessary to wipe down the camera or clean the lens. Secondly, you can wrap the camera in this towel when storing it in a bag while out but the camera is not in use to absorb bumps or impacts. This shouldn’t cost more than ten dollars from a camera store or online and you may want to get a new one every year or two as these can get dirty over time.
2.5.2 Nylon Drawstring Bag or Pouch
If you need to stow your camera while out or it begins raining heavily and you want to protect it, it is good to have a small nylon bag with you, preferably with a draw string or other kind of closure. This lets you stow your camera with the towel wrapped around it and placed in your main bag or a pocket, insulating it from the weather and any dust or debris outside or within the carry bag.
2.5.3 Lens Cap OR UV Lens Filter
I am not convinced that a UV filter is needed on a camera lens at all times because your digital camera’s sensor already has a filter over it that eliminates UV and in most cases infrared light. However, if you regularly lose lens caps or find it annoying to take them off and on while shooting and storing your camera, a UV filter will provide protection for your lens’ front element so you don’t scratch it while it is in your bag or while you walk around and may scrape past something. I don’t think you need both lens cap and lens filter, but it is nice to have one or the other as a barrier for protection against the elements.
2.5.4 Air Hand Pump
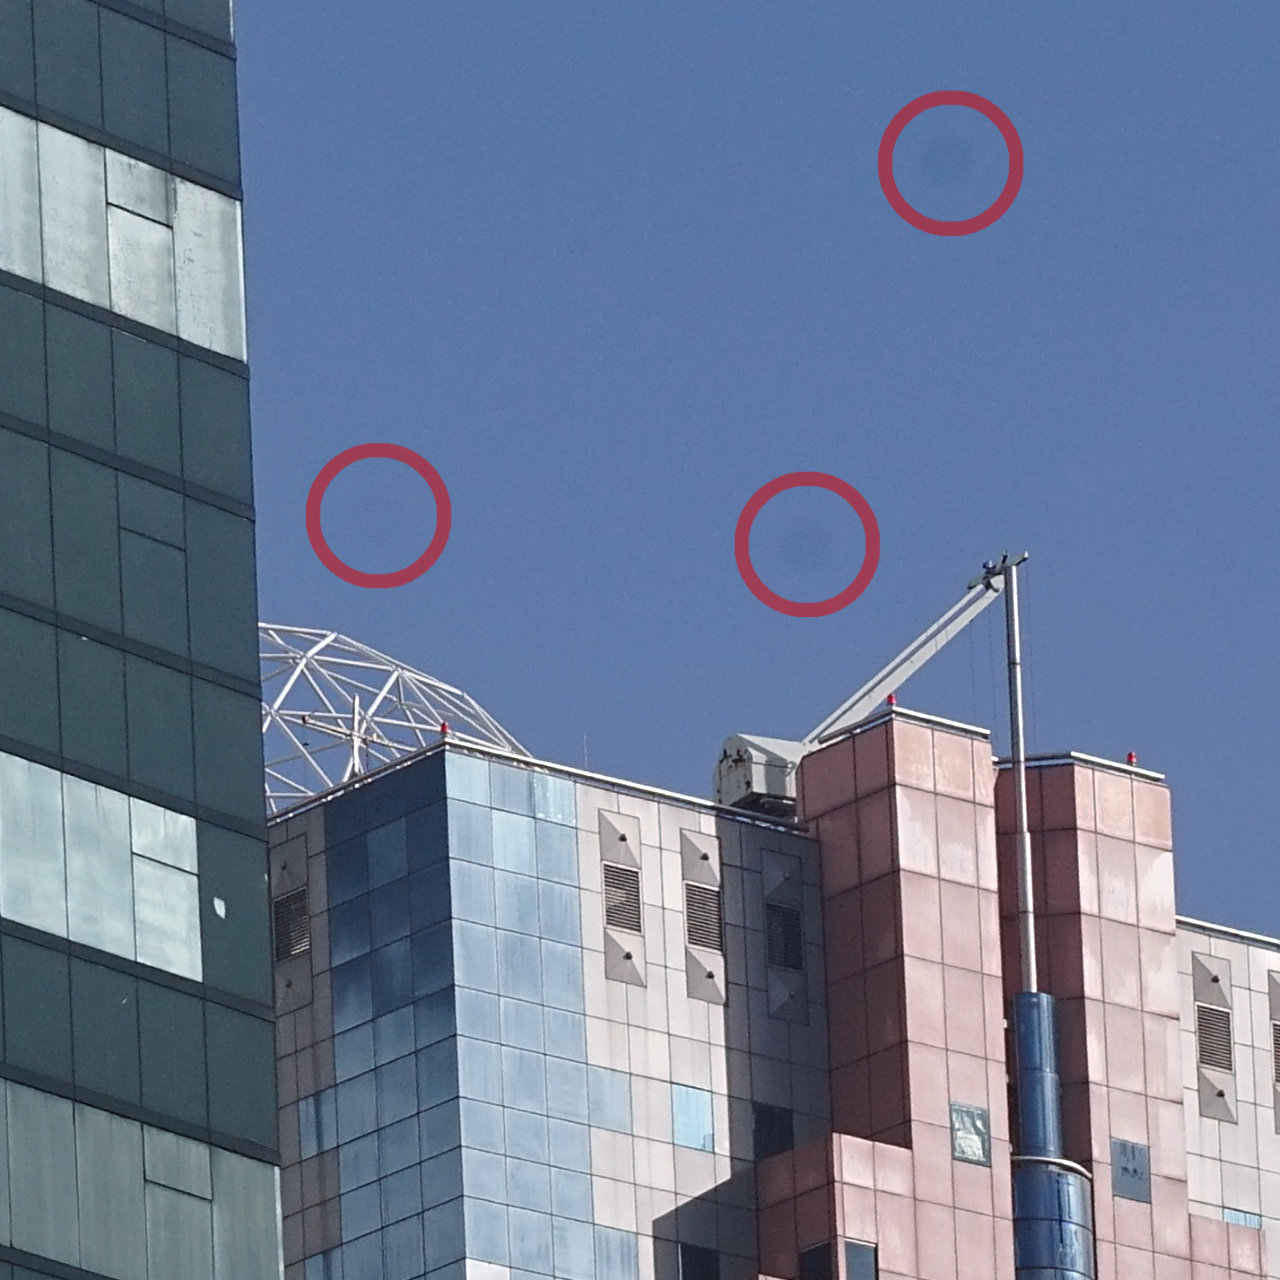
Inevitably as you are shooting you will get dust on your digital camera’s sensor. As mirrorless cameras have become the norm over Digital SLRs, I will assume a good deal of you have mirrorless cameras like the A6000, and these are more sensitive to sensor dust than a DSLR. When you do notice dust in your images, do not blow air from your mouth directly on the sensor. The water vapour and potentially mucus can get on the sensor and electronics, creating even more of an issue. Use an inexpensive air pump instead if you are outside and need to quickly remove debris. Many mirrorless cameras also have a “cleaning mode” which vibrates the sensor very quickly to dislodge dust on it. In my experience this rarely works well and you’ll need the air pump as well.
2.5.5 Sensor Cleaning Kit
Every once in a while you are going to want to properly clean your sensor. Finer dust and other contaminants are going to accumulate on the sensor that the air blower and the cleaning mode won’t be able to get rid of. These kits are just a sterile microfibre piece spread over a plastic wand and you then apply a supplied cleaning solution to the wand. Scraping gently in a single direction just once or twice, you can remove the debris. I find I need to do this once every few months.
2.6 Camera Lenses
Before I begin this section, there is a very important message that I want to make clear. A relatively inexpensive camera like the Sony A6000 and a cheap adapted vintage film lens, or the “kit” lens these cameras often come with, are both capable of producing very high quality images. Yes, extremely expensive professional lenses and more advanced cameras can get even better results in terms of image quality but image quality is probably one of the least important or impactful parts of what makes a good photograph and as many of us are sharing our images on digital online platforms with relatively low maximum resolution limits, almost any dedicated digital camera is going to be able to create good quality photographs.
That being said, there are a few things worth knowing when it comes to lenses. If you find yourself wanting to shoot interiors you will want to have a wide angle lens, otherwise you will need to take multiple photos and stitch them together using software on a computer. If you want to take handheld nighttime shots you really want to have a lens with at least a 2.8 (or preferably a 1.8) maximum aperture to allow more light to hit the sensor.
In my mind, a completely capable, and affordable, set up is using a kit zoom lens, or an adapted film zoom if you don’t have one, for general photography, and a 50mm 1.8 adapted film lens for night photography. This will give you wide and telephoto options while walking about, and the 50mm 1.8 you can use at night time and for portraits as most of you will be using entry level cameras with crop sensors and 50mm is closer to a 85mm in 35mm (full frame) equivalence. Most days on my primary digital camera (a Sony A7M3) I make do with a 35-105 f3.5-4.5 Minolta film zoom lens, that cost me the grand sum of $USD8, simply because it covers a range of focal lengths that I enjoy shooting at, is reasonably compact and it is replaceable if I ever happen to break it somehow.

Beyond this advice, buying new lenses is something fun to do for variety but in my opinion you are not going to significantly improve your photography by just buying gear. You will improve your photography by having consideration for your shots and practicing. Taking the time to go places that have interesting scenes and subjects and actually shooting will give you many more good photos than buying a new lens and not making any effort to explore or shoot with it. Even still, a new lens can give a new perspective to your photography and there are non-technique related aspects of the hobby, that include collecting, which might help motivate you to shoot when you find yourself unmotivated. If using a mirrorless camera such as the Sony A6000, I would recommend getting an inexpensive manual lens adaptor and trying out older film lenses, even zooms. You will be surprised how well they keep up with extremely expensive brand new auto focus lenses made for digital cameras, many of which often use pre-existing lens designs that are decades old from the film photography era.
3.0 Tips on Shooting
This section is divided into two main parts: the basics of framing, composition and camera settings to consider for every photo you take; and a series of small practical lists of tips for various types of shooting, such as portrait and street photography,
3.1 The Basics
3.1.1 Composition
“Composition” refers to the arrangement of elements within a photograph. It involves how the various elements in a scene are arranged within the frame (the rectangular image that you are seeing through the EVF or monitor).
“Elements” refer to the various components that make up the final image. These can be the physical objects captured in the photograph, but also refer to abstract factors like light, color, and texture. Here are some examples:
- Physical Subjects: The primary subjects or objects within the frame. This could be people, buildings, animals, trees, etc.
- Light: The presence, absence, and quality of light, including factors like direction, intensity, and colour.
- Colour: The hues and tones within an image, which can strongly influence the mood and visual impact of the photograph.
- Texture: The visible ‘feel’ of surfaces and objects within the image. This can include digital noise
- Space: The empty or filled areas within an image. This could be positive space (areas occupied by your main subject) and negative space (empty areas around your subject).
- Line: Visible or implied lines that guide the viewer’s eye through the photo.
- Shape & Form: The two-dimensional (shape) and three-dimensional (form) aspects of the elements in your photo.
- Pattern & Symmetry: Repetitive elements and symmetry that can be used to create a point of difference in the image to capture the audience’s attention.
- Depth: The sense of three-dimensionality in a photograph typically created by having a distinct foreground, mid-ground subject and background.
- Perspective & Viewpoint: The position from where the photo is taken by the camera and lens, affecting how the elements relate to one another. (e.g. being far from the subject to create a grand scale, shooting low to high to exaggerate size, etc).
These elements can be arranged and manipulate in near infinite ways to create your photograph. Composition can also be considered in terms of visual narrative and aesthetics. It determines how the subject, foreground, background, lighting, and other components are organised to convey a specific mood, idea, or even a story.
There are many guidelines and techniques that can help in achieving a compelling composition, such as the rule of thirds, leading lines, symmetry, framing, viewpoint, depth, and balance. However, these are not hard rules but rather suggestions, and sometimes breaking these rules can also result in interesting and dynamic compositions. Mastering more techniques of composition will give you a better ability to control what kind of photograph you want to create.
- Rule of Thirds: Divide your image into thirds both horizontally and vertically, and place points of interest at the intersections.
- Leading Lines: Use natural lines in the image to direct the viewer’s eye toward the main subject. This will be discussed more in framing.
- Light vs Dark: The human eye is lazy, and it will be drawn towards light/white areas of a photograph over dark ones. The use of light backgrounds for “white space” acts on this principle. Dark edges and corners with lighter centre can often be used to draw the viewer’s eye towards a centrally focused subject.
- Symmetry and Patterns: Utilise symmetry and patterns for creating something visually impactful for the audience. The human eye often detects patterns automatically so it is a good way to make your photos stand out by including them.
- Depth: Create a sense of depth by including elements in the foreground, middle ground, and background. This can be further enhanced with lower apertures to create out of focus areas in the fore-ground and even background with the subject in-focus in between. I find depth composition to be important for creating immersion.
- Perspective: Get lower or higher, point the camera upwards or downwards, or level, depending on what you wish to portray. Use the EVF or monitor and view the scene at different perspectives to see if one angle is more compelling than others.
- I like using the “gridlines” overlay, which are available on most digital cameras, as they help me do two things. The first is keeping a photography straight and level. You can fix this in post-processing but getting it closer to what you wanted is better to do in the camera. The second is letting me better see the proportional location of various elements in the frame to allow for applying the rule of thirds and other compositional principles.
3.1.2 Framing
“Framing” is a sub-technique of composition and refers to composing the image in your EVF or monitor where the goal is to draw attention to the subject or scene of your image by way of blocking other parts of the image with objects or contrast in the scene. Framing can involve using natural surroundings, out of focus, or in-focus elements, or scenic objects to border the subject or to break up a significant part of the photo.
Framing can be achieved by using various elements such as buildings, trees, windows, arches, or even blurred foregrounds to surround the main subject, thereby drawing the viewer’s eye towards it.
This technique helps in providing context, creating depth or layers, leading the eye, and enhancing the overall composition of the image. It can also help to isolate your subject from the rest of the scene, which can be particularly useful in busy environments where the subject might otherwise be lost.
Tips:
- Use natural frames: Look for elements like streetlight poles, doorways, window frames, vines on a wall, or even low-hanging tree branches to create a “frame” around your subject from the available objects in the background of your shot.
- Pay attention to the details in the background: Be mindful of what’s behind your subject as if it is too busy details can distract or distort. If the background cannot be framed well, then consider using a low aperture and get close to the subject to blur the background.
- Fill the frame: Don’t be afraid to get close to your subject to exclude unnecessary background details, particularly in portraits.
- Consider context: Using garbage on a sidewalk as your frame for an attractive fashion model might not be the right messaging versus using sand, or plants for a similar effect.
3.1.3 Landscape vs. Portrait Orientation
In photography, “landscape” and “portrait” refer to the orientations of the image.
Landscape orientation is when an image is wider than it is tall. It’s called “landscape” because it’s particularly suited to capturing wide, expansive scenes like landscapes, cityscapes, and panoramic views.
On the other hand, portrait orientation is when an image is taller than it is wide. It’s termed “portrait” because it’s traditionally used for portrait shots, where the vertical layout can better accommodate the human form. If you are shooting with the intention of posting on social media platforms that are typically viewed on a phone, such as Instagram, shooting in portrait orientation will be more practical.

Both orientations can have a significant impact on the composition of a photo and the way the viewer interacts with it. Choosing between them depends on the subject matter, the composition, and the photographer’s creative vision.
3.1.4 General Settings on your Camera
For Manual Mode, as I recommend learning to use, most lenses regardless of quality are quite sharp around an aperture of f/8. 1/160 shutter speed provides crisp results handheld for still scenes and static subjects. ISO400 on almost any digital camera made after the year 2005 is going provide acceptable clear results. On the Sony A6000 I am using in this guide, I find that ISO1600 still provides good results, however I will use ISO100, the lowest ISO, when possible for a clearer image. Also keep in mind that digital noise via using a high ISO set can be a valid technique to create texture in a shot.
If in doubt put the camera in P mode, or A mode if you want creative control over depth of field (remember, wide aperture will blur more of the shot out of focus; and narrow aperture will increase depth of field and more of your scene will be in focus and sharp). In P or A modes, keep your EV setting to 0 for a generally well-exposed image and -1 or -2 EV for a darker shot, and +1 or +2 EV for a brighter shot. If you are shooting action, and want to use an automated mode, switch to S mode and put the shutter speed to 1/500 or 1/1000 depending on the speed of your subject. In S mode, take note, if your lens aperture cannot go wide enough based on the available light at a given ISO, you will need to increase ISO otherwise it cannot expose correctly to your set EV.
3.2 Types of Photography
3.2.1 Portraits
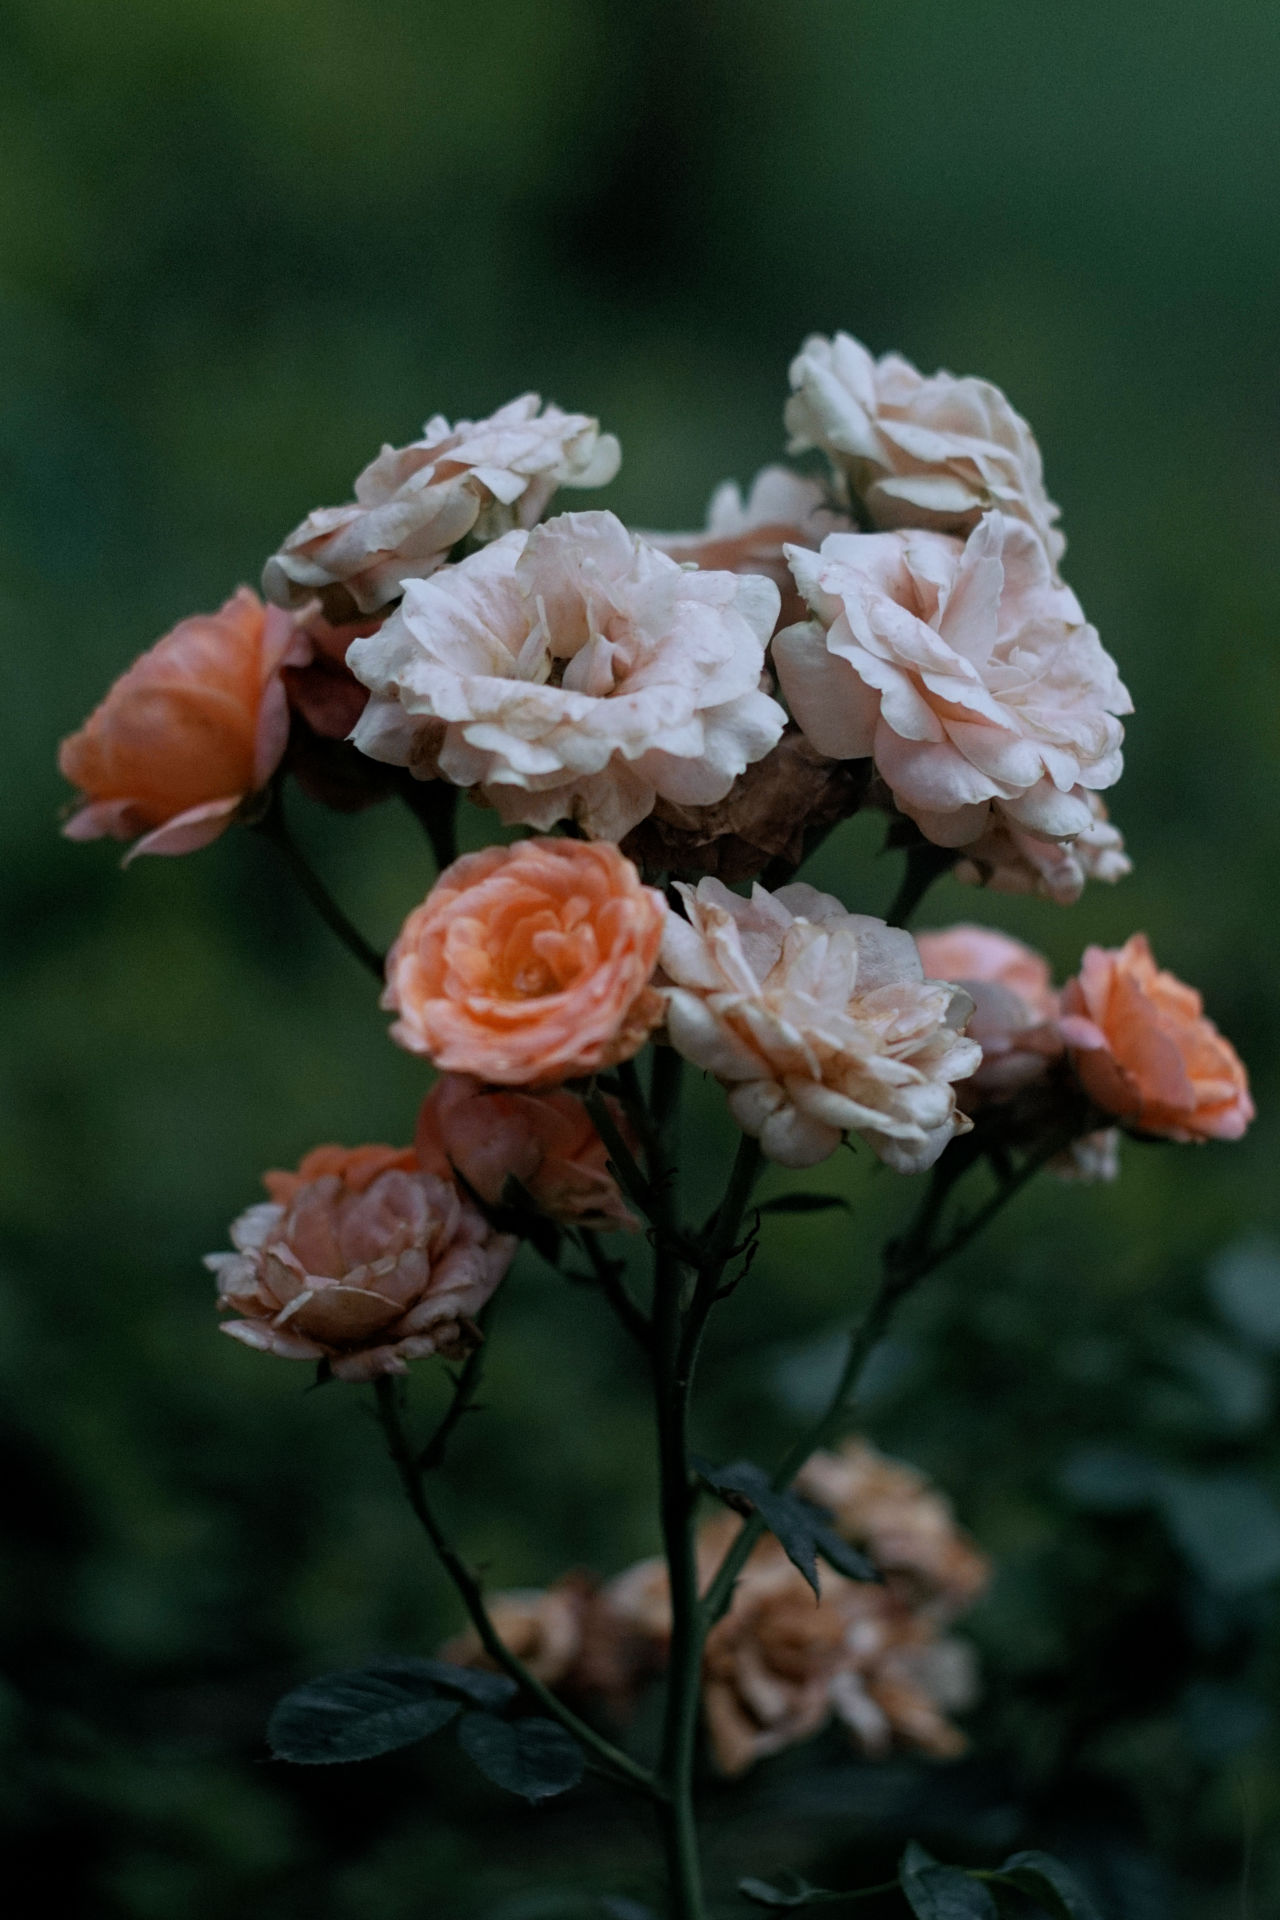
I consider portraits to be any shot where the subject is the most important part of the image, typically a person, a relatively static animal such as a pet dog resting on a sofa, or even a shot of a flower in a garden. The subject is the focus, and the goal is to provide some sort of feel, look, or emotion to the portrayal of that subject. In general, with a person, a flower or a beloved pet, this is to make the subject look attractive (to your standard), but not always.
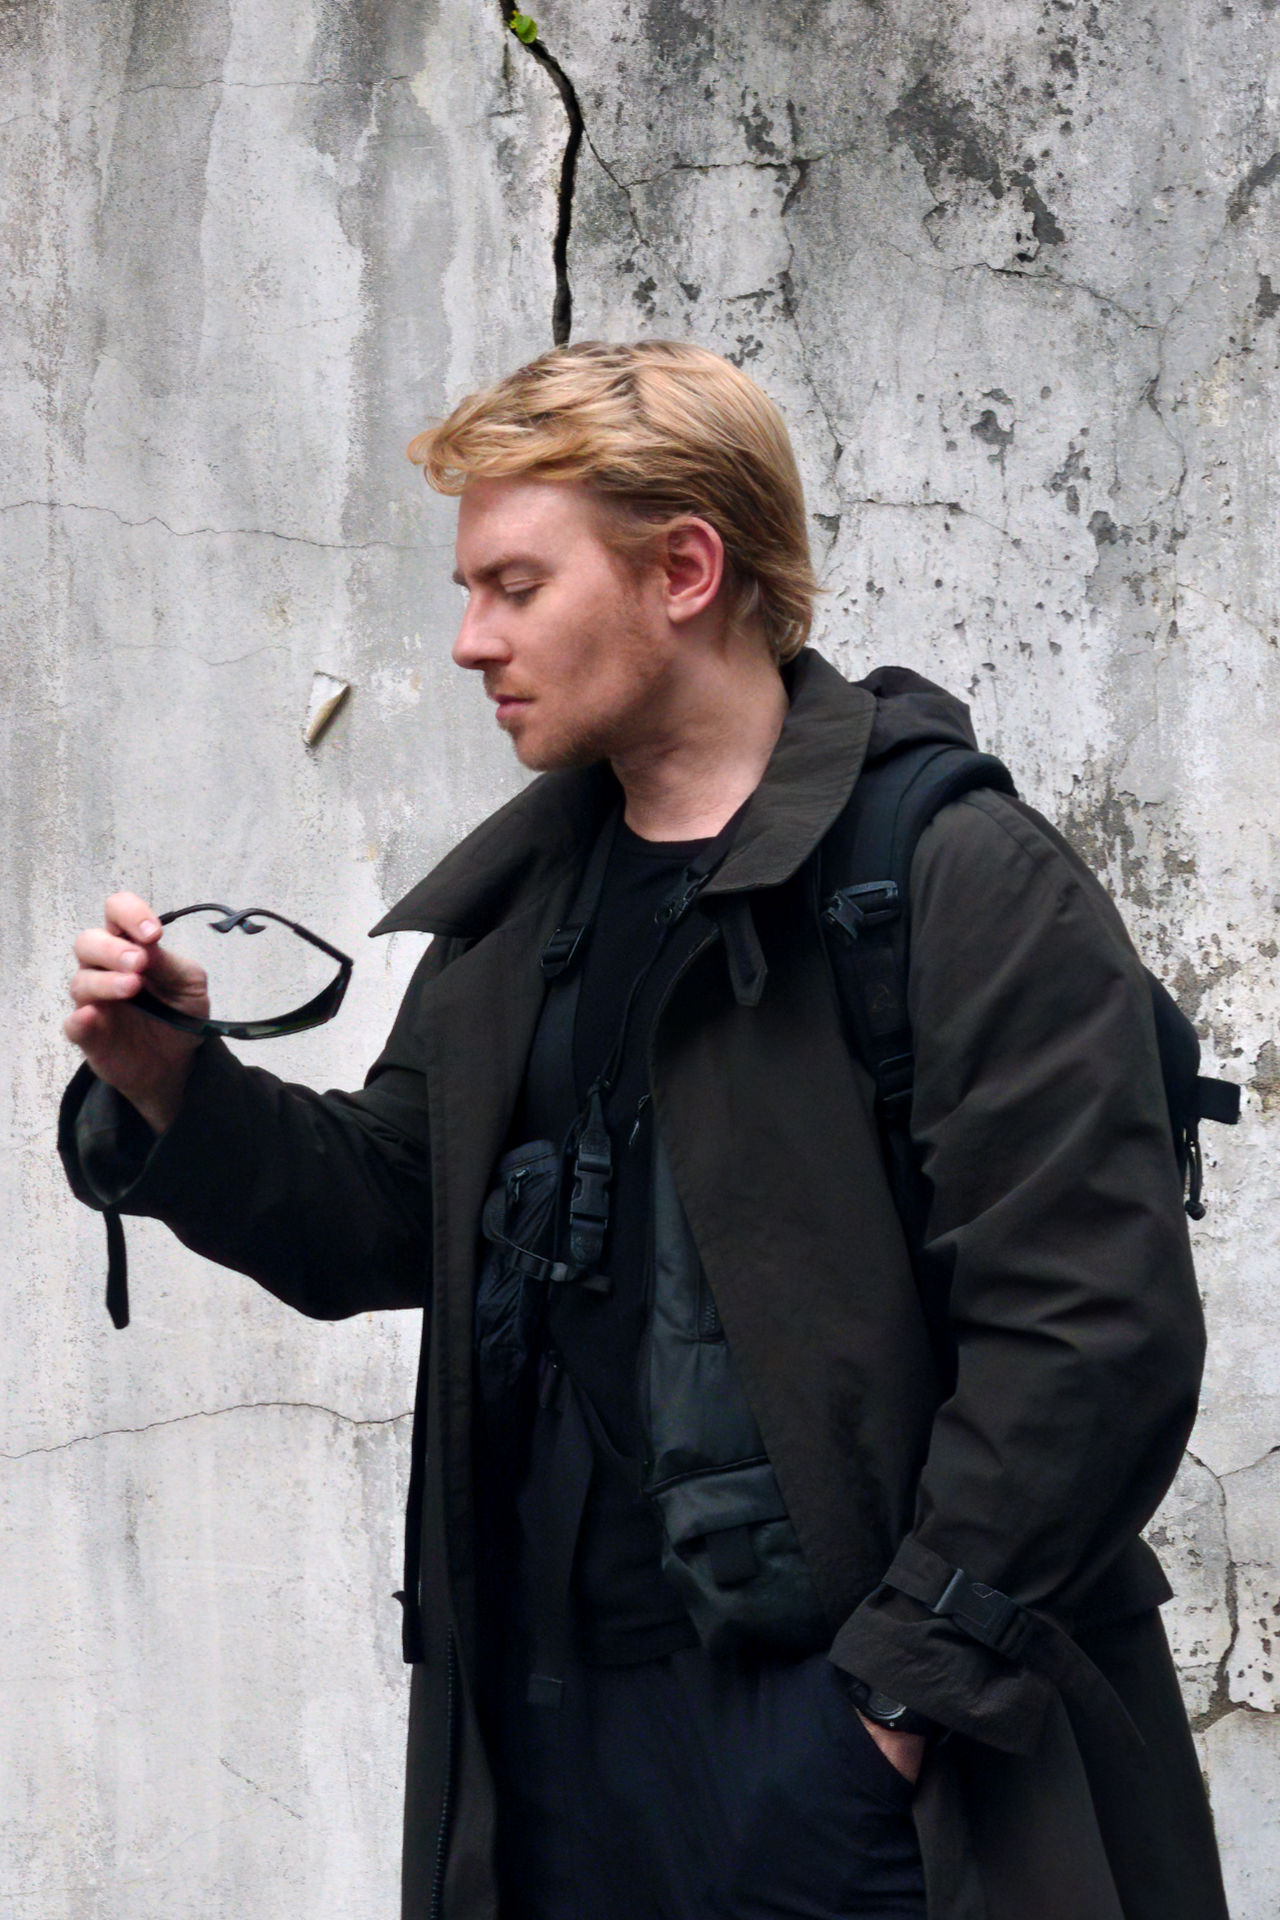
Intent:
- A photograph with the primary focus on the subject, typically to convey an attractive or flattering perspective of the model; but could also be used to convey other expressions, emotions and feeling; including negative ones.
Tips:
- If shooting a model (human or animal), make sure the eyes are in focus, this becomes increasing important if you use a wide aperture with a shallow depth of field. You don’t want to be focusing on the model’s nose or ears with the eyes slightly blurred. This is particularly important to note if you are using auto focus (please consider using manual focus for portrait photographs especially).
- In general, top-down lighting will be extremely unflattering for even teenagers let alone older models and every pimple, wrinkle or blemish will become high contrast, aim for light that has a more horizontal angle to flatter the model’s features. Having the light source behind the camera is typically ideal. This can be done using reflected light off a building or window for example, positioning the model in front of it, ensuring their face is illuminated by this light and then getting between the light and the model (without blocking the light source).
- If shooting outdoors in the middle of the day where lighting is very challenging, you can have the model stand under an outcropping such as a overhanging roof or tree, at the edge of the shade. This funnels and reflect light horizontally to create a flattering effect.
- A camera flash can be used to fill in wrinkles and lines on a model’s face when shooting in top down lighting outdoors. Some cameras such as the A6000 have a built-in flash, but some might not. If you are doing heavy portrait photography, consider purchasing a more powerful flash for your camera.
- Extreme sharpness is not something that should be a significant priority in portrait photography and will enhance every pore on the face, much less blemishes, hair strands and other aspects of the model that are not the priority to highlight. Getting the eyes and other features in focus, yes, so sharp that every single skin imperfection stands out, no. Older film lenses shot at their widest open aperture often become quite soft and this can be an advantage for shooting portraits.
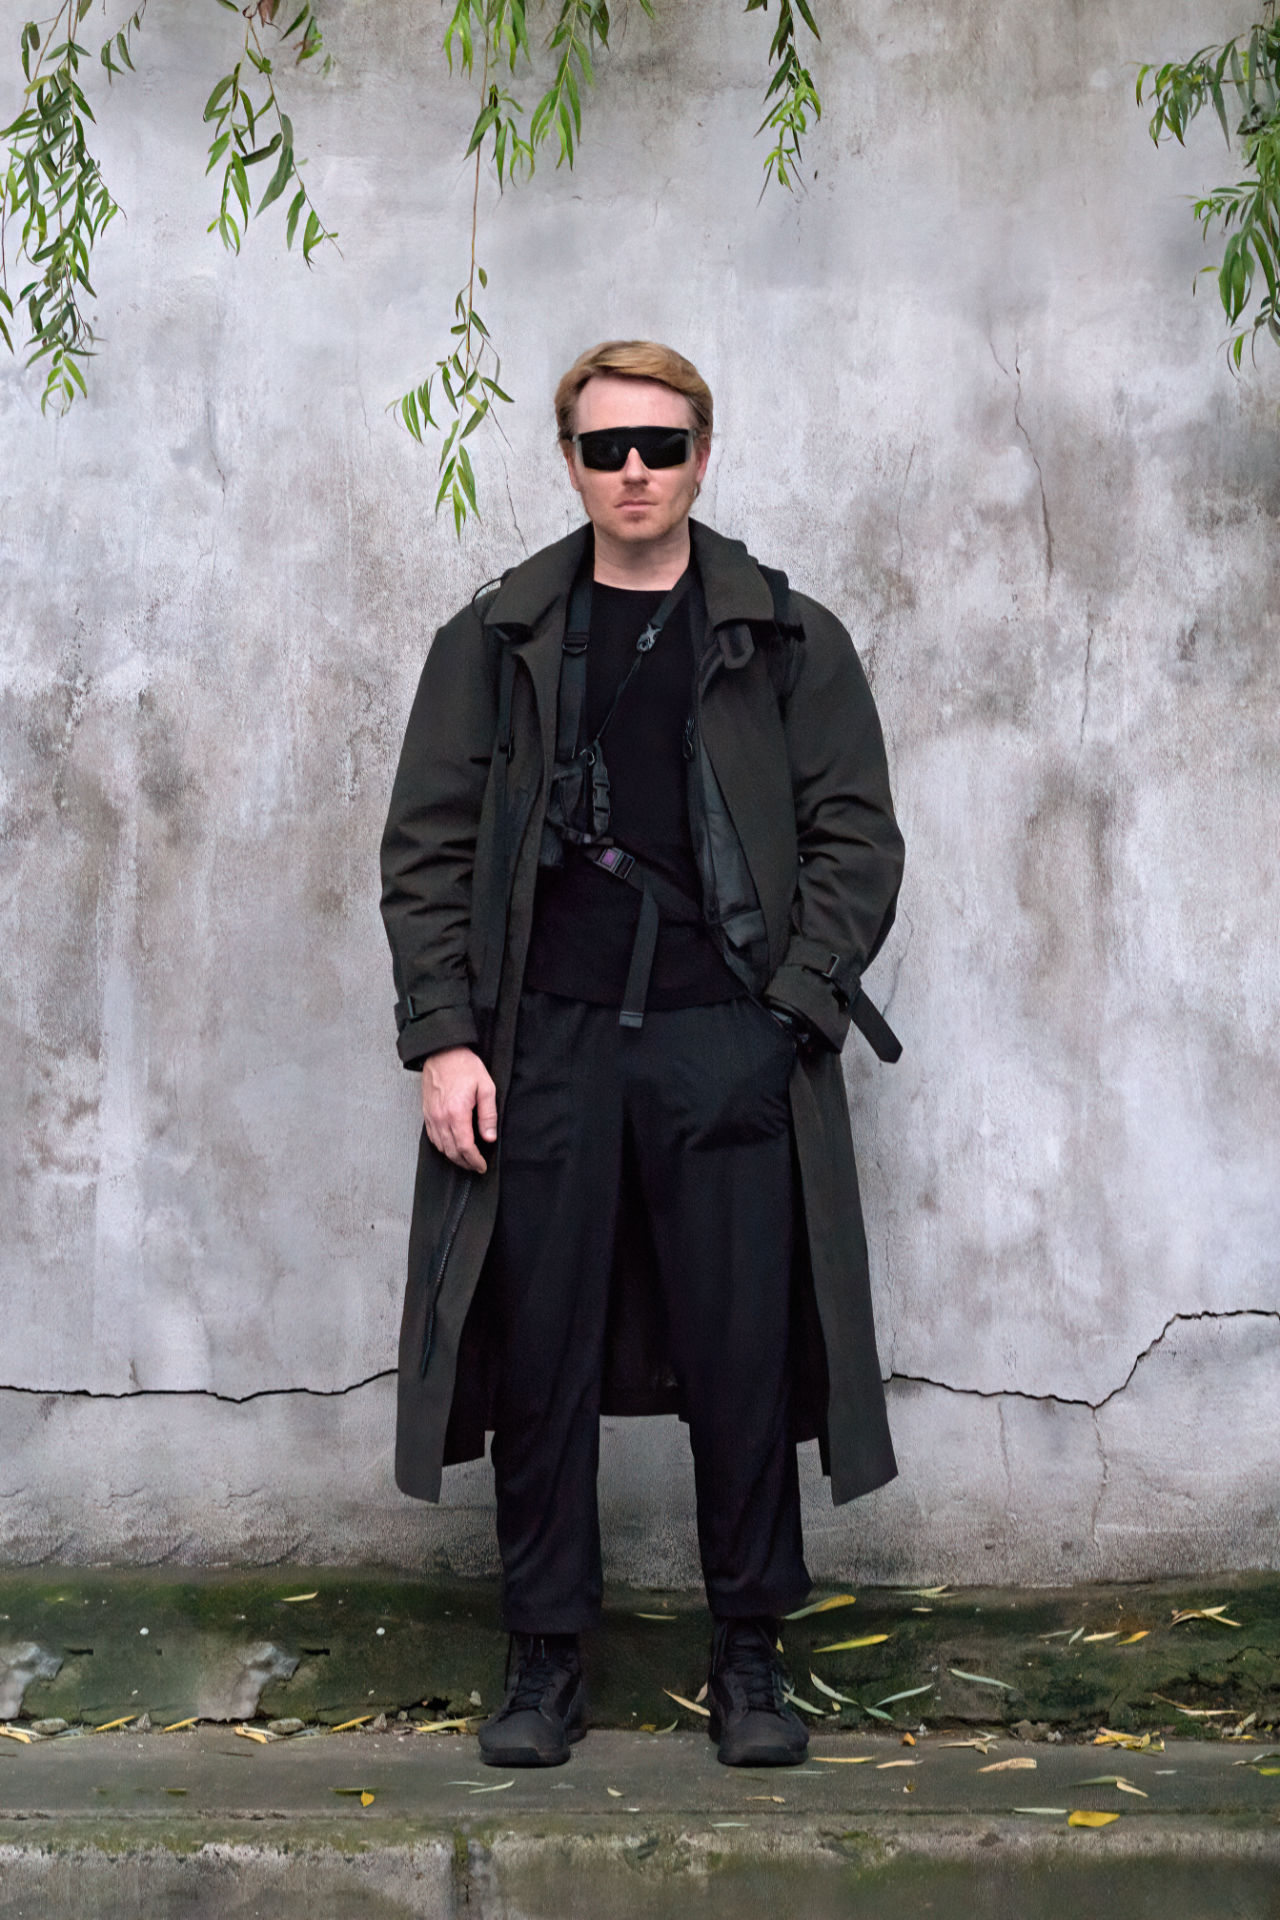
3.2.2 Fashion
Fashion photography, to me, are a class of images of worn garments or accessories where the focus is less on the individual model and more on the items, in their worn-state (as opposed to product fashion photography where they are displayed on a hanger, mannequin or flat lay). Fashion shots can be extremely difficult to do well and require quite a bit of practice and knowledge of aesthetics. You want the model (or yourself if you are using a timer) to be posed in a flattering way that isn’t awkward. You want contrast and detail on the clothing so that it stands out, which often means top down lighting, but also flattering light on the model’s face, which usually means horizontal light to reduce lines and marks. Then, you want an interesting background that frames and complements the person and the clothing style. Posting all black technical wear with a suburban background often looks ridiculous as would a mini dress and high heels on a woman in the middle of the wilderness.
Intent:
- A photograph where the focus is on the clothing, shoes or accessories on a model where the goal is to make the fashion items attractive as presented in the state of being worn either static or in motion.
Tips:
- Avoid shooting low with an upwards angle as it can create an awkward “pin head” effect where the model’s feet become enormous and the head very small; instead, keep your lens height relative to the model around chest to chin level, dead-on.
- For self-fashion shots or “fit pics”, which is something I know that some of my readers are interested in taking, manual focus really can help make things more simple than having to auto focus a proximal position where you will be standing for each timered shot.
- Ensure there is attractive light on both the clothing as well as the model’s face. If this is impossible due to lighting, consider turning the model’s head until it hits shadow while the clothes remain illuminated.
- Aside from the face pose, you need to watch the hands and feet. Some models are quite good at manipulating their poses in front of a lens but many might need your direction.
- Watch out for wardrobe issues, if you are a beginner you likely do not have a stylist helping you and the model may not be aware of issues such as hair that has fallen out of place, a shirt that needs tucked in a more flattering way, or a jacket hem falling in an unaesthetic position. You will have to be the photographer and the stylist in one. Consider reviewing your pics after taking the shot and taking close note of the garments and make sure nothing is out of place.
- A plain background removes one element of having to coordinate the model, their outfit and the setting; there is a reason why all white studio backdrops or sterile wall “fit pics” are so popular: they are much easier to do. As you get more advanced, complementary backgrounds and framing can be considered to enhance the appearance of the clothing and the model.
- Using a longer range lens over 100mm with wide aperture, say under f/2.8 can blur out backgrounds significantly to isolate the entire subject without the need for a plain background or wall.
- If static poses look awkward, or the model is uncomfortable (often my case when I photograph myself), having the model in motion walking can be a very effective method for capturing a more natural pose. For clothing with a lot of volume, like a large coat or a dress, this has the added bonus of creating impressive silhouettes not possible with a static posed shot.
- This type of photography in particular needs a lot of practice and the more you shoot the better you will get by being able to pose your model, attend to styling issues and light both the clothes and model’s face attractively.
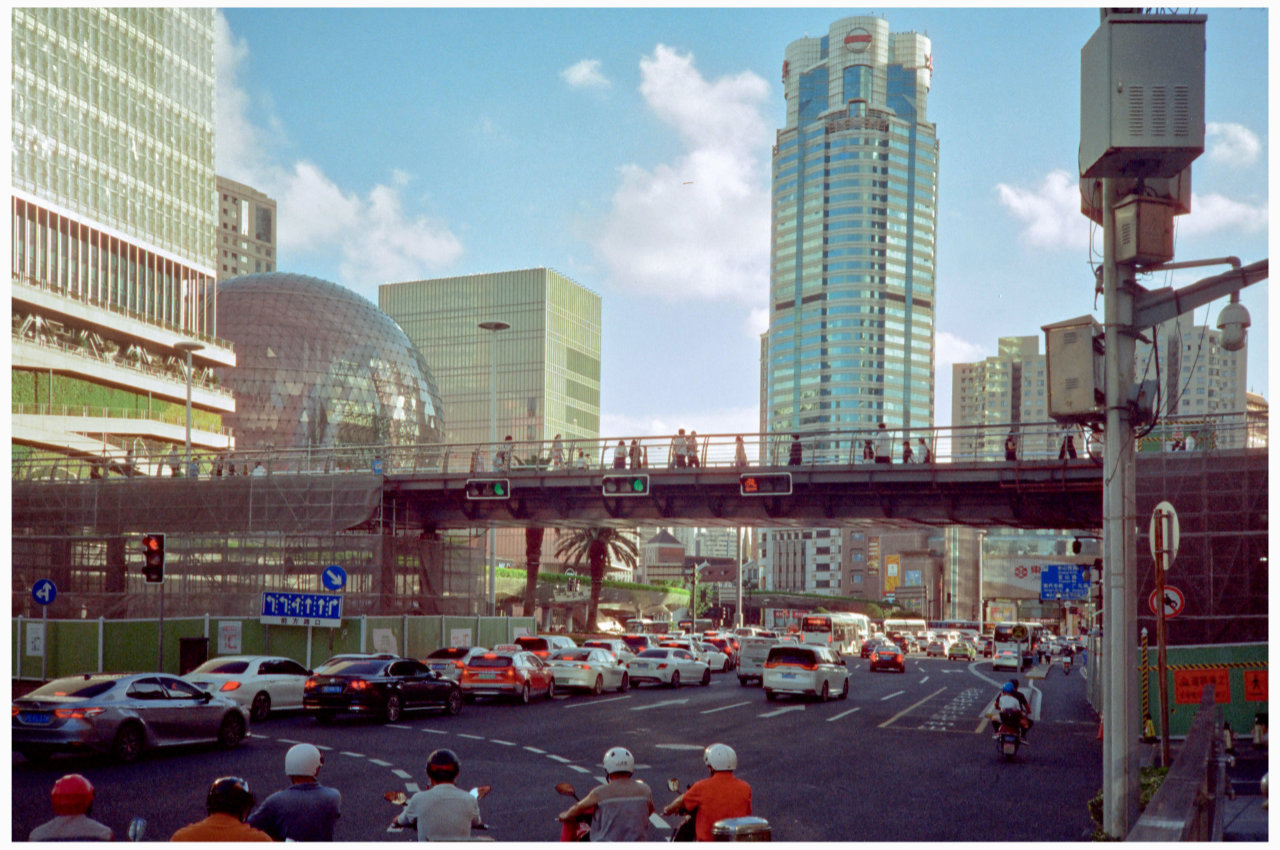
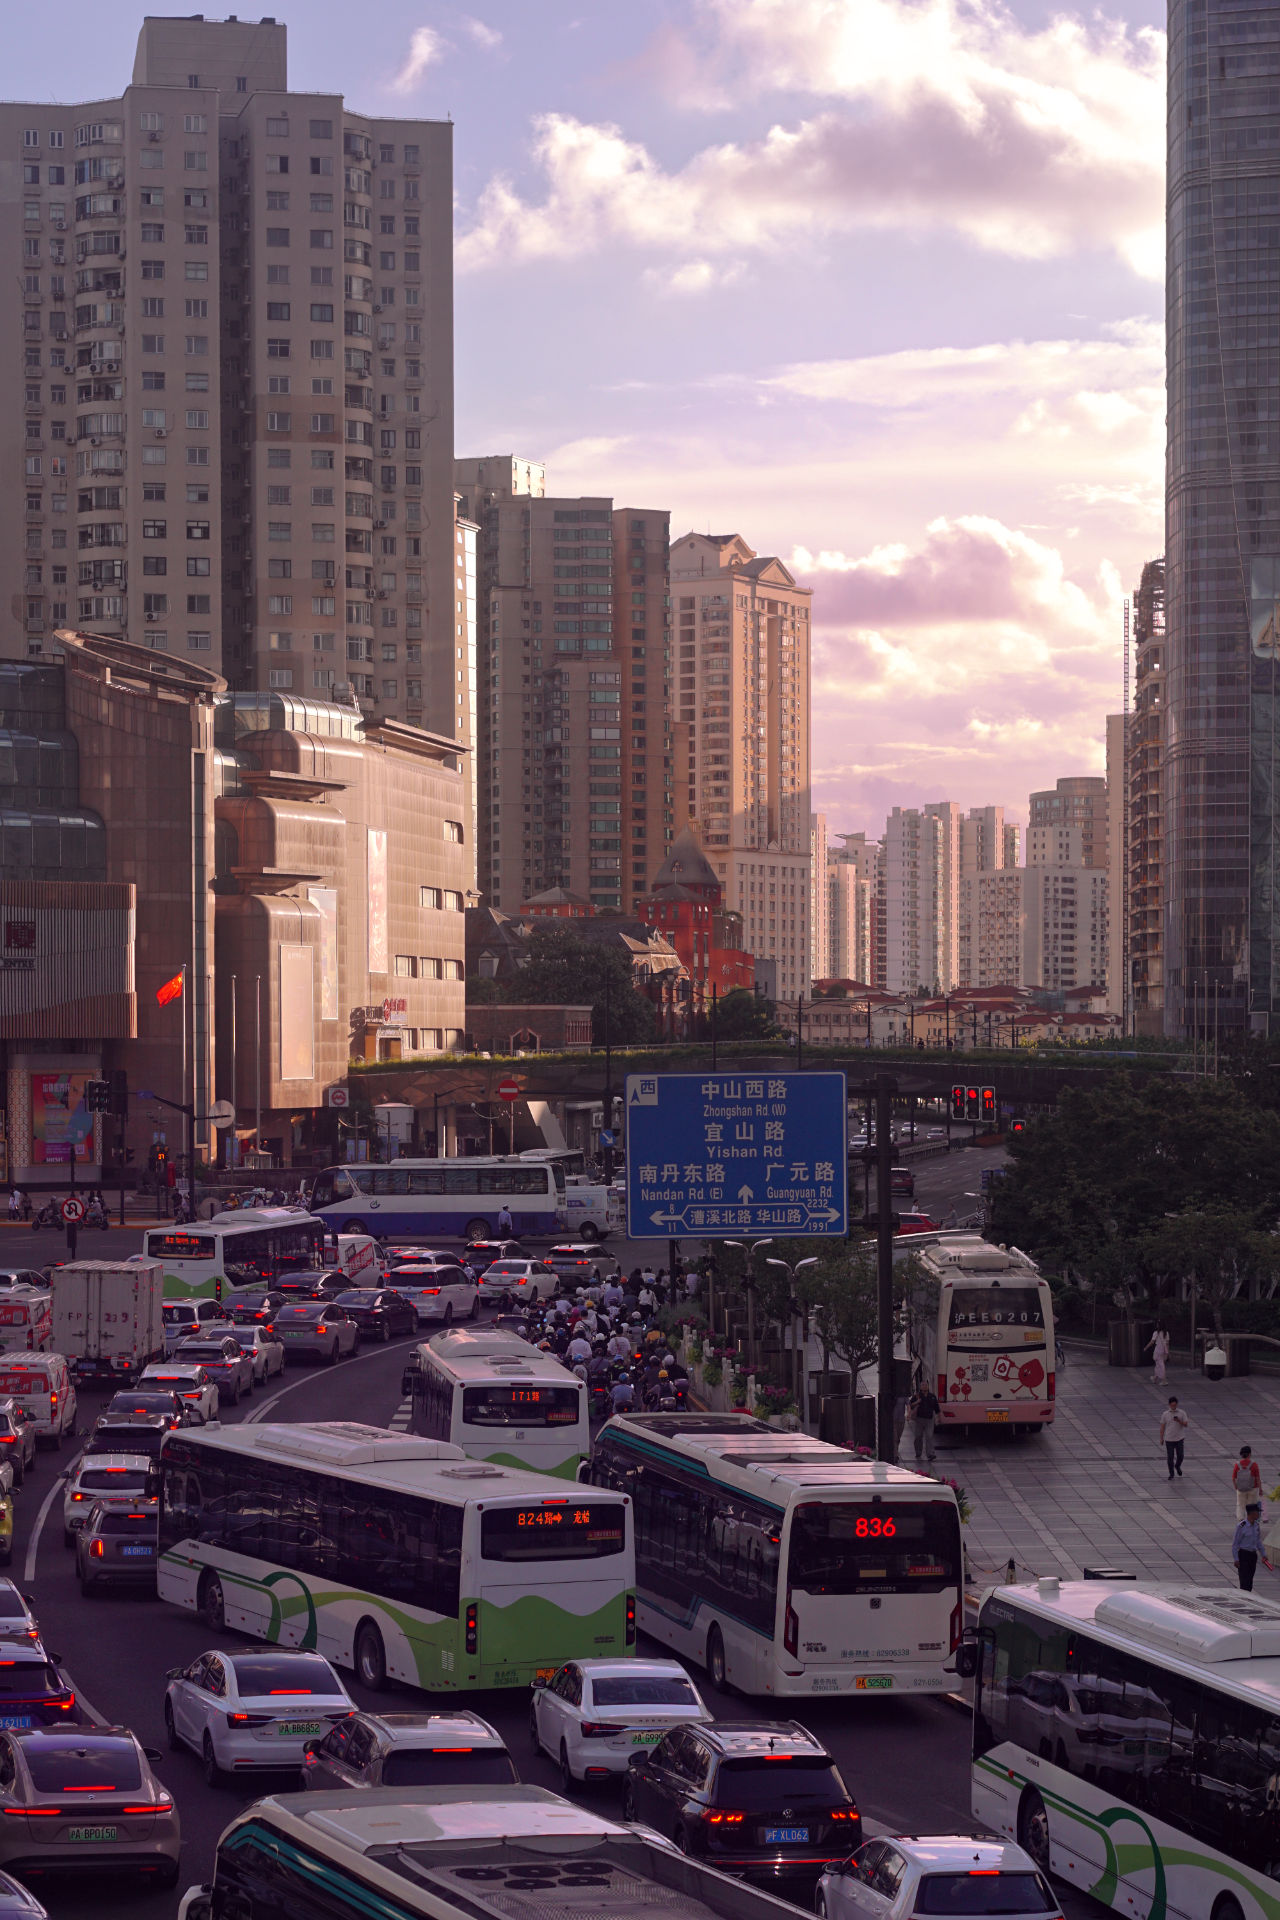
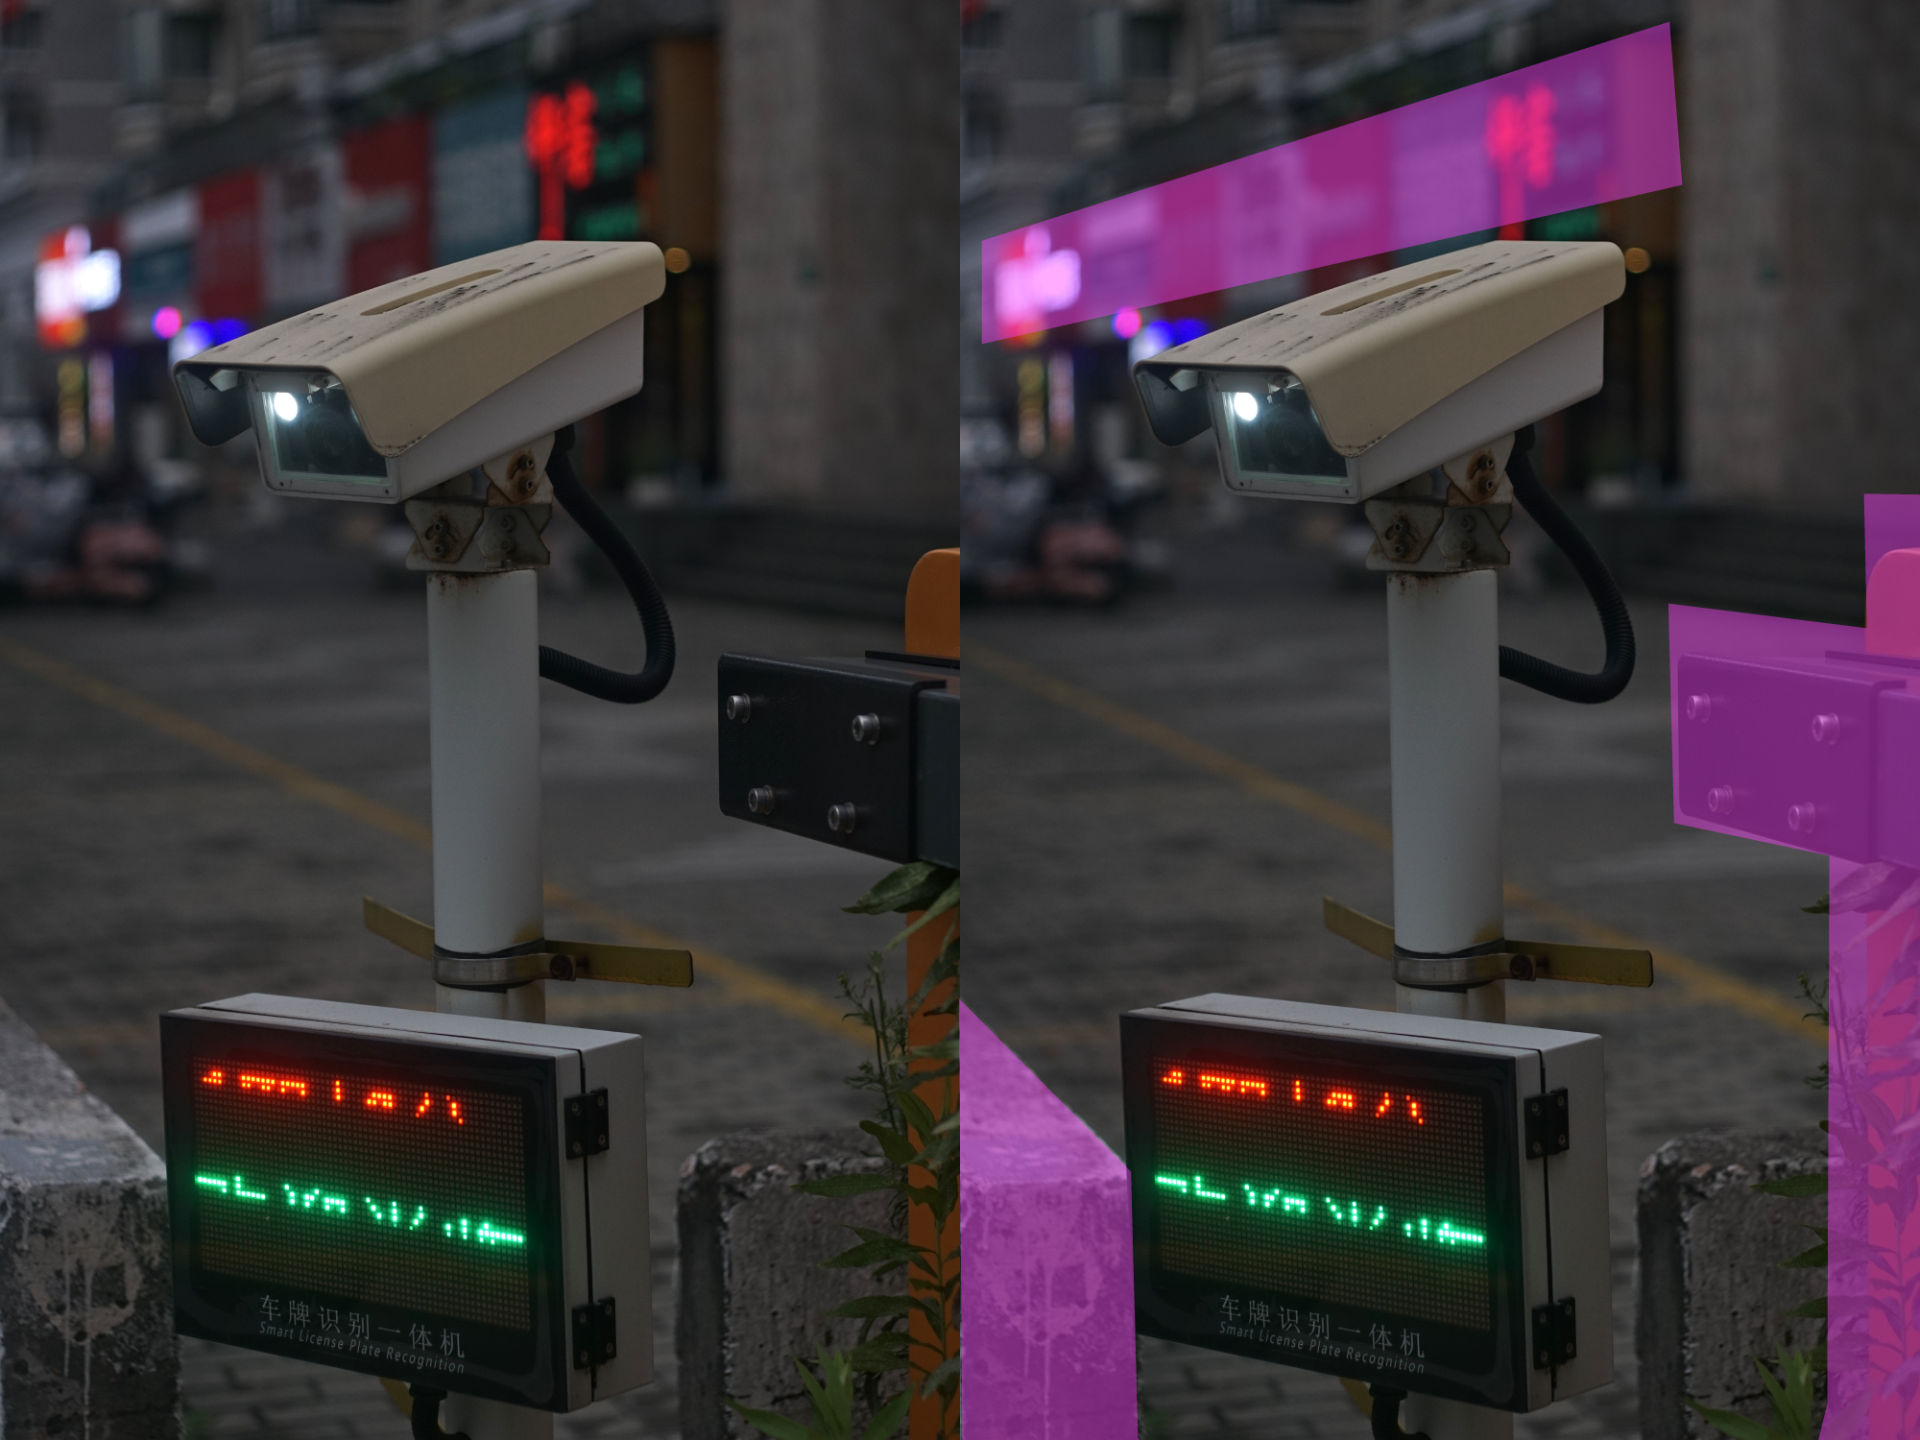
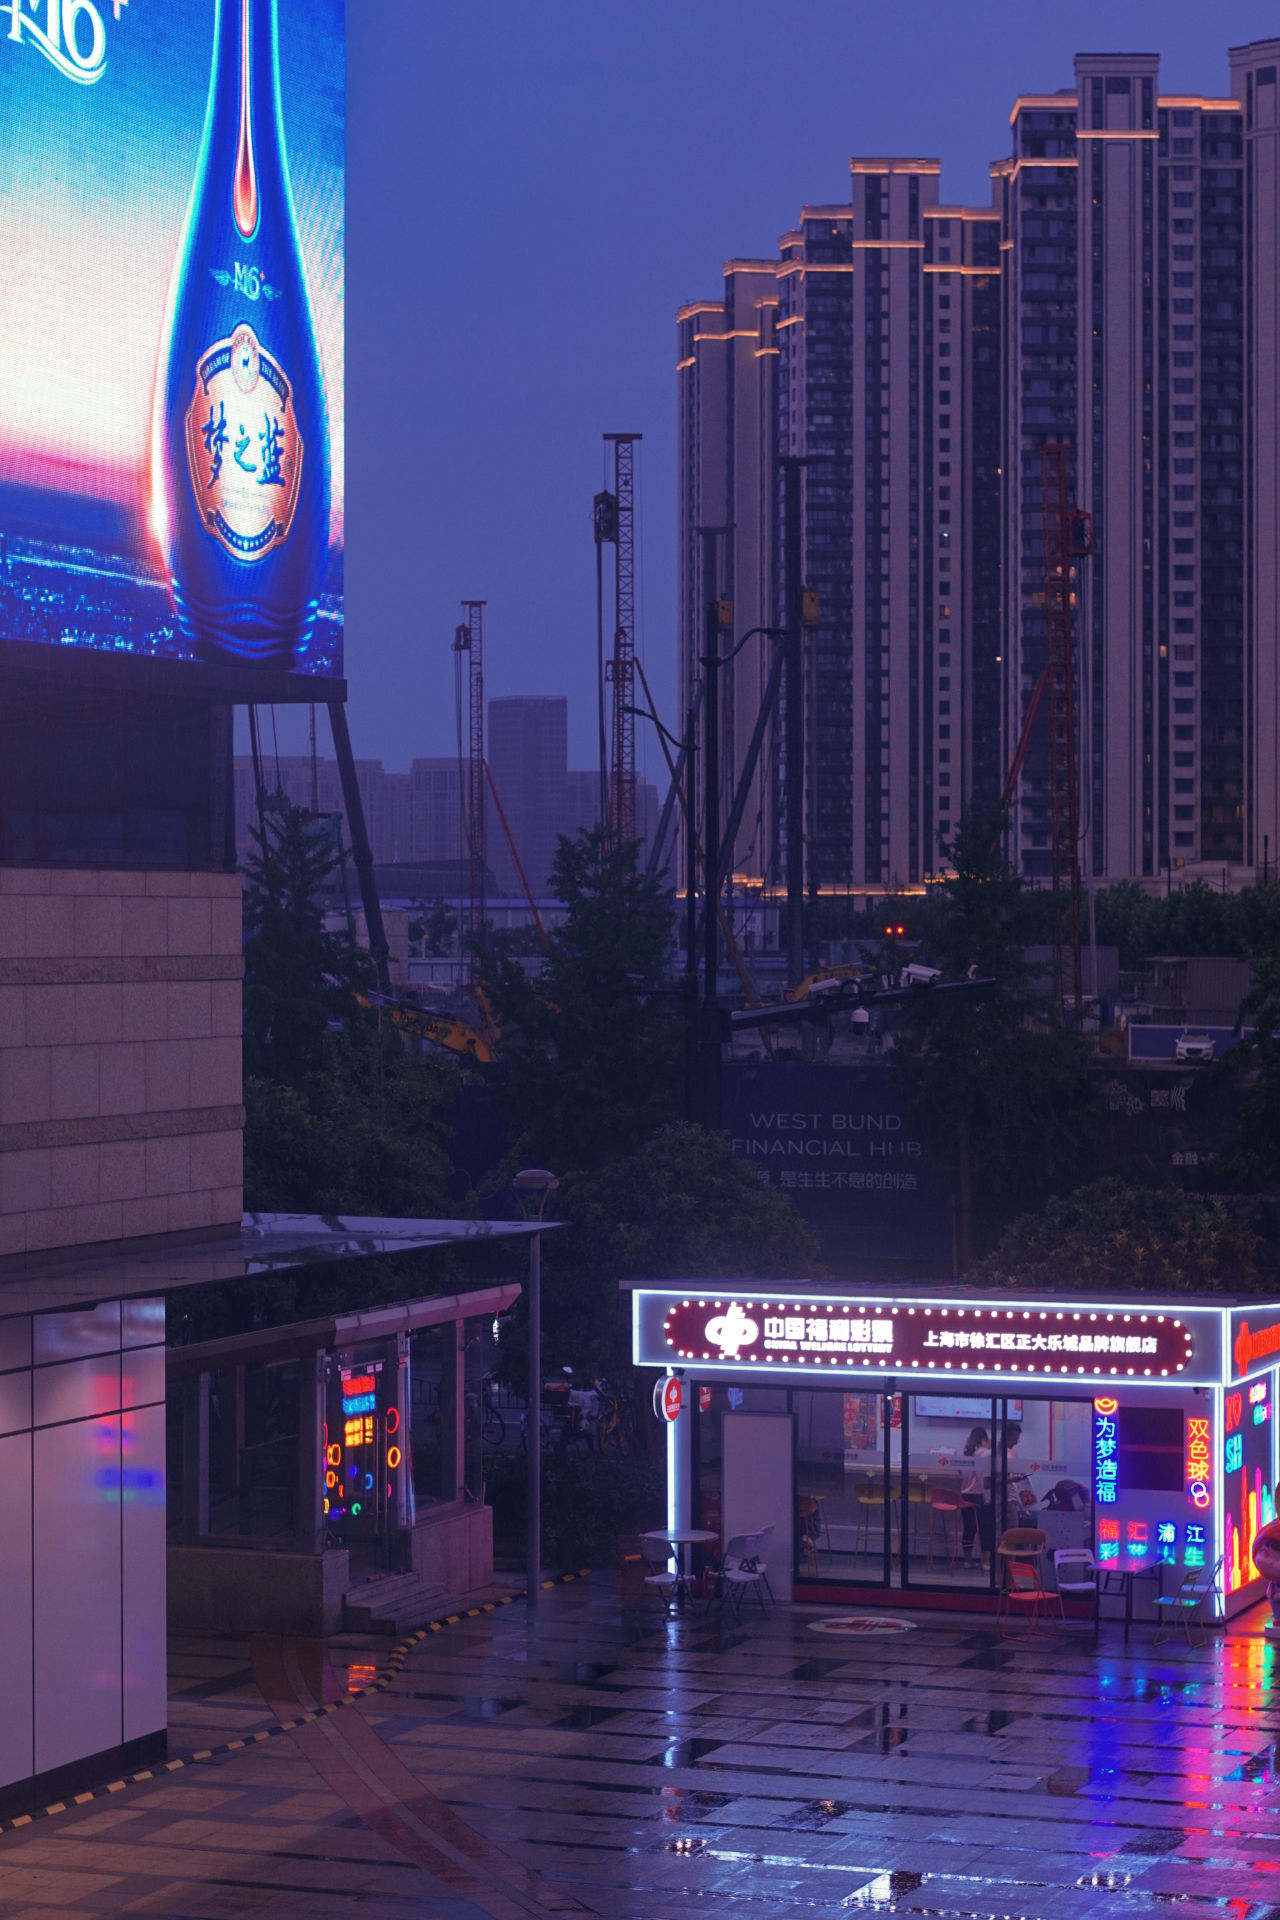
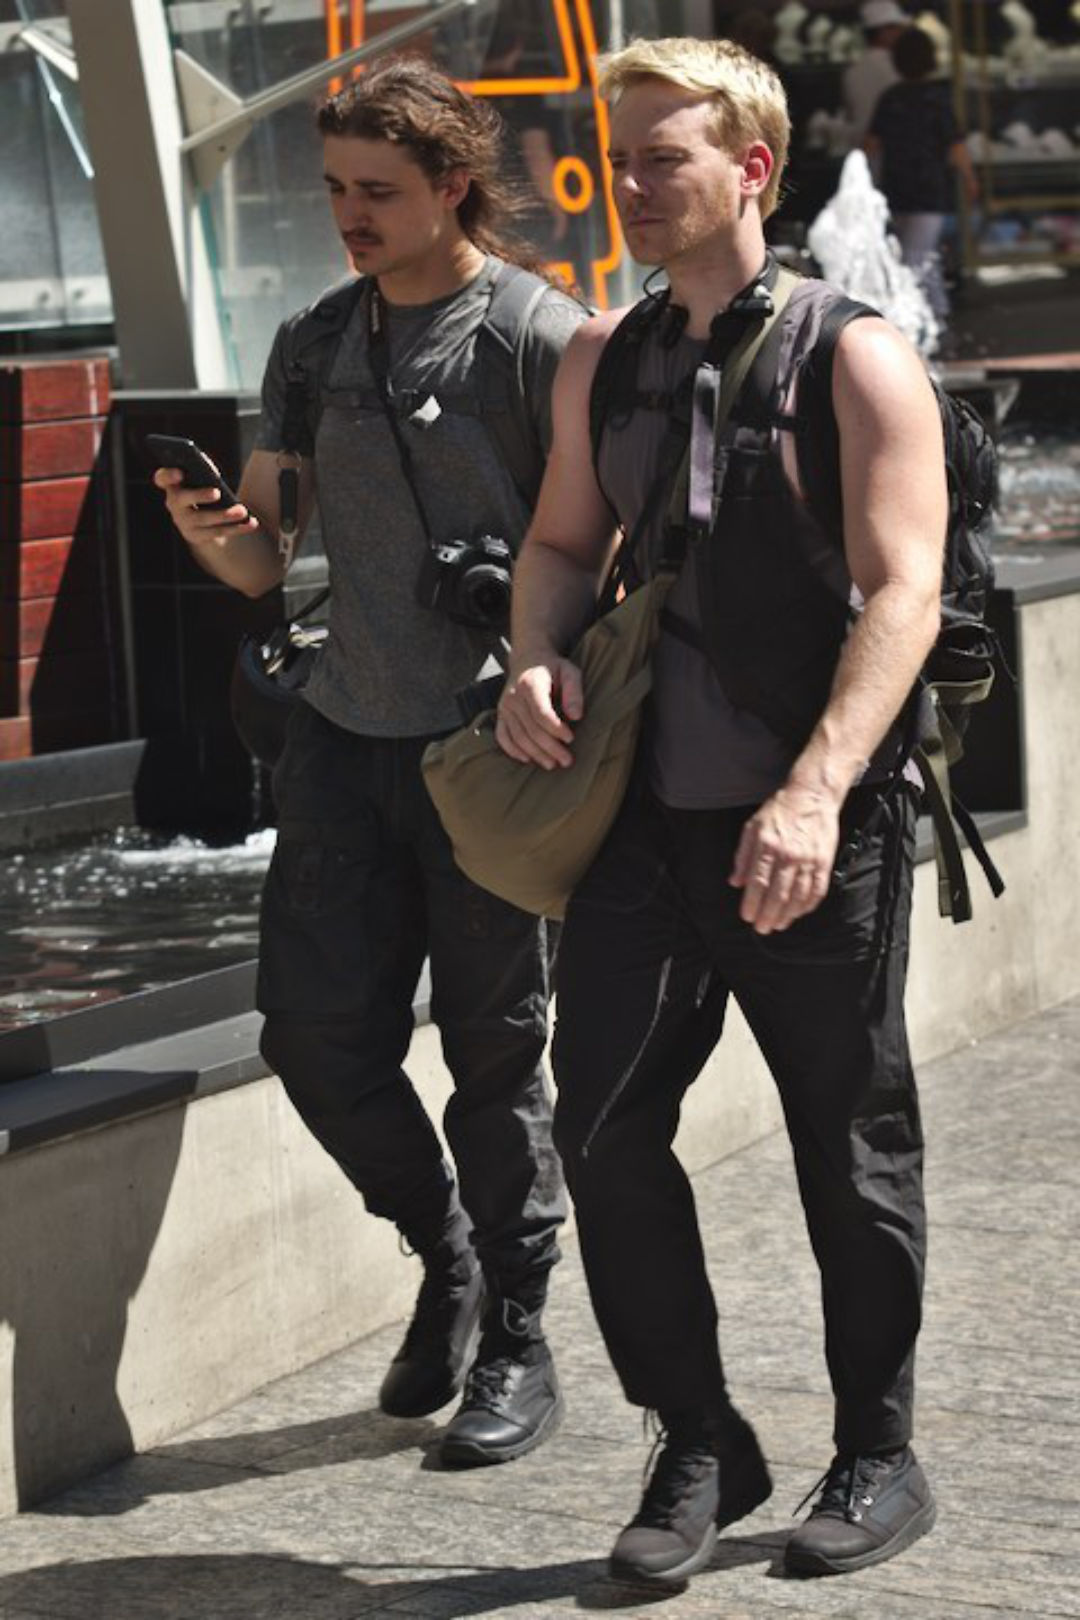
3.2.3 Street Photography, Landscapes and “Scenes”
I like to lump street photography, landscapes and just “scenes” in general as one kind of photography where there is no specific subject and the goal is capturing an environment and potentially things that happening within. Street photography that features isolated human or animal subjects, even if candid, I would consider more of a portrait even if you have less control over the model. The photographer in these cases ventures into the wilderness or urban setting and actively seeks out visually engaging frames.
While landscape photography is considered a lot more slow-paced, I don’t differentiate it between street or scenic photography and believe that the methodology of a photographer “hunting” for visually pleasing or impactful frames made possible through considered composition is the same for all types of scenic photography. “New topographics” is a movement in photography to shoot urban scenes in the way one composes landscape shots, and that is the perspective I am taking on street photography in this section.
Intent:
- A photograph of a natural or urban scene with significant immersion for the viewers, that shares a perspective of reality that you manufacture with various photographic techniques.
Tips:
- Composition and framing for good street and landscape shots are exceptionally important. Portraits and fashion shots can often get away with enticing models and clothing to create an eye-catching subject, isolated on a blank background or with low depth of field. In scenes, you do not often have the ability to use a low depth of field to isolate a subject, since the entire environment is your focus.
- The challenge is in finding a naturally occurring environment or urban setting that you can compose and frame in an interesting way. Thus the focus of the image is the scene and being immersed in the entire shot rather than engaging with a particular subject (a shot focused on a building is an architectural shot, and one focused on a person is a portrait, etc). Travelling to interesting areas for your landscape shots, such as a nearby mountain range, or taking the longer route home from work to explore more developed urban areas are methods you’ll want to consider to having more opportunities to capture interesting scenic frames.
- In static landscape shots you may be able to use considerably longer shutter speeds with a tripod than afforded by a busy urban street if one wants to freeze frame all motion, but certainly long exposure urban scene shots are valid as well.
- A feeling of depth will be very useful for improving immersion in your compositions, making sure there is a foreground at least separate to the scene’s depth of field can be an easy way to accomplish this.
- When you encounter a visually interesting scene to your eye, ready your camera and try composing frames at various perspectives, angled up, down, in landscape orientation or portrait, and so on. Relatively banal scenes you pass by every day on your commute may become interesting with a slight change in perspective or even a crop.
- Do not frame your street shots too high as it often looks odd without a sidewalk, ground, path or road that the viewer would expect to see in front of them and harms immersion as well. Street shots are not architectural even though they almost always contain buildings.
- Provide a sense of scale by including objects of different size in the shot.
- Do not single out subjects in the shot, instead let them blend into the scene, this could even be shooting at a lower shutter speed and letting people, cars, water, etc be blurred in motion as a suggestion of their energy rather than being concerned with their poses or form. (you would be surprised how an awkwardly captured person in a street shot can degrade from the feeling you intended to be captured).
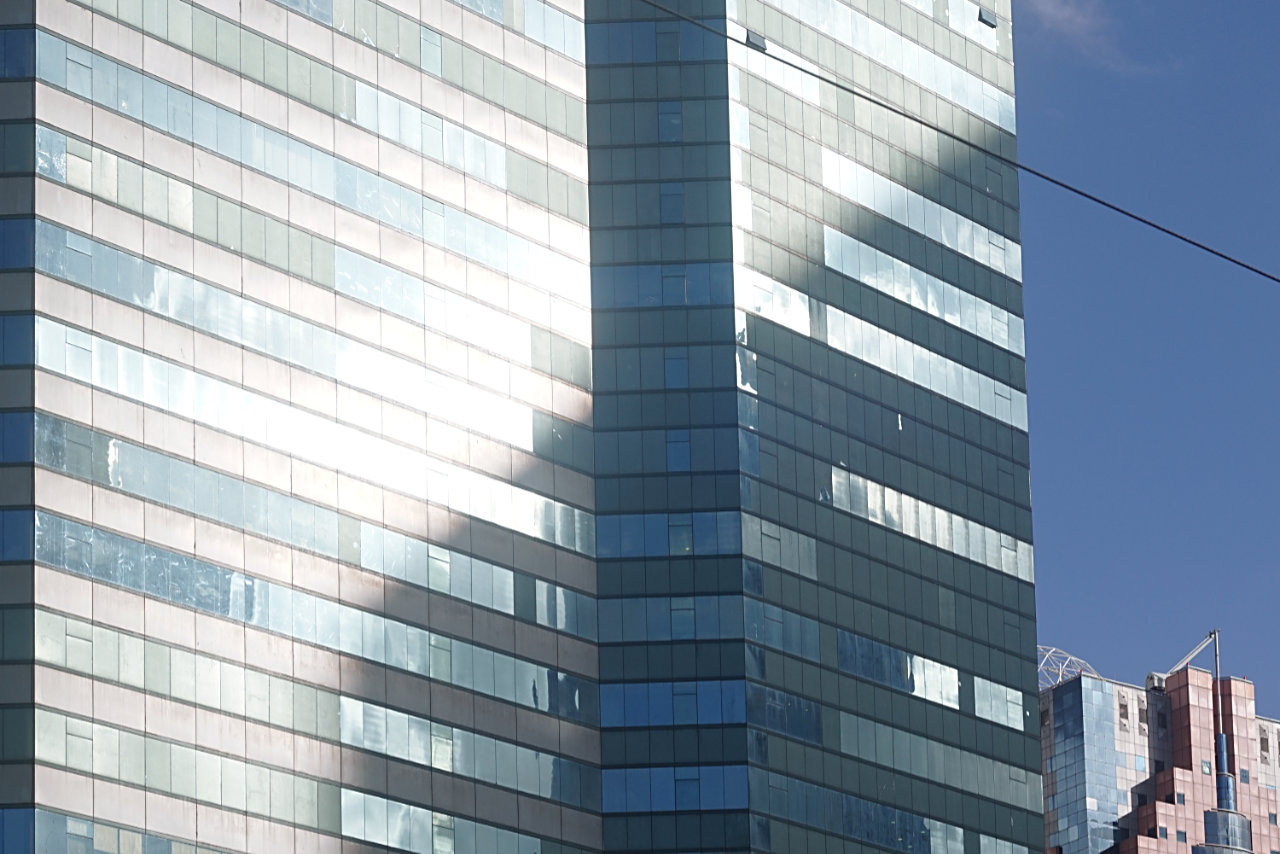
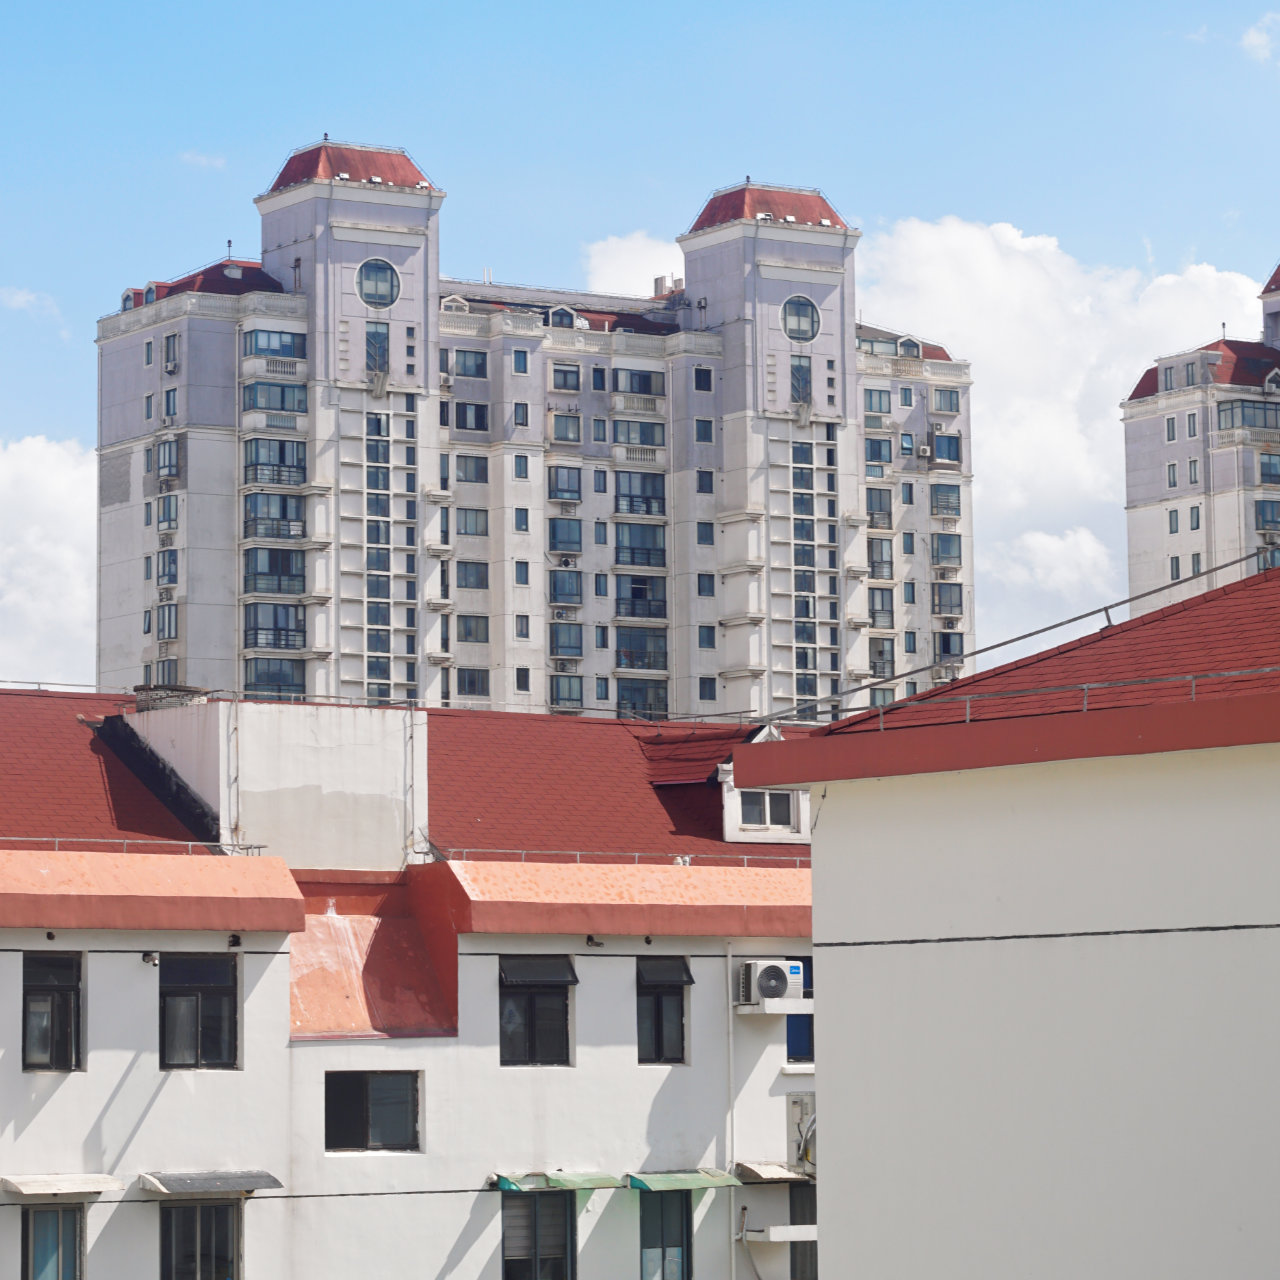
3.2.4 Architecture
Architecture photography focuses on the capture of buildings and similar structures in a way that is both accurate and aesthetically pleasing. Like urban scenic photography, it can act as a historical document, preserving architectural styles and details at a given time and place. Architecture might also be inspiring, serving as an artistic medium, exploiting unique lines, shapes, and patterns of buildings to create almost abstract but aesthetic images. Depending on lighting and your compositional choices, you can also convey a specific mood or atmosphere associated with the right building.
Intent:
- To capture a building or structure in a way where the structure is the focal point of the image and to highlight features of the building for historical accuracy or artistic purpose.
Tips:
- Like street photography, architecture is something that many people might pass by and see every day. You need to use framing and composition to turn these ordinary sights into an eye-catching and interesting photograph.
- Post-processing will be especially important in these shots to correct rotation and perspective. Additionally, sharpness can be added into an image to highlight your focus structure.
- Unlike portrait photography, getting your buildings and other structures sharp and having their features stand out is often a priority. Try setting your aperture to f/8 and above.
- Timing can often be important to capture a particular structure in a way you intended, you are dependent on natural light from the sun or artificial light if its shot at night. That can mean having to wait for the right time or weather.

3.2.5 Action Photography
I am not going to spend much time on this because I feel like action photography is an advanced technique, often benefits from specialist autofocus equipped telephotos (though is certainly achievable with budget gear with some skill) and is not something that a hobbyist photographer probably feels compelled to shoot all the time like they might with street or portraiture. A once in a while attendance to a motorsport event or game? Sure. But I can’t say I encounter the need for action photography regularly.
Intent:
- To capture a subject in motion, often at velocities where typical shutter speeds (1/160) are inadequate, to accurately or artistically capture the action being performed in an attractive or ideally representative way.
Tips:
- If you want the entire shot to be sharp, 1/500 shutter speed is your minimum, and might not be enough. You should check your results based on the kind of shot you are doing. A car coming towards you will not need as fast shutter speed as a car driving right past you as the relative speed is significantly different. Increase your shutter speed if it is not sharp enough. If you find your auto focus struggling to lock on to the subject as it moves about (for example a child playing or a dog running), consider using manual focus and choose a spot the subject is frequently moving into and wait until they are in range and shoot.
- If you want a sharp subject but a blurred background, then you need to try panning. Panning is when you choose a slow shutter speed say around 1/60 or 1/100, and you focus on your fast moving subject and you move the end of your camera lens at the same speed as that subject relative to you. What this does is it acts as if the subject is not moving but is holding still while the rest of the scene is being pulled at the speed of your lens motion. This is a difficult technique to master but has a pleasing result.
- You may also be interested in capturing moving subjects with a hint of motion blur. These are not crisp or sharp but they can be done in an aesthetic way and express the sensation of high speed in a way that freeze framed, high shutter speed shots cannot. Experiment with different shutter speeds and potentially low apertures or even high ISO and digital noise to compose a more artistic frame of action photography.
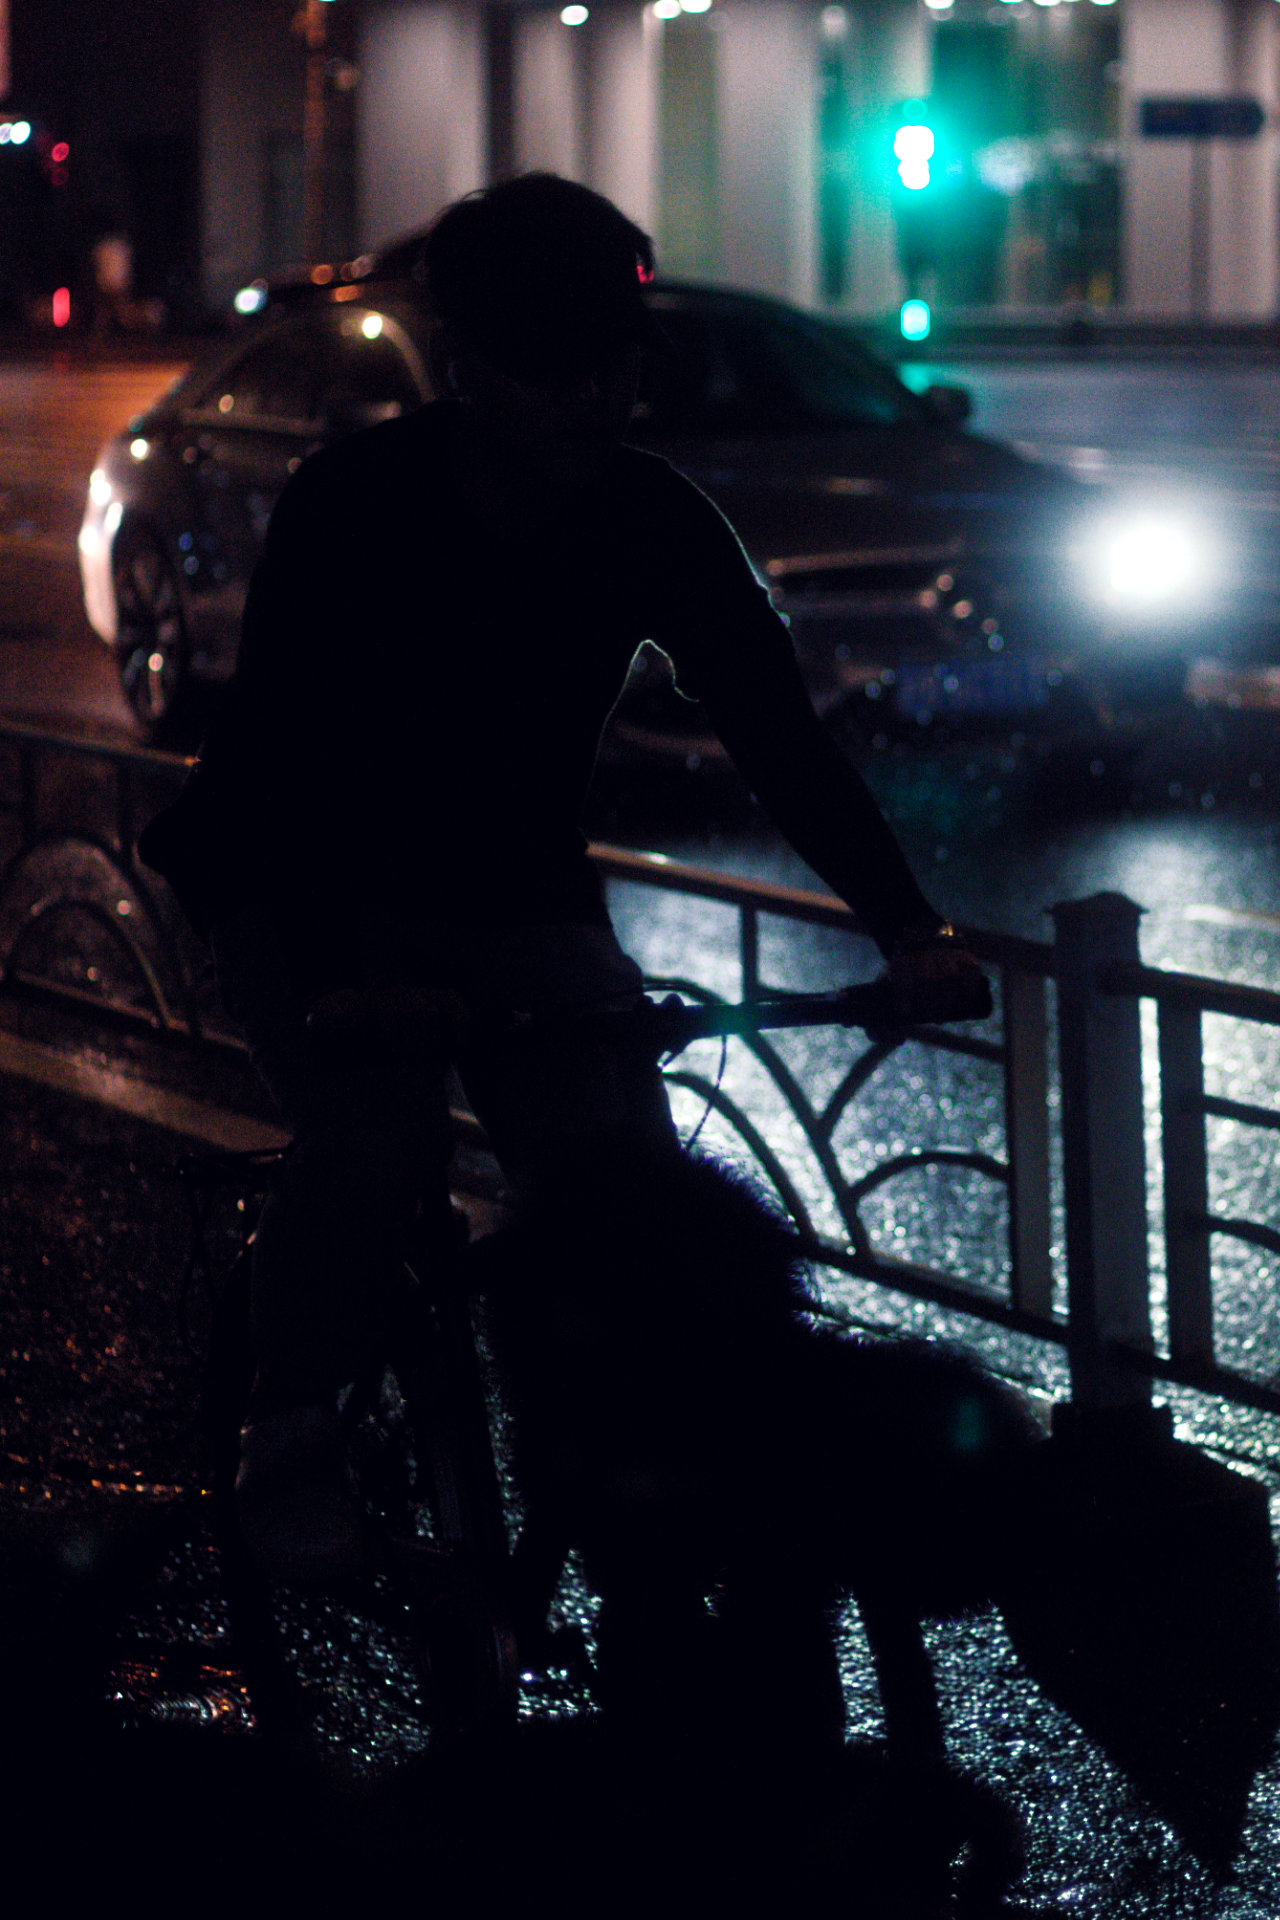
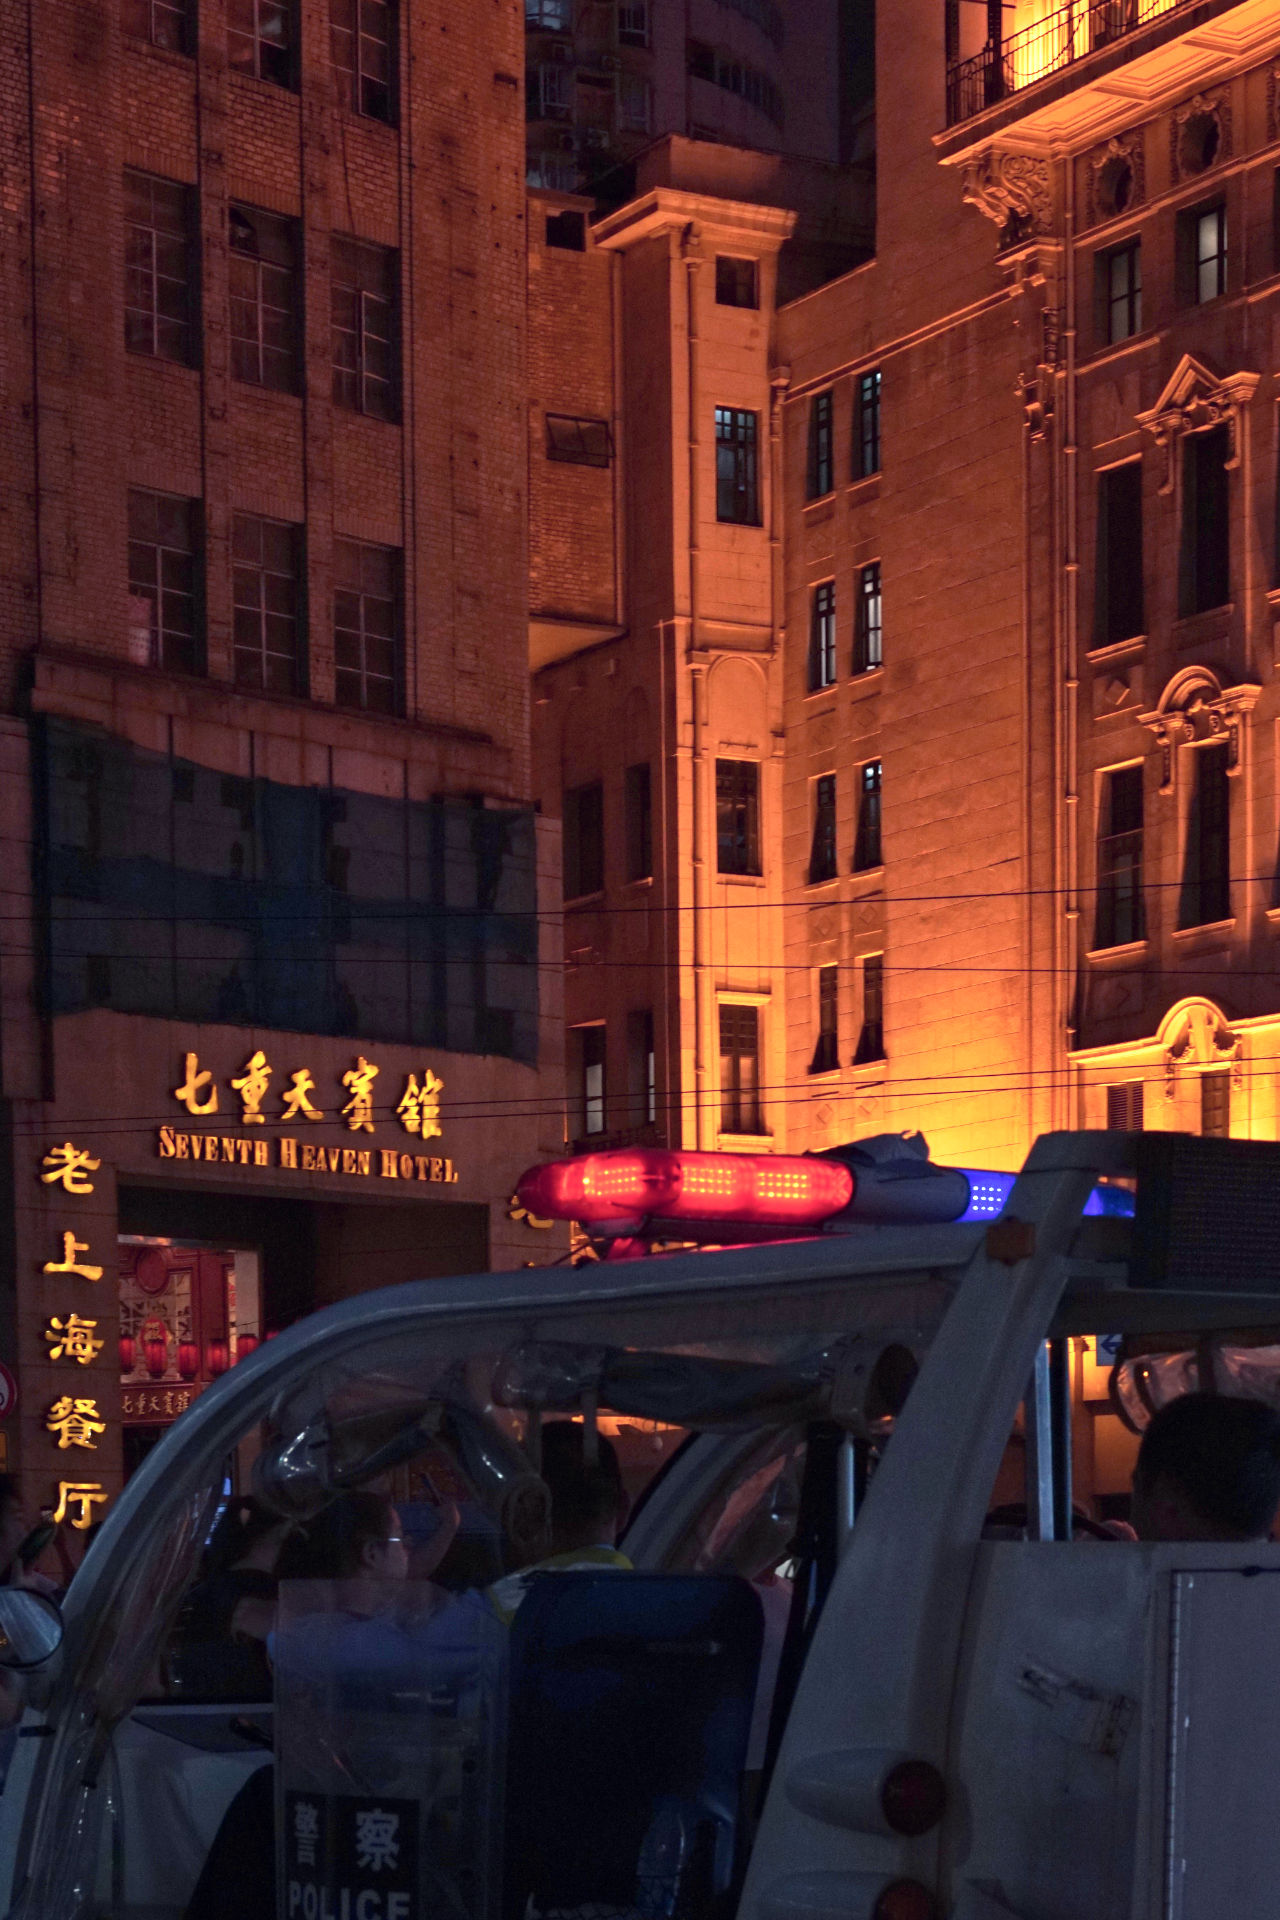
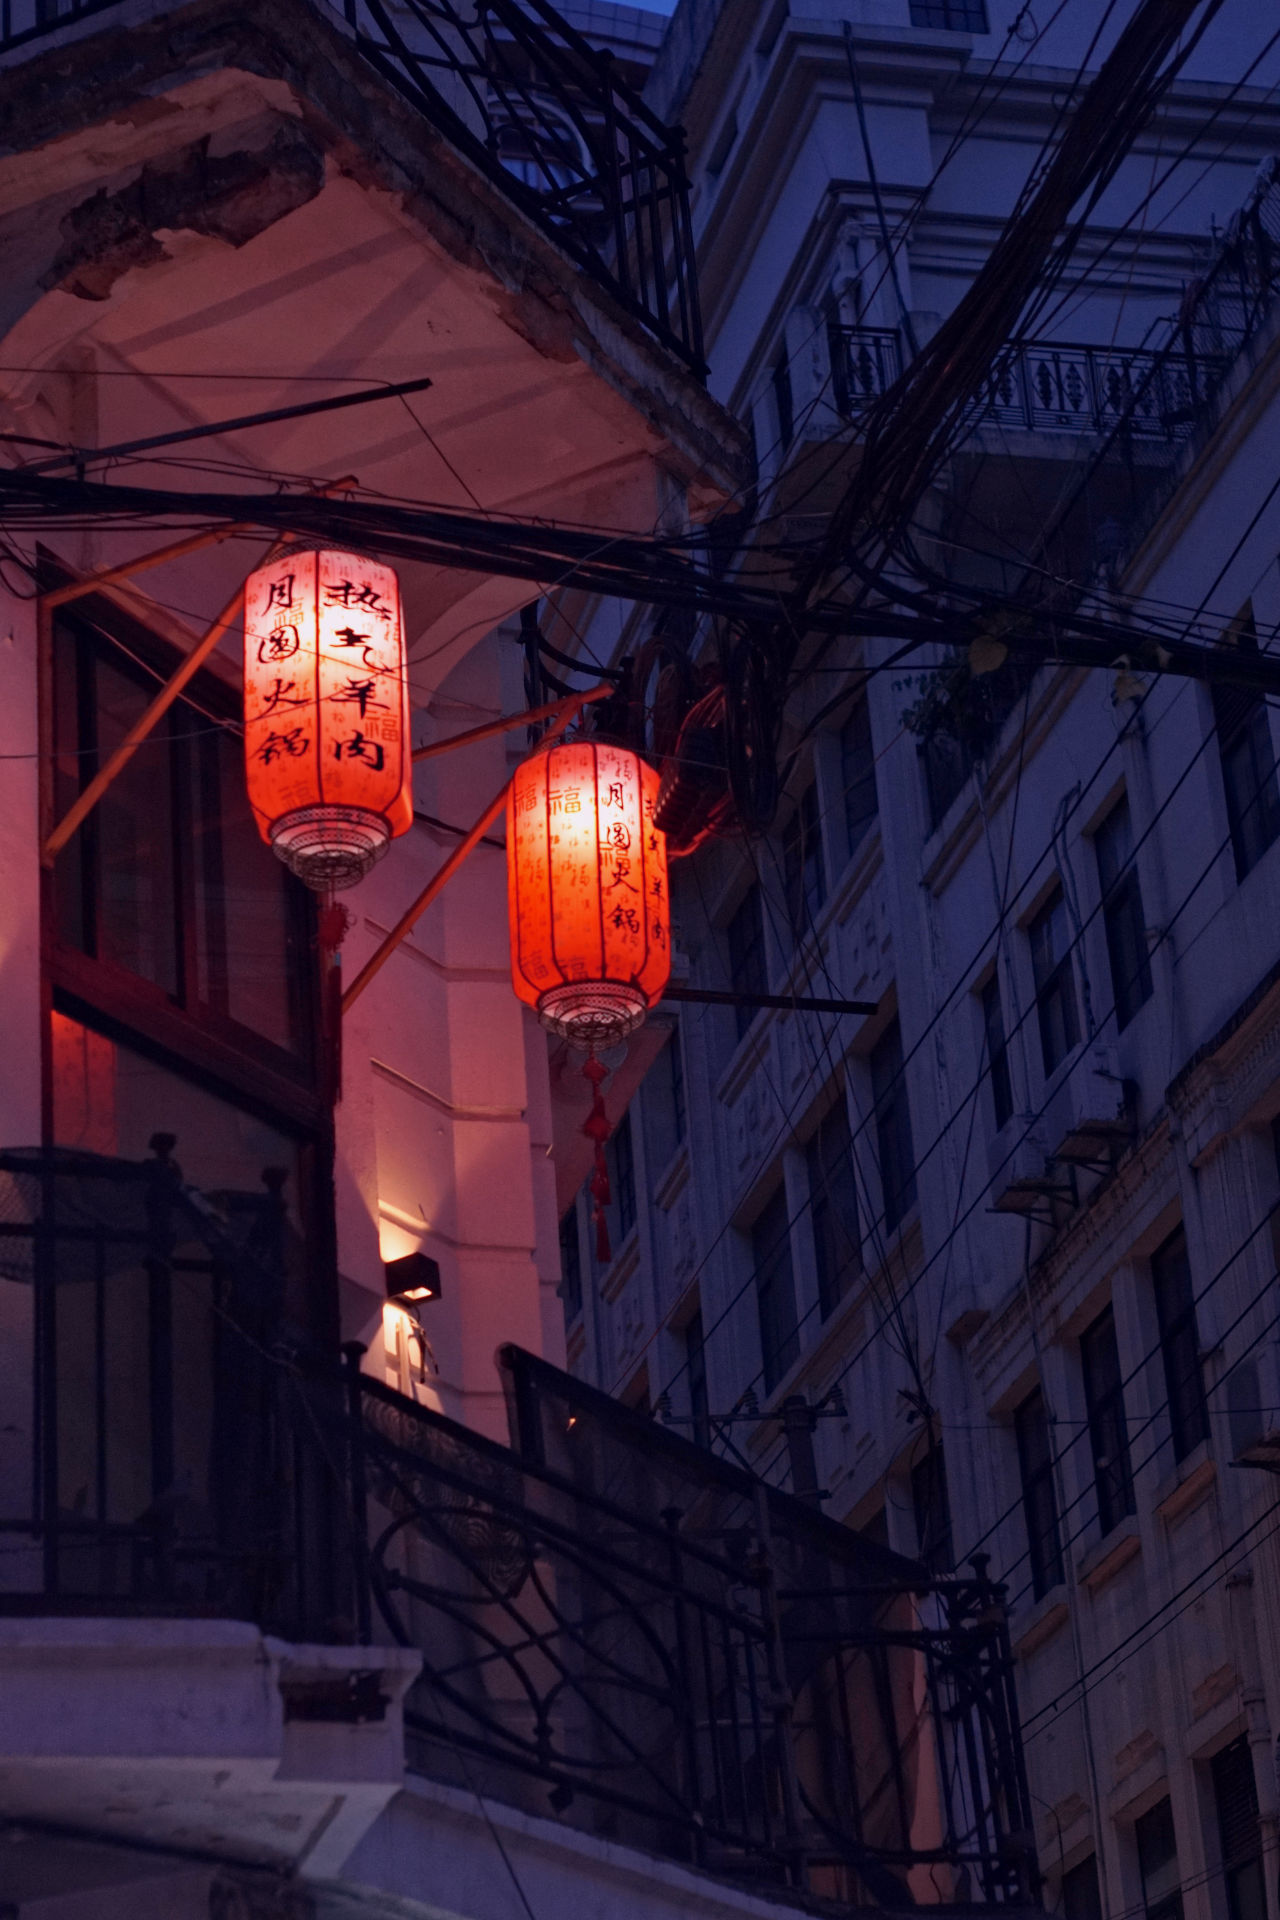
3.2.6 Night Photography
Night photography to me simply encompasses other types of photography however the shots are taken during the evening. It’s probably more a genre with some technical considerations versus a category of photography. That being said there are certain conventions that are often used, with low key shots that emphasise vivid colours and high contrast.
My interest in neo-noir film, artificial lights and a routine that typically had me take my commute home after dark gave me an appreciation of, and plenty of practice for, night photography. For whatever reason, I’ve also found that night shots are less popular than those taken during the day, so they do provide an extra measure of differentiation to your photography if you are willing to go out shooting after sunset.
Intent:
- To capture a photograph in low light conditions, making use of artificial light sources and their various synthetic colours to enhance its mood or feel.
Tips:
- Increase the ISO on your camera: Some older cameras, like the Sony A6000 I am using for this guide, do not have amazing high ISO performance. Basically the noise increases so much that the photo loses sharpness and detail. I will assume you have a more entry level camera for this guide as you are starting out but if you actually have something quite modern or even a full-frame sensor camera, this should be your first option to get enough light to expose your frame.
- Lower your shutter speed: On entry level cameras you most likely do not have image stabilisation (IBIS) and a good rule if you are holding the camera by hand is that the shutter speed should not be slower than 1 / focal length in mm of your lens, (i.e. a 50mm lens should be 1/50 shutter speed minimum, a 200mm lens needs 1/200 at its slowest, and so on). If you have a more modern camera with IBIS however you can often go significantly slower than this rule, I have handheld shots at 1 second on my Sony a7M3 with acceptably sharp results.
- Use a tripod: This method was popular for film cameras in street photography at night because you could not just change your ISO or handhold a long shutter speed like you could on an advanced digital camera. Having a tripod or resting your camera on a stable surface like a park bench or rubbish can can let you use a lower ISO and longer shutter speed to get a much better result. The issue with the tripod of course is having to carry a relatively large and bulky accessory with you, which for many people (including myself) is an unacceptable compromise to the activity. As an alternative find a fence post, trash bin, or other resting place for your camera.
- If you have the camera resting on a tripod or otherwise, and are doing a long exposure of a second or more, use a short, 2-second timer instead of pressing the shutter button to reduce the risk of the camera moving slightly during the exposure.
- Artificial lights are your friend. The light source and the light that they omit should be primary compositional elements for a good night shot. Learn how different artificial lights project their beams. Street lights typically project a rather weak, downward conical beam of light that you can use to illuminate subjects while projectors such as stadium lights provide a stronger, more directed and horizontal beam. Decide whether you wish to expose your subject ideally (typically over-exposing the light source) or expose the light source correctly and leave other elements dark.
- You may have a flash built into your camera and it can often a produce an interesting effect in low light photography, however it is often very obvious when used without fine-tuning and you may or may not enjoy its effect. For action shots, it can be necessary however if you want to capture sufficient details on a moving subject.
3.2.7 Other Types of Photography
There are numerous other types of photography that I won’t be covering in this basic guide either because I don’t have a particular skill or relevant knowledge to share about them (such as sports or product photography) or because I feel that they require specialist gear beyond what a beginner will most likely have access to (real estate photography requiring ultra-wide angle lenses, drone photography, or long-range bird photography).
4.0 Post-Processing (Editing) your Photos
There are two completely free methods for doing this relatively easily, one is for smart phones and the other on your PC. Either will be able to also help you crop your photos and resize them for sharing online as well.
4.1 Snapseed
The first is doing so on your phone. I am going to assume that many people starting out want to be able to share their photos online and many of the apps for this are predominantly located on smart phones, such as Instagram. Thus editing your photography on your phone can be quick, convenient and the result will look very close to how much of your audience will view it. If you are planning to share higher resolution shots or do prints I would not recommend this method however.
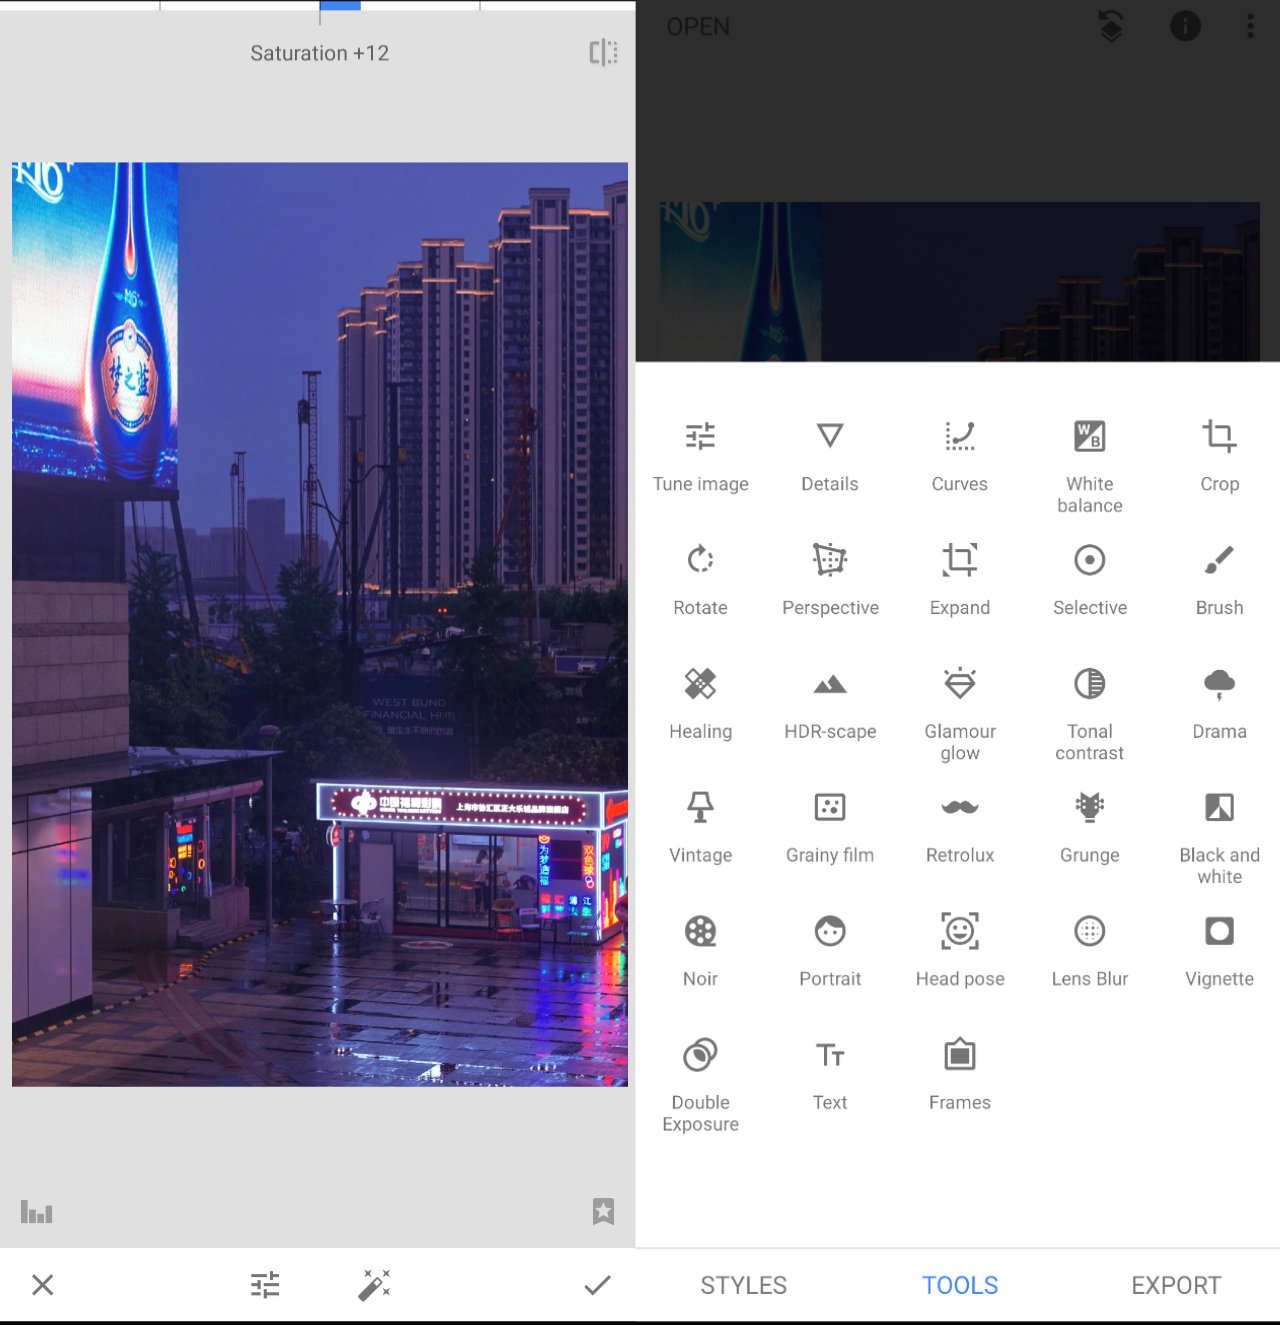
Sometimes after editing photos on my PC I still may tweak them on Snapseed once sending them to my phone, simply because a phone’s screen might render the image a bit differently than I intended for sharing. Sadly, Google purchased Snapseed some years ago and discontinued its updates. However, it is still available to download and works well.
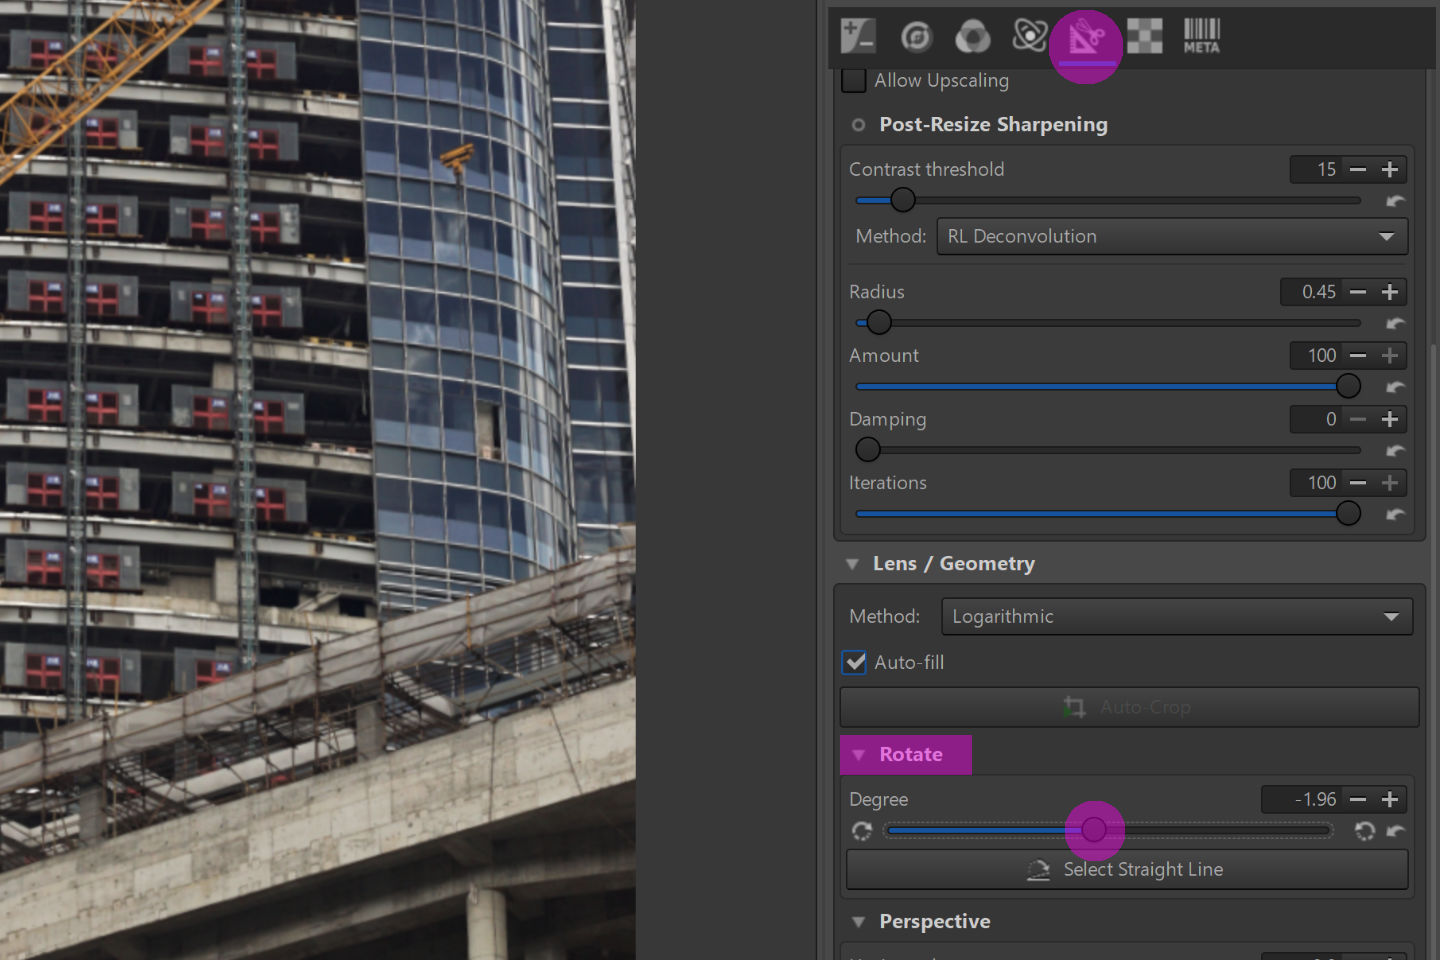
4.2 Rawtherapee
This is an extremely powerful free open source software (FOSS) available for Windows, Linux and Mac operating systems on a PC. I will argued that this is a superior software to learn to use than Adobe’s Lightroom, as it provides a far greater range of controls for manipulation. For single photographs, Lightroom is not capable of manipulating images to the degree that Rawtherapee can. Lightroom’s benefit is in handling large number of photos at once (though Rawtherapee certainly can provide batch processing) and it is more user friendly, including applying “filters”. I’ll argue that those features are actually better for professional event and wedding photographers who have to provide hundreds if not thousands of photos to clients and cannot possibly manually edit each photo in a short period of time at those volumes. As a beginner hobbyist, having more power to edit your individual photographs via Rawtherapee will be an asset versus applying filters via Lightroom to a handful of shots you might want to edit and share in a week.
Rawtherapee has an excellent training wiki that covers all of its functions here: LINK
I included just a handful of basic functions that I typically use on most of my photos here to get you started.
4.2.1 Straightening / Rotate
Probably my most used function on Rawtherapee. Try as I might to keep a photo level in the EVF, most images benefit from a slight rotation clockwise or counterclockwise. Rawtherapee’s real-time handling of straightening with a slider is in my mind superior to what is offered in retouching software such as Affinity Photo or Adobe Photoshop.
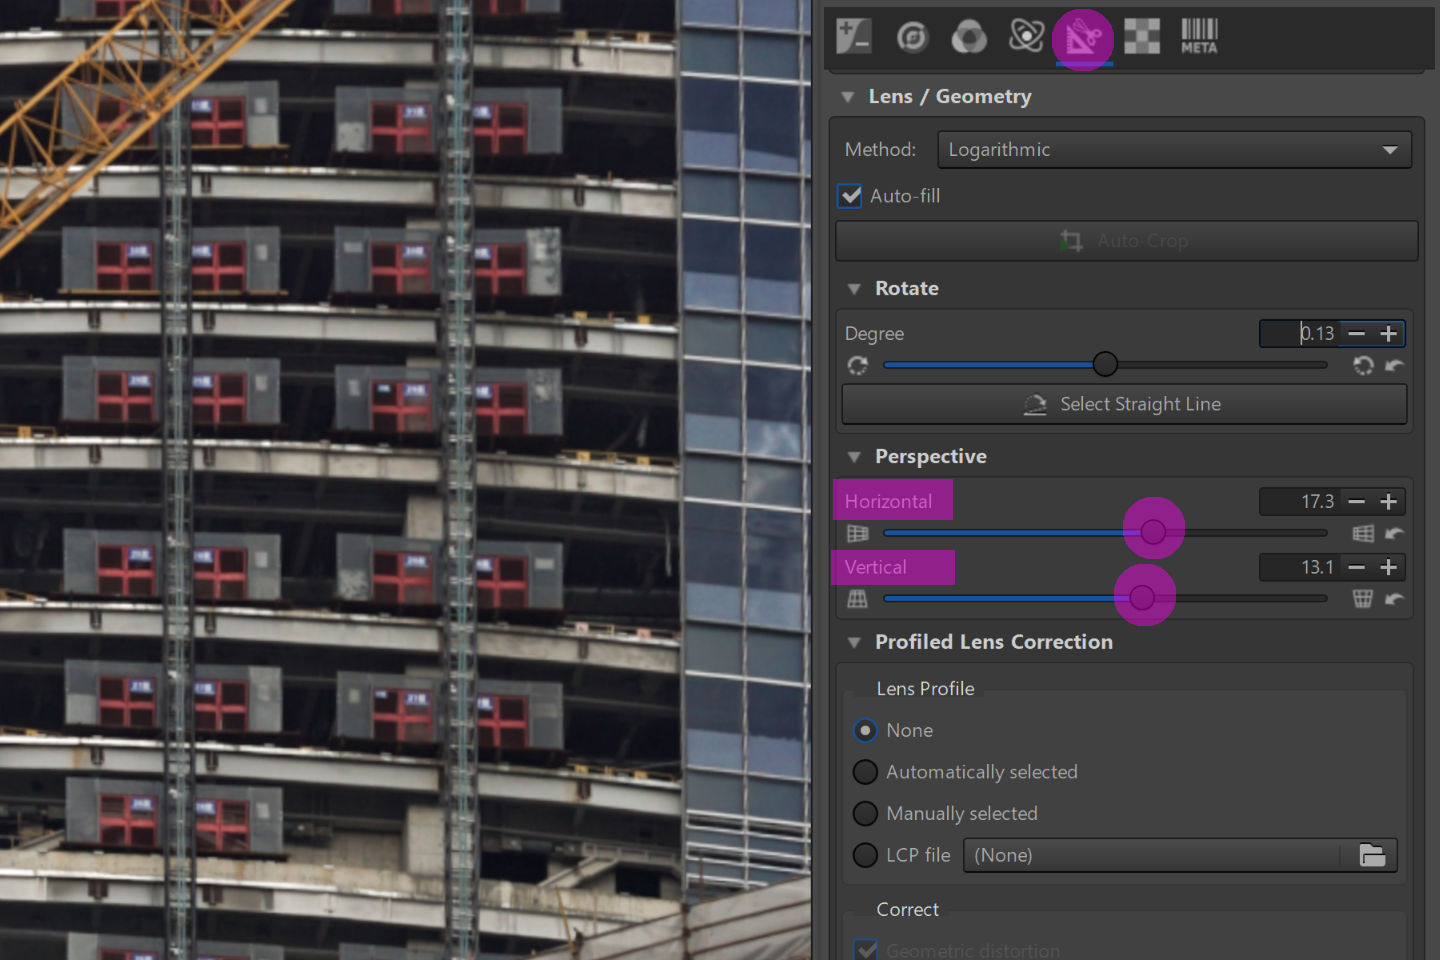
4.2.2 Perspective Manipulation
This is important especially for architectural photography;. Often your lens might be angled up or sometimes down and not completely level with the ground and even when you straighten the image with the horizon line, buildings or objects might appear skewed at an angle. Perspective manipulation fixes this, and can do both horizontal and vertical. If you use this tool, as you adjust these sliders, you’ll want to also adjust Rotate to keep things straight.
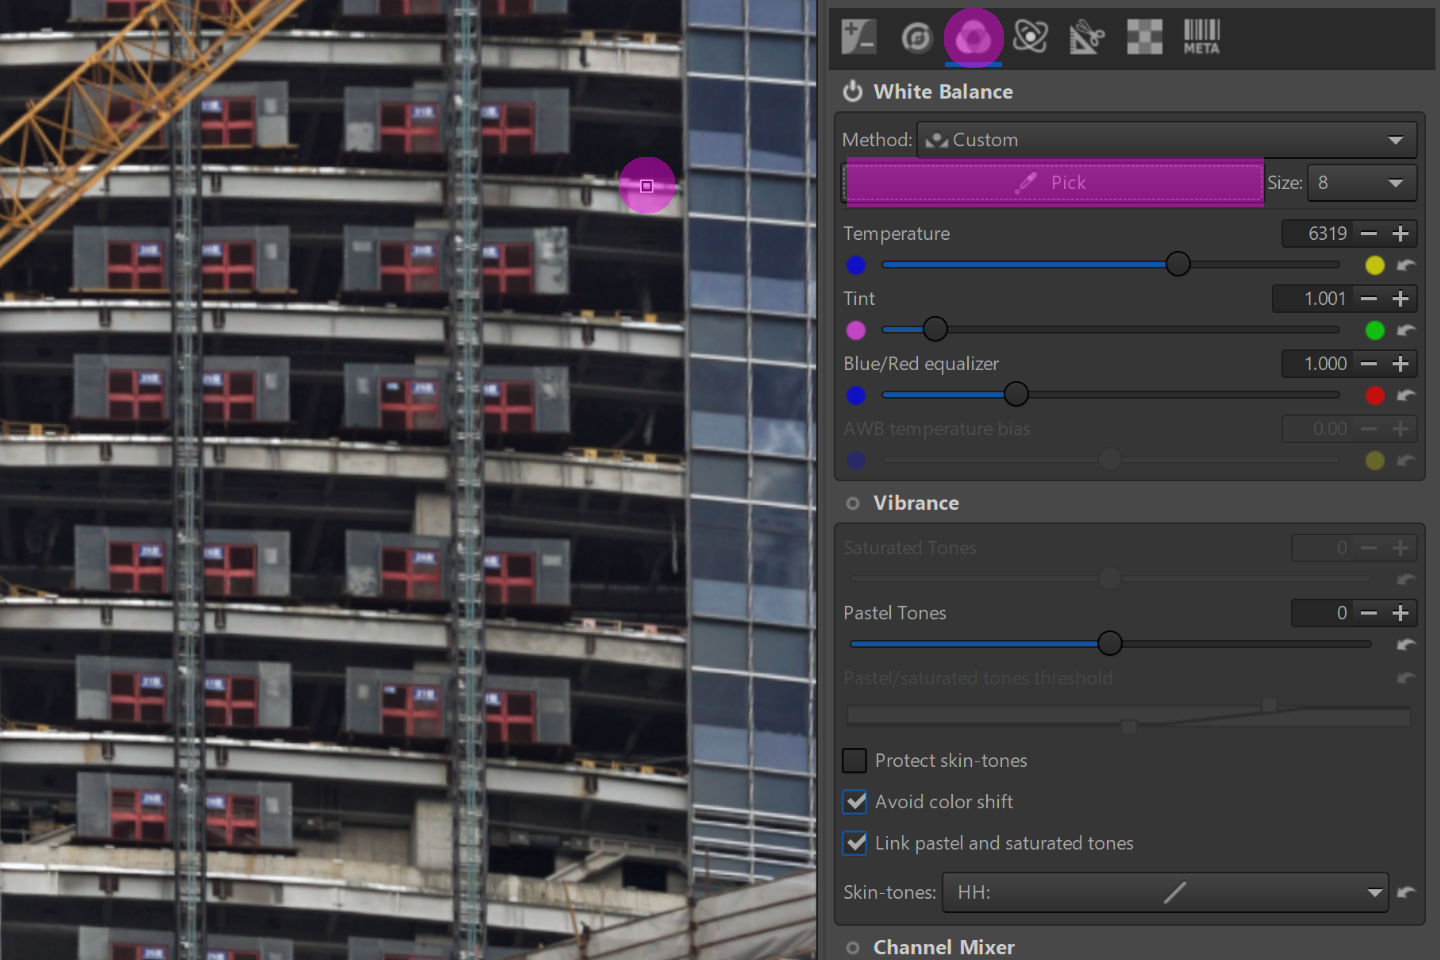
4.2.3 White Balance
Getting the colours right for your photograph is mostly handled quite well in your camera’s auto white balance function. However there might be times when find an image’s colours off and either want to correct the colours to be more realistic, or perhaps to make them more surreal if that is your intention. You can use the eyedropper in Rawtherapee and click it on a pure white or grey spot in your image if you are going for realism. However if you want to convey a certain look, the yellow/blue and red/green sliders can be manually adjusted. For night photography with all the different temperatures of artificial light, I find this method to be useful.
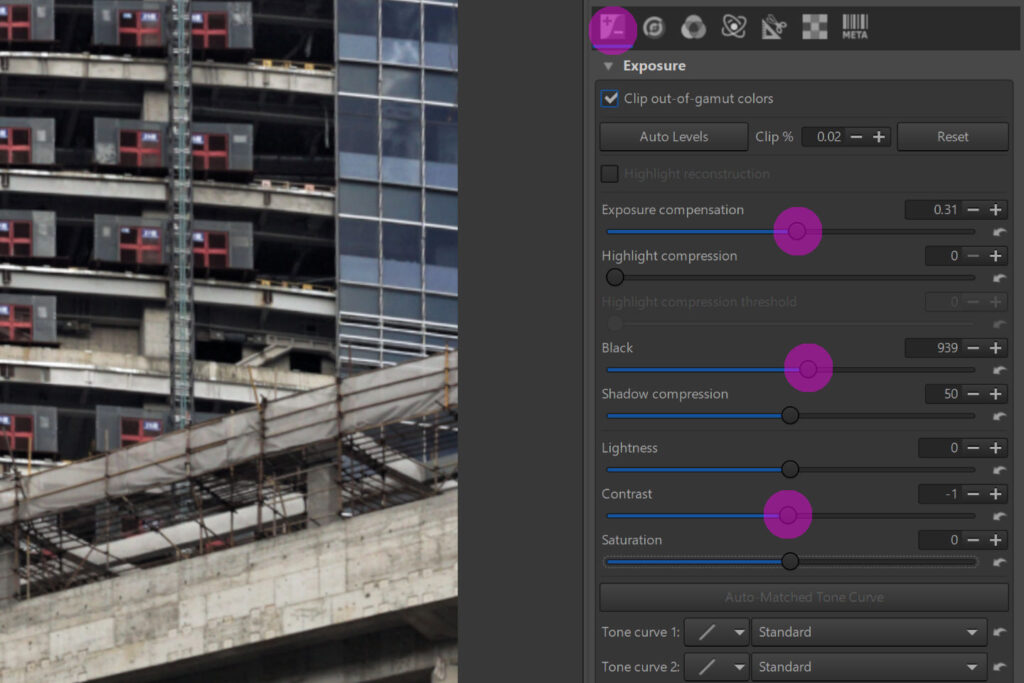
4.2.4 Exposure Changes
Once you have the white balance done and the image is straight and perspective corrected to your tastes, you’ll most likely want to brighten, darken, or increase contrast with this set of sliders. I tend to turn increase exposure until an image is bright enough, increase blacks and lower contrast slightly, but you’ll be able to see in real time what each slider does to your shots to create an image consistent with your idea.
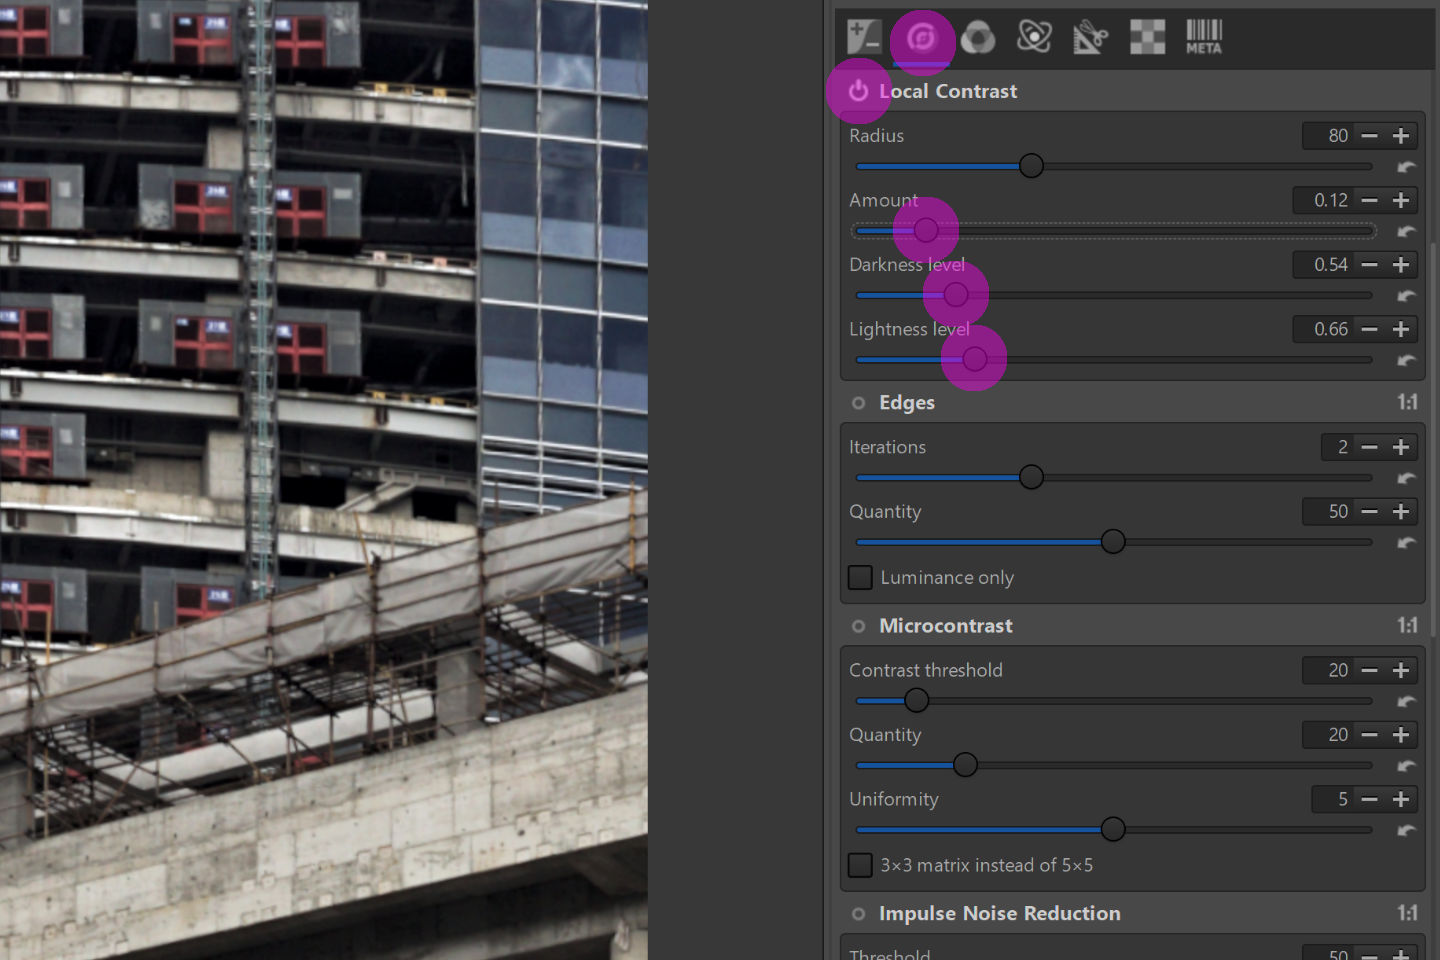
4.2.5 Local Contrast
This is the equivalent to Lightroom’s “clarity” function and increases the prominence of both whites and blacks in an image. I find the default setting too severe and usually dial down the “Darkness” and “Lightness” levels as well as the “Amount” using the sliders. Note: the default for this tool is “off” so you’ll need to turn it “on” with the highlighted power button noted below, if you wish to use this feature.
5.0 Sharing your Photos in 2023
It is likely that the majority of people reading this guide have an interest in sharing the results of your photography hobby with other people be they fellow hobbyist photographers, friends, or the general public. Your audience doesn’t owe you anything. No matter what you do, the important part of sharing on these apps if you want your own work to get awareness and hopefully appreciation is that you network, you follow, you like, and you talk publicly and on DMs to other users. No one is going to come to you because you are posting great photos. For better or worse, the advent of video content as the most engaging media type on social media has dominated photography, and it is not realistic to expect that a beautiful shot of a landscape, or a building, or of fashion is going to be shared, viewed or go “viral” in the way a humorous or thrilling video clip will in 2023. As I’ve repeated throughout this guide, you need to shoot because you love taking photos, you enjoy editing your images and you want to share with other hobbyists and photography appreciators.
If you are intending simply to keep a personal record of a subject or place with your photography, take no heed of this section.
5.1 Platforms to Share your Photography Online
5.1.1 Tumblr
This is my social media platform of choice and the one I started out in 2015, which was perhaps already past its hey day. It had a mass exodus when the platform was sold and hardcore pornography was banned from the site, but since then it has actually been growing again. It is still far smaller than Instagram despite this growth. The benefit of Tumblr is that you can post any ratio of photos you want, you get far better image quality and a higher resolution and you can customise your page with hundreds of free templates (I use a tweaked template from Zen Theme’s: LINK). Further, while Instagram makes sharing feed posts easy using the Story function, Tumblr makes it easy to re-blog on the feed itself.
You get 5 hashtags on Tumblr which will help propagate feeds and they work infinitely better than Instagram’s in my experience. The desktop experience on Tumblr however is much better than its app. This means that most users will be experiencing your photos on a bigger PC or laptop screen rather than a phone, which again is advantageous to photographers. While it is rare to find accounts that post nothing but original photography and many are mixed with “inspiration” photos or a mood board of other images, there are accounts, like mine, that are exclusively OC. Together with the ease of re-blogging, this means that your original photography can become highly shared mood board items on Tumblr, and each re-blogs provides notes (likes), tags for your account and appear on the feeds of more users. Some of my highest rated posts are now over 25,000 likes on Tumblr, versus 600 on Instagram, and may propagate for years rather than Instagram’s 12 hours. Finally, because users on Tumblr use it more for mood boarding than sharing their own images, it means that your photographs provide value to other users as content in a way that is different to Instagram where a like means “support” alone, and re-blogging your work as “content” is typically only done by large following reblogger accounts and not creators. Simply put, Tumblr is a better way to display and share photographs than Instagram despite the smaller size of its network.
Some tips for posting on Tumblr:
- Spend some time curating your page. Even if you use the stock page template you can tweak many aspects of it to suit your type of photos. A minimalist single photo per page or grid template suits photography the best, in my opinion.
- Use 5 hashtags with every post and be literal with them rather than brand focused as you might with Instagram. Include mood related tags if applicable. #photographers on tumblr is a popular one for original content.
- I post 3 photos at a time, with a similar theme as some users might like different variations of the same photo. Since I use a 3-column grid this works with my portfolio page as well for consistency.
- Try to upload 1920 pixel images at least, Tumblr can handle higher file sizes and use the PNG file format, as it is lossless.
- Post a lot, far more than you would on Instagram. Getting on the feed is important. Some of my posts only have 1 like and some over 25,000. It is not a popularity contest and people will see and share your posts via tag searches (make sure you use those tags) and on the feed if they follow you or someone who re-blogs your posts. Posting with more frequency also helps you get practice, learn and get comfortable with sharing without any pressure to get likes as you would on Instagram. It can take quite a long time to get a following on Tumblr but it is worth it in my experience.
Here are some interesting cyberpunk and urban-themed Tumblr accounts to consider following if you want to sign up:
- xeoniq.tumblr.com
- tecchnocracy.tumblr.com
- omi99kim.tumblr.com
- warakami.tumblr.com
- skweres.tumblr.com
5.1.2 Instagram
Repeat after me: This is a social networking app, not a photography app. This is a social networking app, not a photography app. Yes, there are photographers posting successfully on Instagram. Yes, millions of photographs are being shared on this platform every day (though this will soon be usurped by video content thanks to the success of TikTok and Meta’s push to convert its platform to video sharing). This doesn’t mean that there is some kind of meritocracy where you will post a “good” photo and it will be rewarded with likes or engagement. Most of your audience will not be able to tell what makes a “good” photograph by your standards apart from a “bad” one (again, your own standards) and an image that has a subject that is interesting to a given user will always be more attractive than a image with a subject that is uninteresting. E.g. a barely in focus photo taken with a smart phone of an attractive woman or a cool car is going to be more popular on this platform than your beautifully composed, framed, and lit shot of a flower taken with your hobbyist camera gear. Again, this is why it is important to follow, network with and chat to other photographers on Instagram if you want your photographs to be appreciated by other enthusiasts and not just the general public.

While I feel that Tumblr is a superior platform for displaying and sharing photography, Instagram is clearly superior for networking being much larger, having both large commercial brands involved with it and in general people seem to like chatting more on it via DMs. I use Tumblr to archive and curate photos I like, I use Instagram to promote. There is no reason you cannot mirror your images on both or better yet curate a Tumblr account for people’s mood boards and curate Instagram around images that attract audiences you are interested in connecting with. I also feel that Instagram posts tend to be read more than Tumblr’s and my Tumblr is pretty much images only while on Instagram I do like writing captions sometimes to provide context.
Some various tips I’ve picked up using Instagram for sharing photography over the past five years:
- Hashtags help, use three to five per post.
- #whateveryourcameramodelis, e.g. #sonya6000
- #thelensyouuse, e.g. #canonfd5018
- #yourcityphotography, e.g. #singaporephotography
- Tag the area or at least the city that corresponds to your image; people often find similar accounts using this tag.
- Follow accounts that have content you genuinely enjoy, and like their content to tailor your algorithm.
- Message people about their photos with questions, support/praise. Instagram is a social app, people like to talk.
- Most people view Instagram on a phone, and as such, photographs that are “graphic” and less busy often stand out more on a feed because of the small size of a phone screen versus a PC screen or print. Keep this in mind when cropping. You could do photographs optimised for Instagram separately to your full, uncropped shot that you archive elsewhere.
- Post regularly on your feed. I like posting once a week for notable content I think my audience will enjoy and a story once or twice a day.
- Do not story your own feed post, people avoid advertising. The Instagram app is rife with “sponsored posts” and doing this will reduce views to your stories if it has low engagement. Instead consider an alternate shot or edit to your feed post or a behind the scenes pic taken with your smart phone.
- As always, export your photos in PNG format to reduce unattractive compression of the image quality. I upload at 1080×1920 for IG stories, 1536×1920 for 4:5 ratio feed posts and 1920×1920 for 1:1 (square) ratio feed posts. I’ve not noticed any quality improvement at higher resolutions than this. I did find a noticeable improvement in image quality by uploading with PNG rather than JPEG however.
- There is a trade off between account consistency and account variety. Being very consistent on your profile’s grid tends to attract more new followers who find your account and are able to understand a more one-dimensional grid (e.g. nothing but nature landscapes, or bird shots) versus a varied one that has all kinds of photos on it. However, while these more “directed” accounts tend to grow better in followers, the engagement in comments, interest and likes appears to be significantly higher if you provide your audience with variety and not repetitive shots of sneakers or portraits over and over again. Having a balance between these two can be difficult, I struggle with it myself versus using Tumblr.
Networking is key and if you want photographers to appreciate your work you need to put effort into following and liking your peers’ work. Some enthusiast photography-focused Instagram accounts to consider following; if you have a profile of regularly posted photography I have a feeling they may follow you back as well:
5.1.3 Reddit
I have only ever posted on r/analog, which is for film photography only and not for digital photos, however I am sure there are numerous sub-reddits where you can share digitals or even simply shots taken on various manufacturers’ cameras such as r/nikon. You could also considering sharing nice photographs of your local town or city on their dedicated sub-reddit, if they have one, such as r/brisbane. Locals may appreciate seeing well-shot photos of their area. Be careful not to spam however if the sub-reddit is not dedicated to posting photography.
5.1.4 Flickr
High resolution uploads, no crop ratio limits, camera and lens information, Flickr is one of the early photo sharing apps and is far more dedicated in features to photographers. That being said this platform is very dated, the user base itself is quite old and based on my analytics, most of the audience reading this are under 35 years old. There are some very nice photographs being posted on Flickr but this is probably not the place a young person would network for similar aged peers. Still, if you have the time this could be a great place to archive and sort your photos in a more clinical, less creative way than Tumblr allows for.
5.1.5 Misc. Apps
There are various other platforms you can share your work in and chat to other photographers or the general public. There are many apps for Android and iOs smart phones that are targeting photographers. I do not have experience with these but this list may be useful if you wish to explore and share within these smaller virtual communities:
- Glass
- VSCO
- Behance
- 500px
5.2 Offline
Over the years I have made many friendships with other photographers that I have met through social media or in public in a café or on the street. One activity I’ve grown to appreciate are photo walks and they can be good even just with one other person. You could walk around the city, a garden, go on a hike or travel to another area, chatting, taking photos and sharing. This can even be followed up with a drink or coffee afterwards to compare results.
Creativity begets creativity. If you accumulate a network of peers who engage in creative hobbies you will be more likely to be motivated to create yourself. If you surround yourself with people who only consume either media such as video games or material branded objects, you yourself will be more predicated to vapid consumerism. Ideally you will engage in this hobby to self-actualise and create, and not use it as an excuse for you to collect cameras, lenses and other gear. Finding local friends interested in photography, or even any creative, constructive hobby such as music, art or video, will be a valuable asset in supporting your own creative outputs.
6.0 Developing your Taste and Skills
Something I’d like to add as a final thought in this guide is the importance of reviewing high quality photography and media in general. Just how accomplished writers will have read thousands of very good books and not exclusively fan fiction, magazines or other low brow media, it will be of benefit to you to consume high quality photography content. If you are only viewing the photos on your Instagram feed from other amateurs, you are absorbing perhaps a lower caliber of images versus if you had been looking at the work of celebrated masters in the field. Photobooks are available at libraries and excerpts of professional work are often just a google search away. Find inspiration online, save images you think are good and reflect on why you like them. It will help over time compared to if you just browsed an algorithmic feed on social media or compared with other friends in an amateur-targeted chat room online.
Cultivating personal taste and what you find attractive will help you develop a personal style of your own photography. Professionals have to be good enough to provide photographs in any number of styles that a client demands for a project using an array of techniques, compromising what the photographer him or herself may find attractive. This should not be a consideration for the hobbyist photographer, and your goal should be on creating photos that you enjoy and that represent your own perspective of the world you live in. Research professional photographers, curate images and compiled works of those that you enjoy and consider how you may integrate such approaches into your photography.
7.0 Summary
Photography has brought me a lot of value over the last ten years or so and I hope at least some aspect of this guide helps you in terms of technique, perspective or even just in encouraging you to go out and shoot. You can be more than a consumer of media or products, and instead create your own content to represent your environment, your community and the events that you experience, in your own way. In an online world dominated by algorithmic trends, you can not only maintain, but develop, your own individuality through photography and other means of self-expression. Do not feel limited by your equipment, do not think you need to buy something before you can start. Love the process, practice compositions based on your own vision, research and evaluate the photographic media you like, and finally, curate and share your work, continually.
If you enjoyed this article, supporting SHELLZINE by any amount can be made via the link below. Your contribution is completely optional and all funds help cover the website’s growing hosting costs and enable further original content creation without the use of advertisements. Secure payments by all major card types, including Google Pay and Apple Pay, are supported.
