Written by: XEONIQ [Instagram | Tumblr]
Contents
1.0 Background / Intro
2.0 Clear Screen Modification Guide
3.0 Negative Display Modification Guide
4.0 Crystal Re-Painting Modification Guide
5.0 Styling for Urban Technical Looks
1.0 Background / Intro
I’ve always liked the aesthetic of the Casio F series watches. They are lightweight with a slim case making them more subtle to wear than your average G-Shock or metal diving watch. The most famous of the F series line is the F-91W, identified by military intelligence as the calling card of Al-Qaeda time bomb makers. One thing that has always put me off the Casio F series has been the colourful markings on the screen, which to me are well designed on the watch but detract from an overall minimal aesthetic when worn, especially in all black outfits. As someone who ascribes to the Cayce Pollard Unit (CPU’s for short) ideology of brand aversion made famous in William Gibson’s Pattern Recognition, I could not see myself wearing a F series watch with its stock markings.
A popular YouTube channel, n-o-d-e, was promoting and selling Casio F91-W’s that were modified with a clear screen, a negative display, a re-painted crystal, and then an LED light upgrade and NFC module. N-o-d-e seems to have discontinued this service but luckily the aesthetic modifications are simple to do at home with just a few tools. I acquired an F-84W YJP for ¥300 ($3) brand new in box for my first watch to try this modification and later a F-94W for ¥500 ($5) for this Shell Guide, both using Zenmarket as a proxy to purchase off Yahoo!JP auctions.
This article includes three step-by-step guides on how to do simple aesthetic modifications to any Casio F-Series digital watch. With the popularity of my Instagram post on doing the minimalist mod to a Casio F84-W, I received dozens of messages from people who were modifying their own F Series. However, a few had additional questions or issues in completing the modification, so I felt it would be useful to catalogue and detail the process better for Shell Zine using the F94-W as an example. I have tried to make these as painstakingly clear as possible for those with little to no hands-on experience, so for more experienced DIY’ers much of this might seem redundant.
While I was at it I also performed a popular second modification, the inverting of the display to make it negative; and then a third to paint the crystal. These modifications can be done separately or all at once, it is up to you. While there are some excellent video tutorials on modifying similar watches on YouTube, for those who prefer detailed written and image based guides like I do, without the need to sit through an entire video or skip to or pause certain sections, I have written this guide.
I have also included a pair of casual technical outfits at the end to show potential styling of the watches in an urban context.
2.0 Clear Screen Modification Guide
Equipment Needed
- Casio F-Series Watch (Casio F-94WA used for this guide)
- Screw Driver (Jay Car 48 Piece Screwdriver Set that I used for this guide)
- Cotton Swabs
- Acetone (Nail Polish Remover)
- Hairdryer
- Microfiber Rag
Step 1: Remove the Back Plate
- Remove the four rear screws from the back plate of the watch.
- Put the screws somewhere secure in your workspace so as to not lose them.
Step 2: Remove the Module from the Case
- Remove the module from the case.
- There are small metal prongs that protrude from the back of the module. Pulling on the prong with your fingernail or a pair of tweezers will easily remove the module.
- There is a rubber seal in the case that presses against the back plate. You may leave this in the case or remove it and put it back later during re-assembly.
Step 3: Heat the Front and the Back of the Case
- Hold a hairdryer a few cm’s from the front and then the back of the case at its hottest setting.
- The goal is to heat the glue that holds the crystal to the case so that it can be removed.
- In some watches this only takes 90 seconds front and back, however for this F94W I had to repeat a 90 second burst of heat from the hairdryer 3 times before the crystal could easily be separated.
- Steps 3 and 4 are the most challenging parts of this short guide. Once you’ve completed them the rest are easy.
Step 4: Press the Crystal Out of the Case
- Using the microfiber rag, push on the inside of the case with your thumbs. This is to prevent scratches or damage to the crystal.
- Make sure you push in the center where there is a slot in the case for the display and not on the borders attached to the case itself.
- If you are using excessive force and the crystal does not separate, then the glue has not yet become pliable enough and you should repeat step 3 and heat the case again.
Step 5: Remove the Paint from the Crystal using Acetone
- Do this step over a sink. Acetone has low toxicity but is a strong irritant.
- Coat the end of a cotton swab with acetone and rub lightly on the painted areas of the crystal. The paint will strip off in seconds.
- Keep refreshing the acetone on clean cotton swabs for the fastest result.
- Rinse the crystal thoroughly with water afterwards. You do not want any acetone to remain on the crystal.
- Polish the rinsed crystal on both sides with your microfiber rag to ensure no dust or streaks remain on it.
Step 6: Press the Crystal into the Case
- Heat the case again from the front for 30 seconds to ensure the glue is still pliable. This will help the crystal stay secure in the case after re-assembly.
- Some modders have reported that the crystal may pop out again without an application of glue, however both of my watches remain intact, the F84-W at 8 months.
- If you would like to glue your crystal to the case, I would do so after deciding if you will do the painted crystal mod. Then, remove the factory glue carefully with tweezers and a hairdryer and use very small amounts of glue around the edge to install the crystal.
- When ready, ensure there are no finger prints or dust on the crystal and place it into the case by holding it by its sides.
- Using the microfiber rag press the crystal back into the case. It will pop in without much force needed at all.
Step 7: Reassemble the Watch
- Check the module’s display to ensure no dust or prints are on it.
- Place the module in the case.
- Ensure the metal buttons are projected outwards so that the metal tongs on the module are not bent when pressing the module in.
- Position the rubber seal into its groove and screw the back plate on.
- Remember to only drive the screws 50% to 75% in until all four screws are in place. Then tighten them all flat.
Clear Screen Modification: End Result
The finished result looks rather technical with part of the module exposed. No branding remains.
Without back lighting, the watch is illuminated with a simple green LED on its right side. On the clear screen modification, this lighting seems adequate. However, for the negative display mod, it is borderline unusable in the dark. Click here to jump to styling suggestions for this modification.
3.0 Negative Display Modification Guide
Negative digital displays have become popular, both as modifications and for brand new digital watches, typically offered with a tactical aesthetic like the Casio DW5600BB-1. I noticed that despite how minimal the Clear Screen Mod Casio F series watch appears as a product on its own, when worn in outfits, the bright grey display does stand out in darker, techwear looks. For that reason and others I often do wear my negative display G-Shocks more often. For those who want a negative display digital watch in a more minimal, low profile and easily replaceable case than your average Suunto or G-Shock, I have performed the negative display mod on an F-series myself and documented its process. You can do this modification with or without performing the Clear Screen Mod.
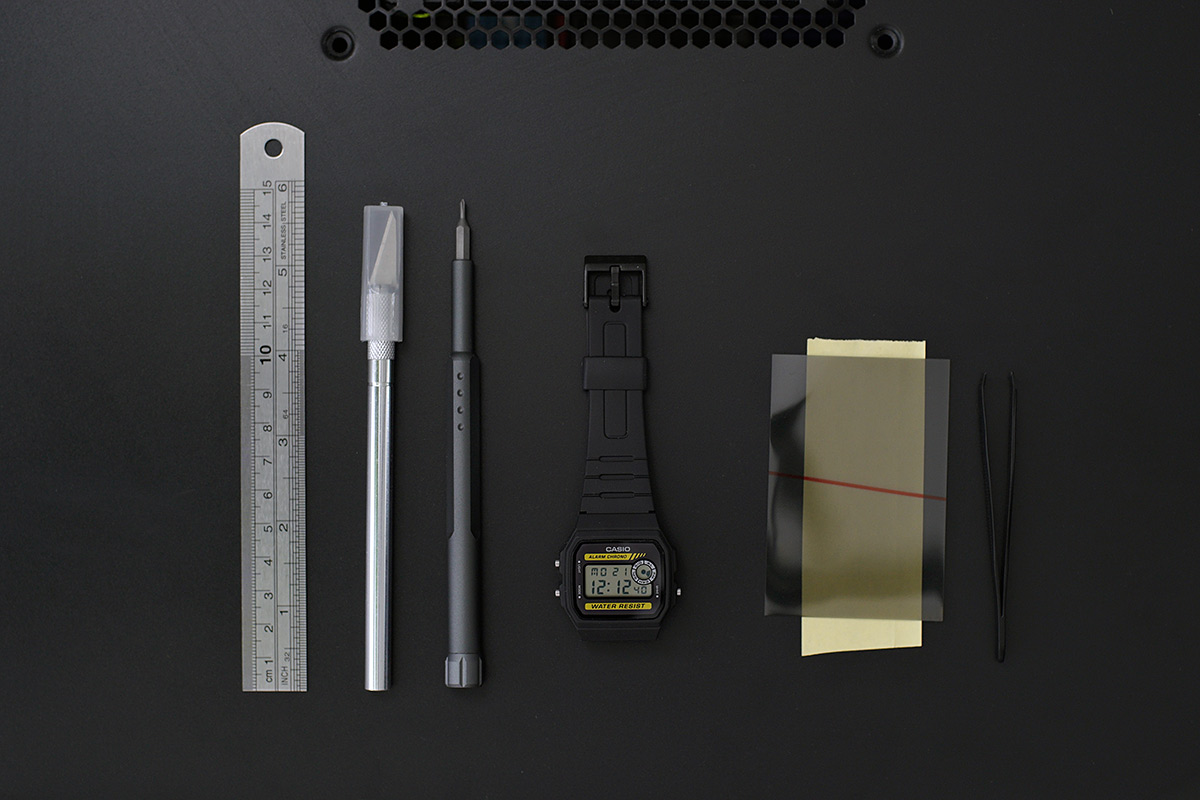
Equipment Needed
- Casio F-Series Watch (Casio F-94WA used for this guide)
- Screw Driver (Jay Car 48 Piece Screwdriver Set that I used for this guide)
- Ruler
- Pen Knife
- Tweezers
- Polarizing Film (Australian eBay Stockist of the Film I used)
Step 1: Remove the Back Plate
- Remove the four rear screws from the back plate of the watch.
- Put the screws somewhere secure in your workspace so as to not lose them.
Step 2: Remove the Module from the Case
- Remove the module from the case.
- There are small metal prongs that protrude from the back of the module.
- Pulling on the prong with your fingernail or a pair of tweezers will easily remove the module.
- There is a rubber seal in the case that presses against the back plate. You may leave this in the case or remove it and put it back later during re-assembly.
Step 3: Cut the New Polarizing Film to Size
- The polarizing film must be cut in the same alignment that will turn the display negative.
- Place the film over the display first to ensure it is negative and not positive. This is the orientation you have to cut the film.
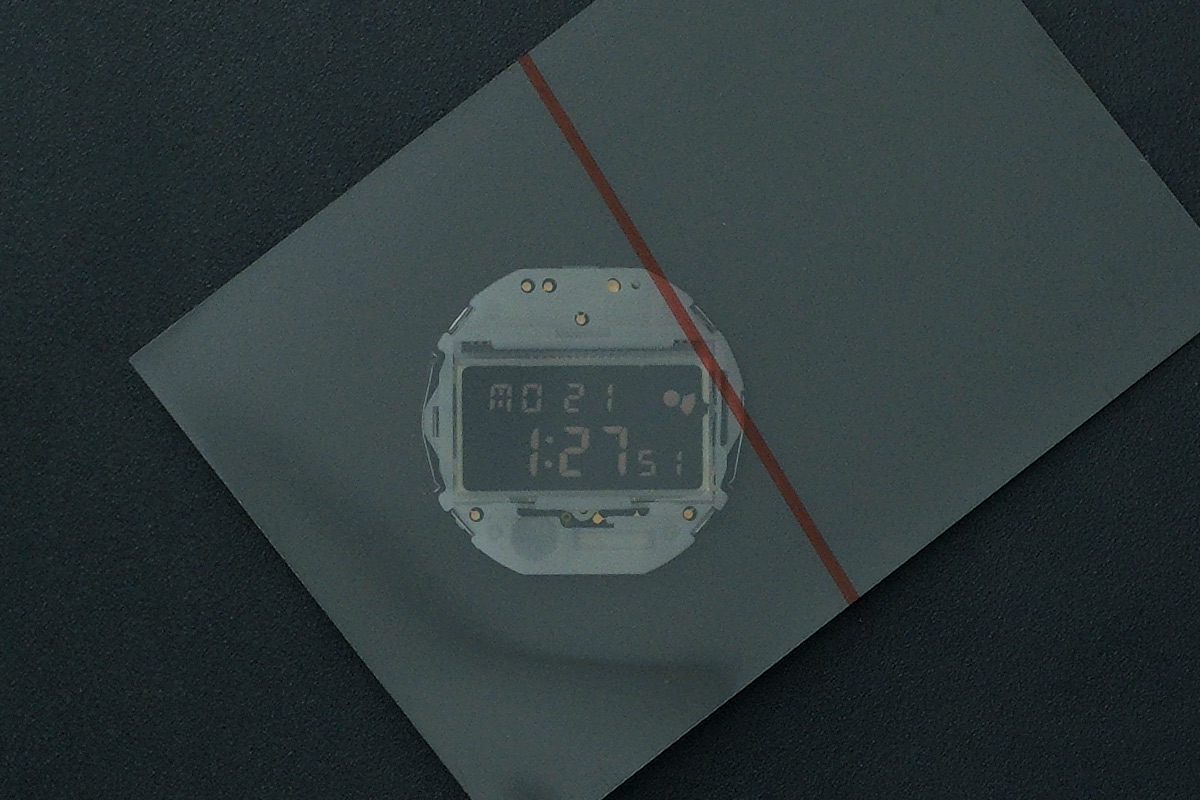
- The polarizing film you purchased (or scavenged from a old smart phone display) must be cut to the exact size of the Casio module display you are using.
- For this particular module that size is approximately 22mm long by 11mm high.
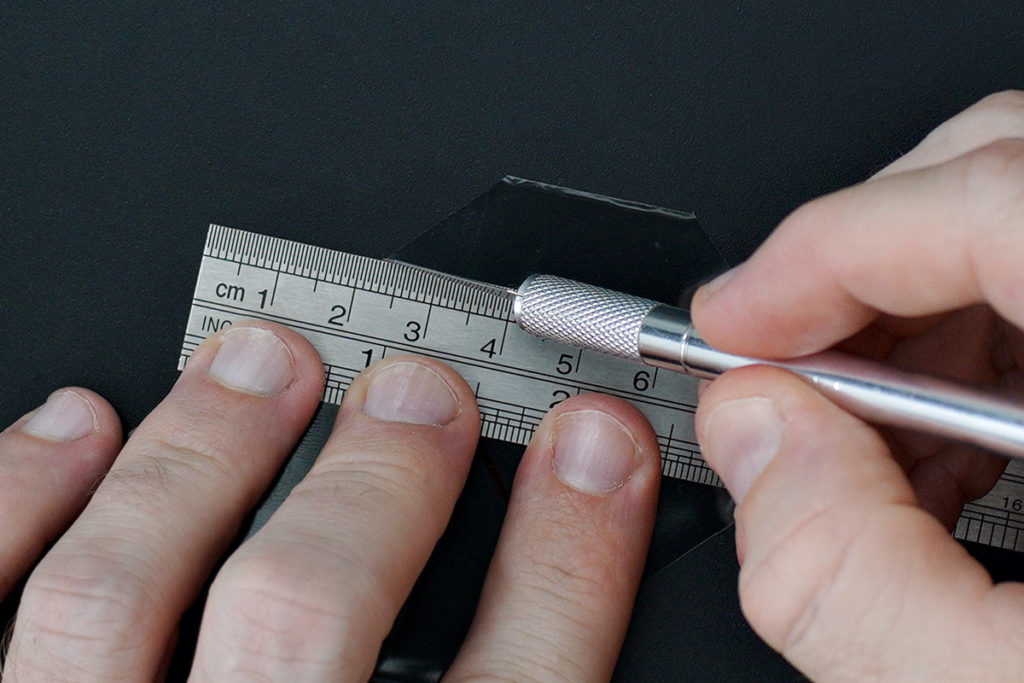
- Use your pen knife and ruler to make the cuts as accurate as possible.
Step 4: Remove Existing Polarizing Film
- Polarizing film is already applied to your stock Casio display. It must be removed before the new film can be applied.
- Place your pen knife very carefully between the film and the display at one of the corners of the display. Approach the display as parallel to it as possible to reduce the chance of scratching the display.
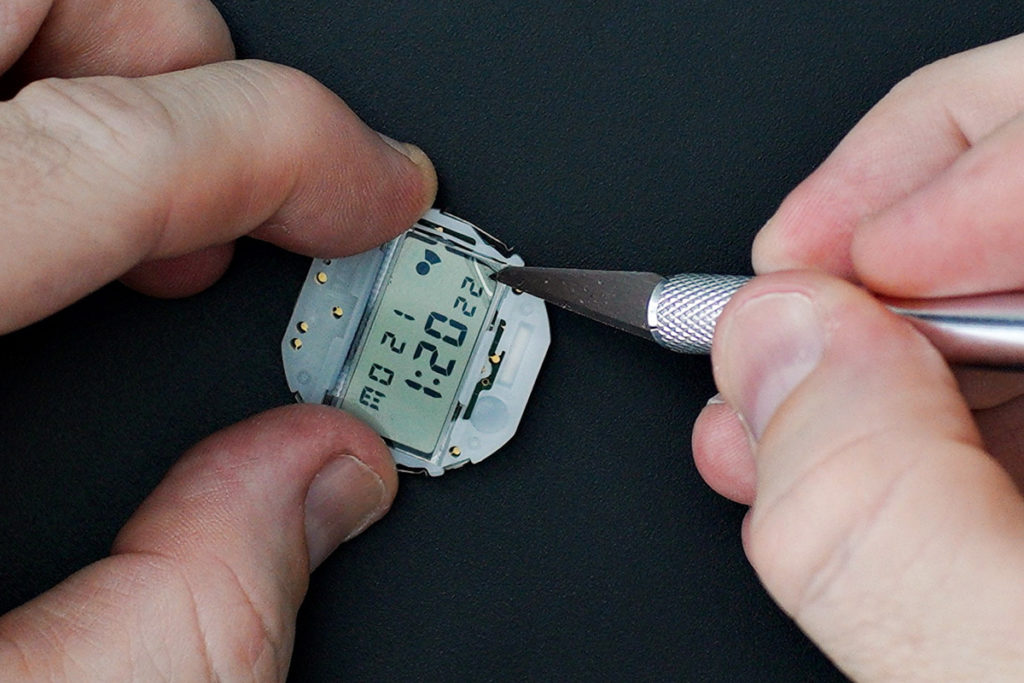
- Once you have lifted a corner of the film sufficiently, grasp it with a pair of tweezers and pull slowly and firmly towards you to remove the rest of the film.
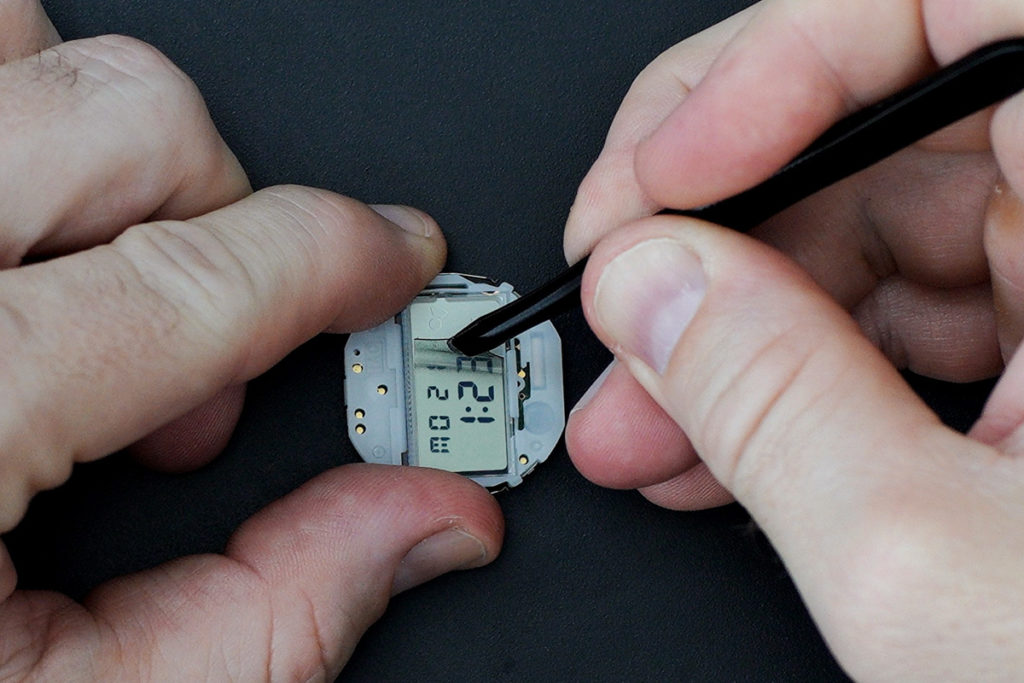
Step 5: Apply the New Polarizing Film
- Remove the protective sheets on the front and back of the polarizing film strip that you cut.
- Ensure there is no dust on the film-less display and align the new film and press it flat.
- Use a paper or plastic card and remove any air bubbles in the film to ensure it is 100% installed on to the display.
Step 6: Reassemble the Watch
- Check the module’s display to ensure no dust or prints are on it.
- Place the module in the case. Ensure the metal buttons are projected outwards so that the metal tongs on the module are not bent when pressing the module in.
- Position the rubber seal into its groove and screw the back plate on.
- Remember to only drive the screws 50% to 75% in until all four screws are in place. Then tighten them all flat.
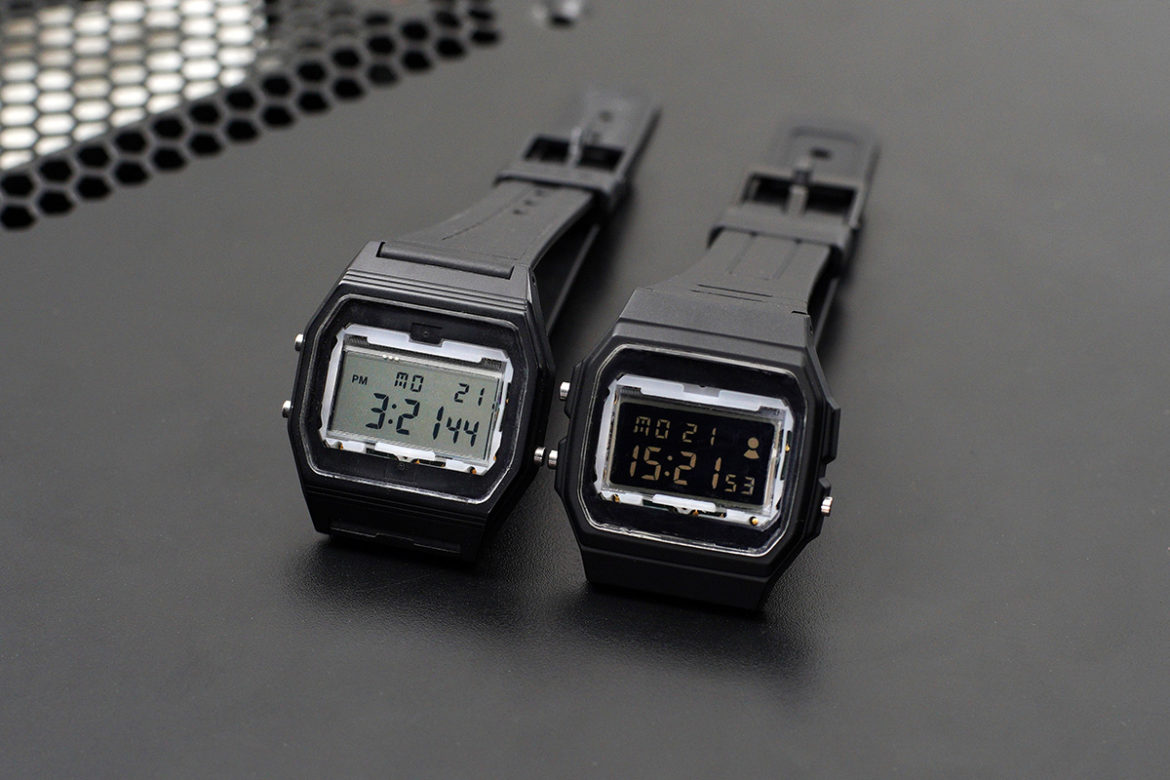
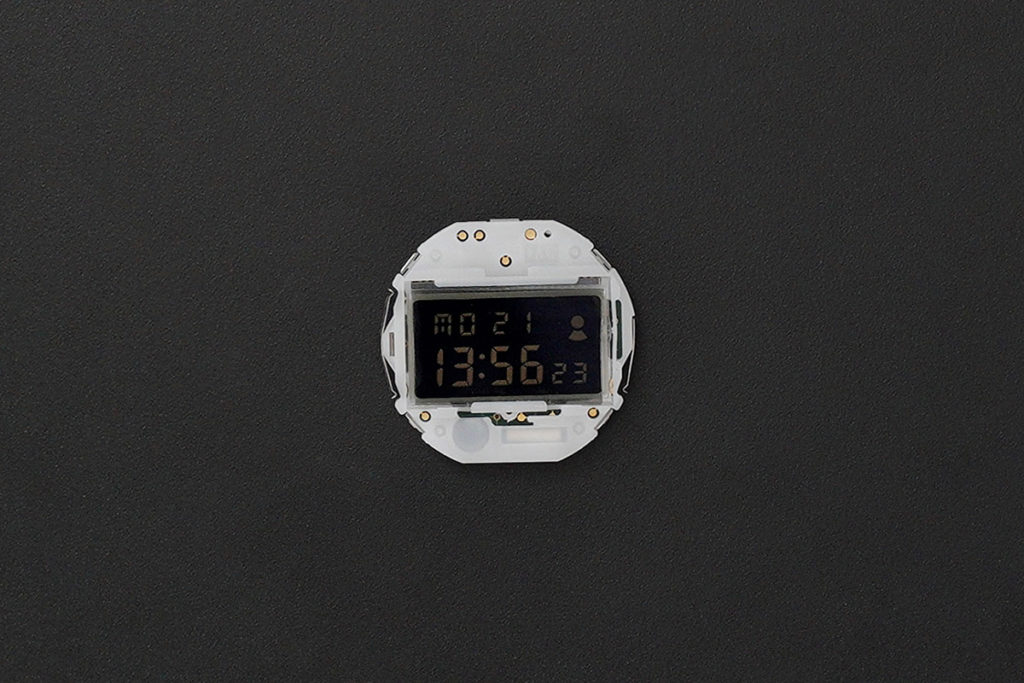
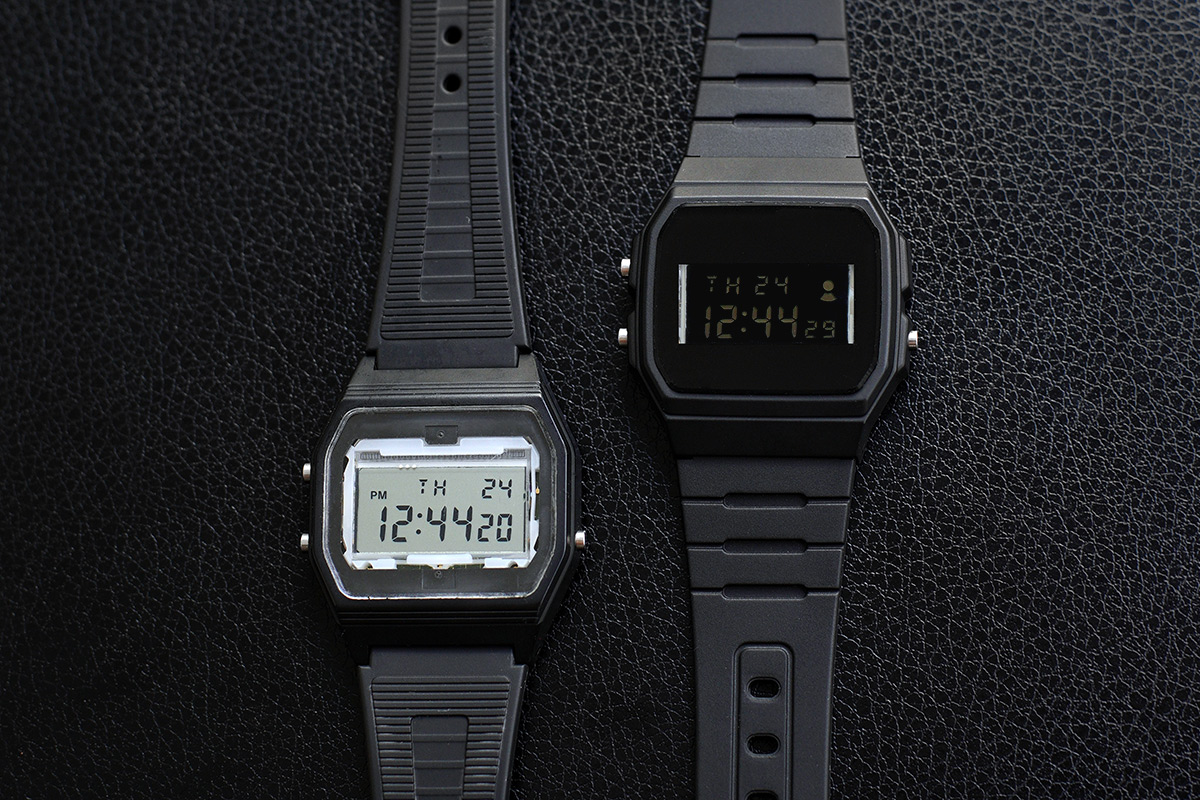
Negative Display Modification: End Result
Below shows the Clear Screen Modification next to the Clear Screen plus Negative Display. The digits now have a gold tone and the display background is black. Elements of the module still remain exposed however and for the purposes of minimalism, if one wants to have the watch truly subtle as part of a mostly black outfit, the Crystal Re-Painting Modification should be considered. Another thing to note is that the visibility of the display is heavily impacted compared to how bright and easy to read the positive display is. Keep this in mind if visibility is very important to you, especially at night since there is no back light on the Casio F series watches.

4.0 Crystal Re-Painting Modification
Re-painting the watch crystal is an option if you have already removed the factory paint from your Casio F-Series. I have not photographed the steps for this job because it is visually fairly straight forward. I have included written steps and some tips to help people who don’t have experience painting.
Equipment Needed
- Casio F-Series Watch with Clear Screen Mod (Casio F-94WA used for this guide)
- Screw Driver (Jay Car 48 Piece Screwdriver Set that I used for this guide)
- Ruler
- Microfiber Rag
- Cue Tips
- Painter’s Tape
- Pen Knife
- Tweezers
- Enamel Spray Paint
Step 1: Disassemble the Watch
- This guide requires you start with a Clear Screen Modified watch, and assumes you know how to disassemble your F series.
- Put the module in a clean plastic bag and avoid touching the display.
Step 2: Cut a Piece of Painter’s Tape to Display Size
- The size of the display is approximately 22mm long by 11mm high.
- If you only want the display visible without any of the white module frame showing through, make your tape 20mm x 10mm.
- I have left the tape slightly narrower than I could have to expose the sides of the module for the light to come in easier once the crystal is re-installed.
Step 3: Apply the Tape to the Center of the Crystal
- Test alignment by placing the crystal back into the case; you do not need to press it back in.
- Anything the tape does not cover will be painted.
- Don’t worry if you get this wrong at first, just remove and reapply until it is correct.
Step 4: Wipe the Crystal Down
- Gently wipe the crystal down and get it as dry and clean as possible.
- Fingerprints, oil, dust, and other debris will undermine the quality of your paint job.
Step 5: Paint the Crystal
- Do this in a safe place that is as free from dust and wind as possible. You are only applying one quick coat of spray paint and don’t need to overly worry about fumes. A gust of wind however could ruin the entire process.
- Place the taped crystal on a piece of newspaper.
- Shake your can of enamel paint vigorously first to ensure an even spray pattern without bubbles.
- Use light strokes of the finger and go over the crystal 6 or 7 times lightly.
- Do not hold the spray can nozzle down as it will cause streaks.
- You only need to do one coat of paint for this. The crystal is clear plastic and excessive coats may be detrimental.
- After 7 light sprays if the crystal looks jet black, pick it up on its sides and check to ensure that it is completely opaque without any areas you can see through. If there are, spray that crystal a few more times again.
- As you are using black paint and are painting on the back of the crystal, if you do have paint runs or dust from your workspace lands on the wet paint you most likely will not see it through the crystal.
- If your paint job somehow turns out poorly when you flip the crystal to see through it on the other side, simply remove the paint with acetone and a cotton swab as in the Clear Screen Modification and try again.
- There is no way to damage the watch with this unless you scratch the crystal somehow. Paint can always be removed.
Step 6: Remove the Tape
- As you are painting on clear acetate, there is a risk if the paint dries over the tape that when you remove it, parts of the paint will come off too.
- For this reason you should remove the tape a few minutes after painting.
- Lift the corner of the tape with a pen knife very gently, making sure you do not scratch the crystal.
- Approach parallel to the face of the crystal.
- Once a corner is lifted, use your tweezers and pull the rest of the tape off slowly.
Step 7: Clean Tape Glue Residue from Crystal
- There will be minor residue from the tape on the section of crystal that was covered.
- Using a cotton swab, carefully, without touching the paint, rub this off.
- This is easy to do if you hold the crystal in one hand while holding it against a window so you can clearly see the residue and any dust on the crystal.
- Avoid touching the paint.
Step 8: Press the Crystal back into the Case
- With a single light coat of black paint, you do not need to wait long for it to dry.
- In 10 minutes hold the crystal by its sides then press it back into the case. the paint is not exposed to the outside and can further cure there. With no chance of abrasion or friction on the paint it will sit in the case and adhere to it.
Step 9: Wipe Down the Module Display
- There is a chance you may have touched the module display or dust has fallen on it while you were painting the crystal.
- To play things safe gently rub the display with your microfiber rag and ensure it is dust and smudge free.
Step 10: Reassemble
- Check the module’s display to ensure no dust or prints are on it. Place the module in the case.
- Ensure the metal buttons are projected outwards so that the metal tongs on the module are not bent when pressing the module in.
- Position the rubber seal into its groove and screw the back plate on. Remember to only drive the screws 50% to 75% in until all four screws are in place.
- Then tighten them all flat.
Crystal Re-Painting Modification: End Result
Blocking out the majority of the module minimalises the watch further. For all black looks, this is ideal for coordination. Personally, my favourite modification is still the original Clear Screen Mod, as the gaudy logos an colours are removed, the innards of the watch module are partly exposed, providing an interesting cyber aesthetic, and it remains very visible in most light. I have other watches with negative displays that I prefer over this blacked-out result for when I do wear all black outfits.
For those without other alternatives, the Negative Display Modification paired with the Crystal Re-Painting mod is a minimal, low contrast and slim profiled watch that I think works well with a number of casual and semi-formal techwear looks.
5.0 Styling the Casio F-Series
Two urban casual techwear looks with prominent styling of the modified Casio F series watches are presented here.
5.1 Clear Screen Modification
To suit the Casio F Series watch with the Clear Screen Modification, I opted for something that mixed light and dark tones and that had cyber references. The grey display complements the shell worn here, rather than clashed with it as it might in an all black outfit. The black webbing on the holster bag is another element of coordination with the watch’s strap.
Outfit Summary:
- Uniqlo U AW16 BlockTech Parka
- Guerrilla Group Quickdraw Holster
- Sony NW-WS410
- ROSEN-X Yama Pant
5.2 Negative Display and Crystal Re-Painting Modification
For more severe, all black outfits, the painted crystal is a better match. While the Clear Screen mod does minimalise the watch, it’s bright grey display stands out if the rest of your outfit is all black or dark. The painted crystal and negative display significantly darkens the watch and thus coordinates better as an accessory with this black casual look.
Outfit Summary:
- Puma x Hussein Chalayan Urban Traveler Jacket
- Jean Paul Gaultier Homme Tencel Mid-Layer
- ROSEN-X Yama Pant

If you enjoyed this article, supporting SHELLZINE by any amount can be made via the link below. Your contribution is completely optional and all funds help cover the website’s growing hosting costs and enable further original content creation without the use of advertisements. Secure payments by all major card types, including Google Pay and Apple Pay, are supported.
